HOW TO MAKE RETAIL BAGS of SAND
1. Go to your local hardware/lumber store and measure a bag of sand.I found a 50# bag to be approximately 20” long x 4” thick x 12” wide
This works out to a scale bag of approximately 3.33” tall x .660 thick x 2.0” wide.
2. I cut a 1” thick (3/4 actually) board to 2.0” wide and reduced the thickness to .660”.
3. I then routered the four long corners with a ¼” bit.
4. Setting up a stop on my table saw, I cut this board into 3.33" lengths.
5. Router all edges of both ends of these pieces.
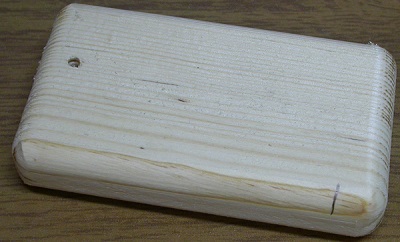
6. The pieces should now look like this
This works out to a scale bag of approximately 3.33” tall x .660 thick x 2.0” wide.
2. I cut a 1” thick (3/4 actually) board to 2.0” wide and reduced the thickness to .660”.
3. I then routered the four long corners with a ¼” bit.
4. Setting up a stop on my table saw, I cut this board into 3.33" lengths.
5. Router all edges of both ends of these pieces.
6. The pieces should now look like this
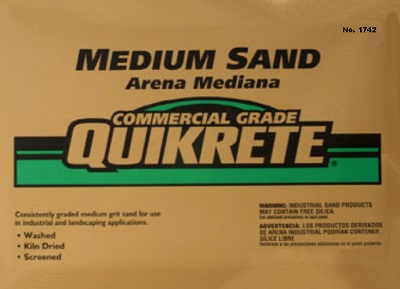
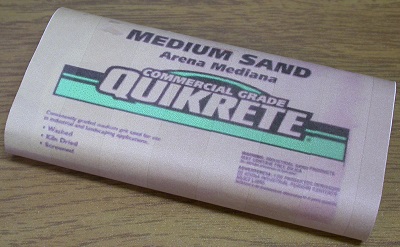
7. I went to the store website and got an image of the bag of sand I wished to duplicate.
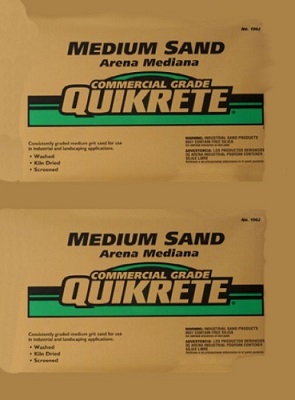
8. After cropping and cleaning the edges, I added frames to this image and a second image of the bag to end up with the final wrapper including the sides and the ends to fold in. It took a couple of tries to get it to print the right size. Not bad.
9. I simply used white paper and printed them in draft mode to get very nice results.
10. Printing two bag covers on one sheet saved paper too. The end wrapper, for my pieces of wood, is 5.625 high and 4.188" wide.
|
|
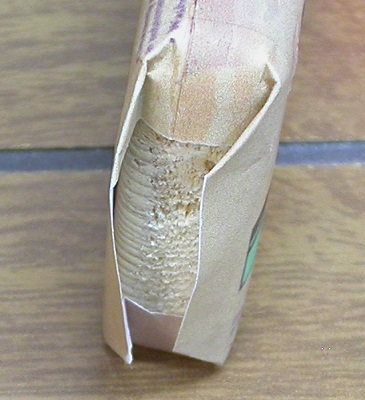
11. I found it easier to glue the bag’s main seam by putting the seam temporarily on one of the big sides of the blocks. Be careful with the glue as the block needs removed and repositioned when dry. Inserting a small scrap of paper between the wrap and the block can eliminate any concern of glue ooze onto the block of wood if desired.
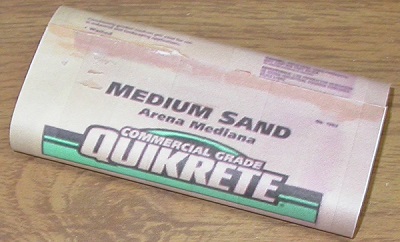
12. Once dry, slide the block out of the wrap. Use your fingers to curl the paper at the seam as it will be rather stiff.
13. Carefully reinsert the block of wood to the center point of the wrapper with the LOGO in the proper location.
13. Carefully reinsert the block of wood to the center point of the wrapper with the LOGO in the proper location.
14. The rest is a lot like wrapping a Christmas gift. Fold in the ends as shown and glue in place.
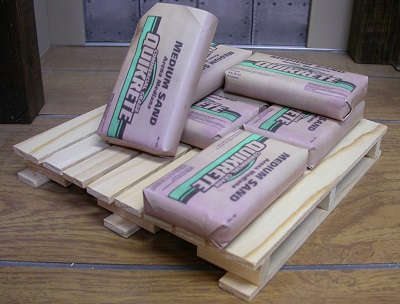
15. Add a 1/6th scale skid and you are all set.
Please keep an eye out for these being featured in an upcoming episode of iCarly:Five Years Later...