HOW TO MAKE A SUITCASE: Both opening and static
I found I had a need for a full set of luggage for a story...then I priced what was available.
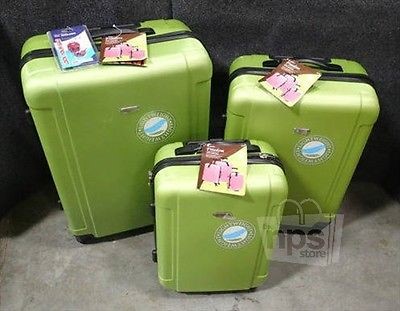
Have you priced 1/6th scale suitcases? They are so far out of my budget I settled on making my own...which was actually a lot of fun. First I needed to decide on how many, what style (hard side or soft) and what sizes. After a few internet searches I picked a set I liked (SEE PIC), wrote down their various sizes, converted those sizes to 1/6th scale and I was off.
Have you priced 1/6th scale suitcases? They are so far out of my budget I settled on making my own...which was actually a lot of fun. First I needed to decide on how many, what style (hard side or soft) and what sizes. After a few internet searches I picked a set I liked (SEE PIC), wrote down their various sizes, converted those sizes to 1/6th scale and I was off.
As I did not intend on ever opening them, it was a simple matter to create a block of wood the size of each case I wanted, which was one large, one medium and two smaller ones.
The cases ended up being approximately…
4.80” x 3.50” x 1.80”
4.16” x 2.91” x 1.58”
3.50” x 2.50” x 1.42”
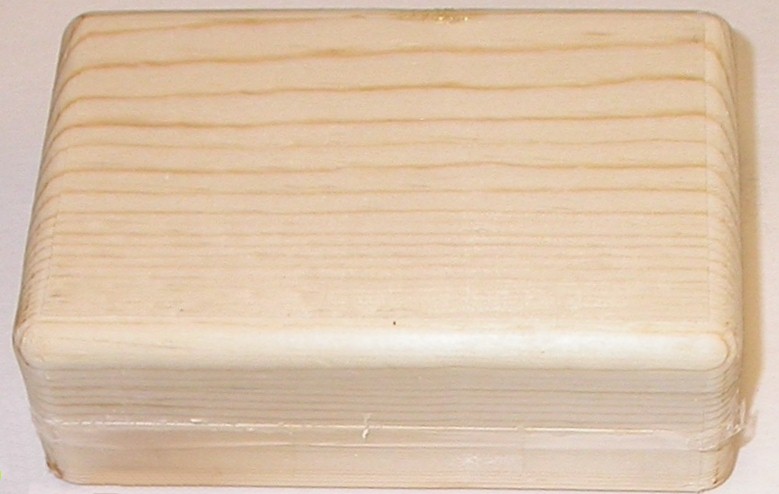
It was simple enough to make 4 blocks of wood in these sizes from scraps I had in the garage and sand them smooth.
I setup my table router with a bit to nicely round the edges and a mini rotary saw blade mounted in my small table mill( a drill press would work here ) to add the groove around the fake opening point. You can see this setup later when I used the same blade to separate the halves of my fiberglass opening suitcase. I turned the brass wheels on my 7 inch metal lathe and used #4 screws as axels. The mill was also used to make the recess in two corners for the wheel placement as well. These wood blocks looked like the one I later fabricated in order to make one of the larger suitcases that would open that we will see later.
The cases ended up being approximately…
4.80” x 3.50” x 1.80”
4.16” x 2.91” x 1.58”
3.50” x 2.50” x 1.42”
It was simple enough to make 4 blocks of wood in these sizes from scraps I had in the garage and sand them smooth.
I setup my table router with a bit to nicely round the edges and a mini rotary saw blade mounted in my small table mill( a drill press would work here ) to add the groove around the fake opening point. You can see this setup later when I used the same blade to separate the halves of my fiberglass opening suitcase. I turned the brass wheels on my 7 inch metal lathe and used #4 screws as axels. The mill was also used to make the recess in two corners for the wheel placement as well. These wood blocks looked like the one I later fabricated in order to make one of the larger suitcases that would open that we will see later.
This one is still missing the wheel recesses and the handle tubes.
The handles are fabricated from brass hobby tubes using 1/8” for the long part that slides into the suitcase and 7/32” tube for the handle. The handle is 1 ¼ inch long. The others are based on the size of the suitcase and how far you want to pull it out.
Handle bar length large case 2 5/8”
Medium case 2 5/8”
Small case 2 1/16”
I drilled two holes through one side only near the ends of the 7/32 tube at .875” centers for the 1/8” tubes to be soldered into place. Drilling the holes into the wood blocks to take these handles required making a jig to guide the drill bit keeping them perpendicular to the surface, parallel to each other and the right distance apart. As these holes are now drilled partly into the radius around the suitcases it would be ridiculous to try and do it freehand.
Once they were ALL completed to this point, I applied enough primer to the wood blocks in an attempt to hide the wood grain. Then it was a matter of applying the final color to the outside and paint only the handle black, leaving the parallel bars brass. Once this dried, assembly was simple enough.
THEN I NEEDED A SUITCASE THAT OPENED…
Again, it started with a similar wood block just slightly smaller in all dimensions to allow for the thickness of the fiberglass.
The handles are fabricated from brass hobby tubes using 1/8” for the long part that slides into the suitcase and 7/32” tube for the handle. The handle is 1 ¼ inch long. The others are based on the size of the suitcase and how far you want to pull it out.
Handle bar length large case 2 5/8”
Medium case 2 5/8”
Small case 2 1/16”
I drilled two holes through one side only near the ends of the 7/32 tube at .875” centers for the 1/8” tubes to be soldered into place. Drilling the holes into the wood blocks to take these handles required making a jig to guide the drill bit keeping them perpendicular to the surface, parallel to each other and the right distance apart. As these holes are now drilled partly into the radius around the suitcases it would be ridiculous to try and do it freehand.
Once they were ALL completed to this point, I applied enough primer to the wood blocks in an attempt to hide the wood grain. Then it was a matter of applying the final color to the outside and paint only the handle black, leaving the parallel bars brass. Once this dried, assembly was simple enough.
THEN I NEEDED A SUITCASE THAT OPENED…
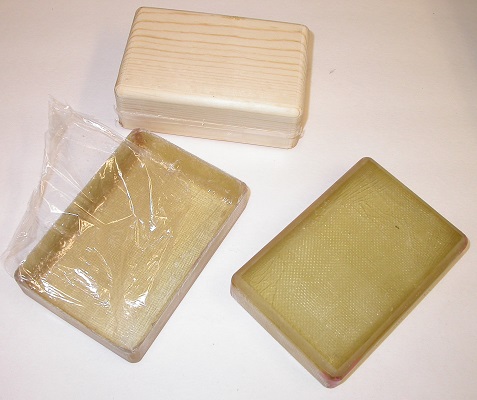
Again, it started with a similar wood block just slightly smaller in all dimensions to allow for the thickness of the fiberglass.

This block was then tightly wrapped with clear plastic wrap from the kitchen. This acts as a release agent since the resin does not stick well to it.
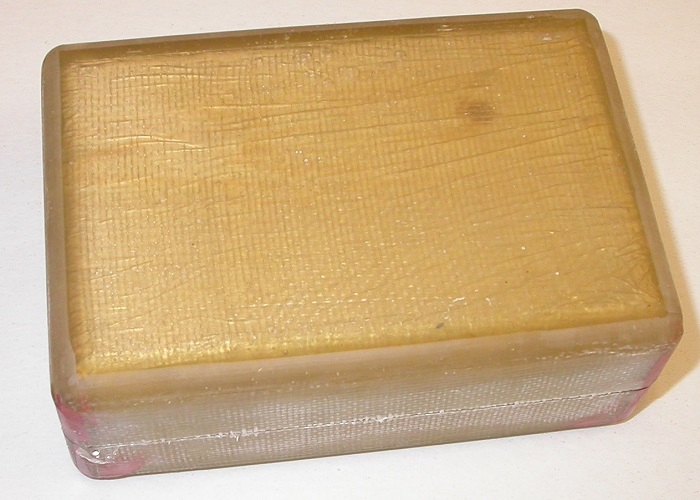
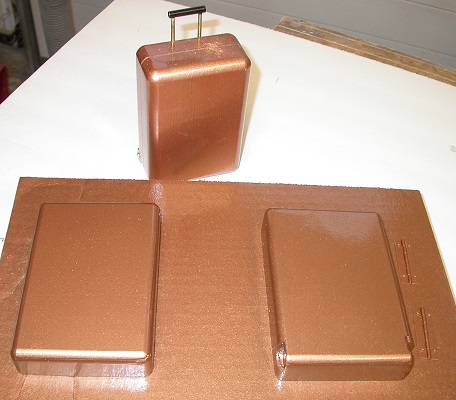
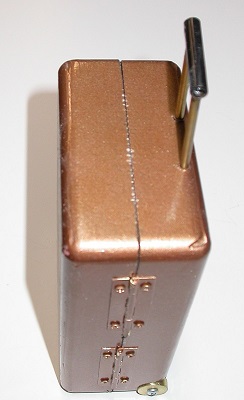
This shows the wood block completely enclosed in fiberglass fabric and resin. Encasing it like this makes the corners rather square again so it has again been run through the table router to regain the radius to all edges.
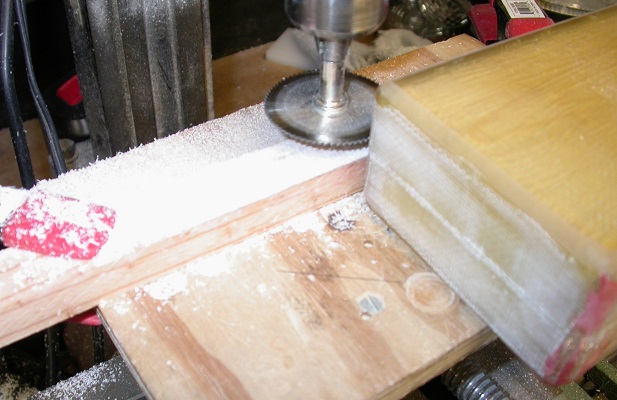
I used the same setup I used for the fake opening point of the original suitcases to separate the two halves needed for this case.
And TA-DA…the two halves pulled easily off the wood block. Removing the plastic wrap from the block and the inside of the two halves was an easy matter.
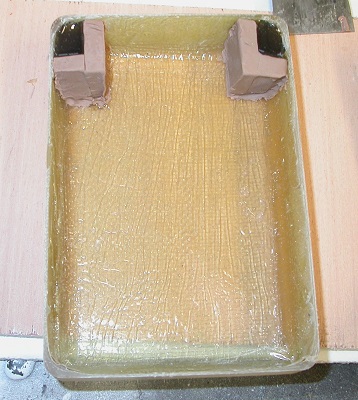
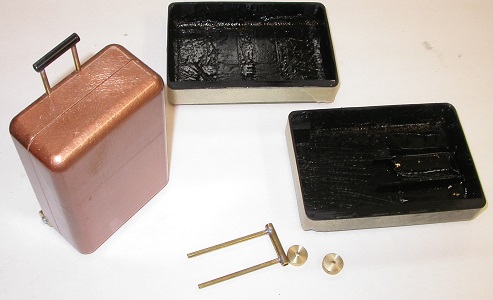
I used a putty knife to cut some ¼” thick slices from a stick of modeling clay to make a form for the wheel wells and filled them with fiberglass resin. Once this was cured, I was able to mill in the wheel wells and drill the holes for the #4 screw axels.
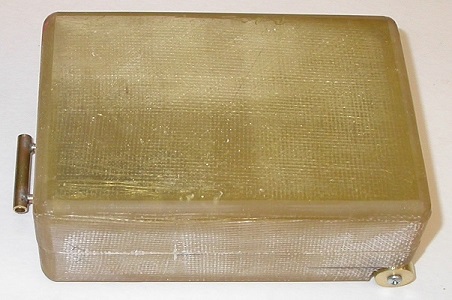
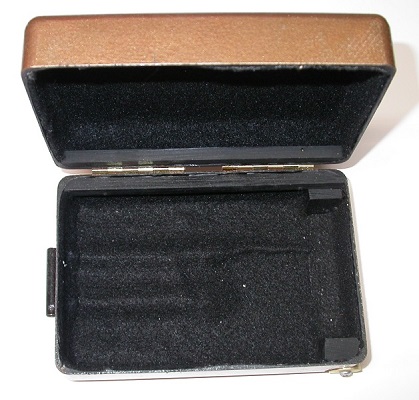
Here we see I have the wheels installed as well as the handle. The hinges are also installed on the other side. (SEE NEXT PICTURE)
Here’s the original non-opening suitcase next to the new one. I added two strips of wood to the hinge edge to make installation easier. The handle is made to slide easily into 5/32 brass tube. These two tubes are secured in place with a bit of fiberglass fabric and resin. I have since also shortened the axel screws so they do not stick into the interior.
|
|
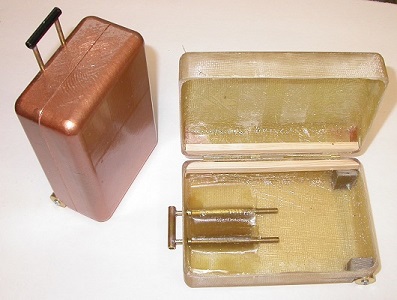
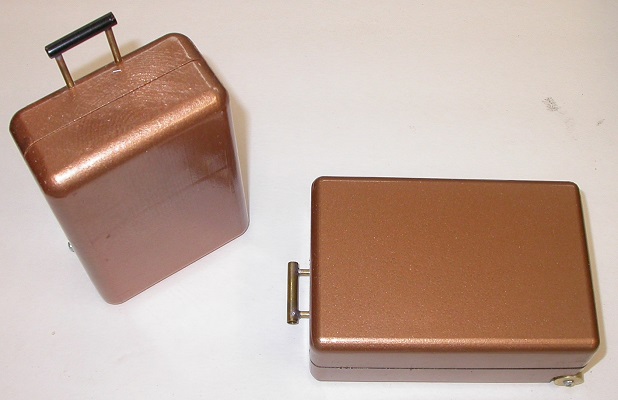
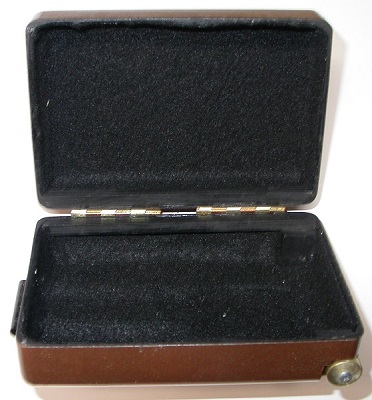
Again, here’s the original non-opening suitcase with the new one, painted flat black on the inside and the wheels and handle. Once dry, the outside was painted to match the originals.
|
|
All is needed is to paint the handle and install the lining to the inside to hide the handle tubes.
|
|
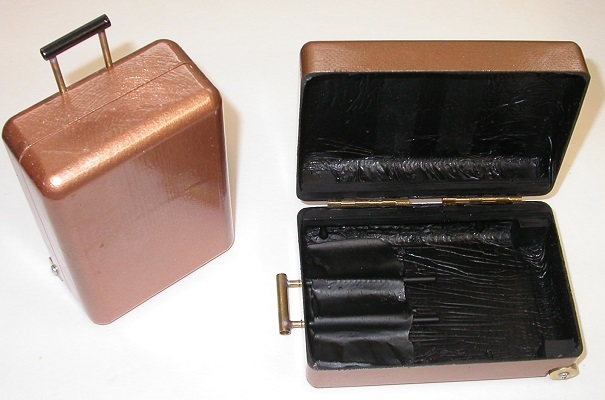
I used black felt with a sticky back coating for the lining. That is why I used flat black paint on the interior. This would help hide any issues in getting the felt to look right at the edges. The top half came out great while the bottom, due to the tubes, has some wave and one wrinkle to it but still is SO much cheaper than any available to buy.
|
|
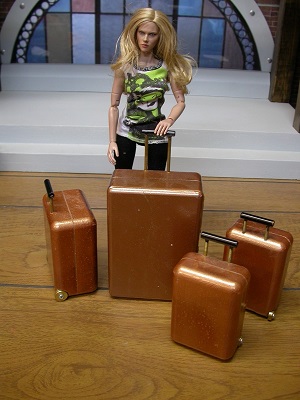
Here we have the finished OPENING suitcase as well as it and the smaller non opening suitcases with a figure. I am actually quite please with the result. Particularly when considering the retail cost, if they were even available in these sizes. If you need clarification on any point, please let me know.