HOW TO MAKE SLIDING BARN STYLE DOOR

With the debut of my Sliding “Barn Style” Door in episode #47 of my The Great Warehouse Heist story, I have received several requests for a “HOW TO” on making it. As I have no future plans to make another, I put together this detailed overview of the process with enough pictures I can only hope it helps.
For my “barn door” style sliding door…first was to determine the size of the opening. As mine is for people and not equipment, I judged from the size of my typical hinge-door openings which is 6” wide and 13 ½” high. The height is easy enough to deal with but the width I was a bit more flexible on…ending up nearer 7 ¼” wide.
For my “barn door” style sliding door…first was to determine the size of the opening. As mine is for people and not equipment, I judged from the size of my typical hinge-door openings which is 6” wide and 13 ½” high. The height is easy enough to deal with but the width I was a bit more flexible on…ending up nearer 7 ¼” wide.
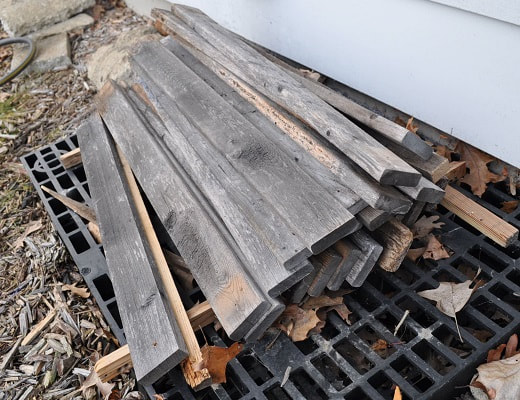
Using nearly the last of my stock of old, weathered 2” x ¾” stock, I cleaned up the ends so I had enough pieces 27” long. Yes, my walls are normally 28” high but I had to trim these 28” pieces by ½” per end to get to solid wood.
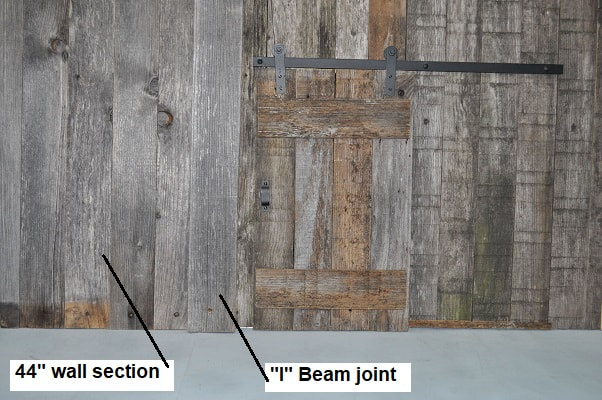
As my wall was only going to be about 21” long to keep its weight down, as it can easily be made longer as needed with other wall sections and “I” joints as shown below.
I needed 7 pieces 27” long and 4 pieces about 13 ¾” long for above the door.
As my wall was only going to be about 21” long to keep its weight down, as it can easily be made longer as needed with other wall sections and “I” joints as shown below.
I needed 7 pieces 27” long and 4 pieces about 13 ¾” long for above the door.
|
|
This process made my hallway wall typically 66” long. Plenty for my purposes.
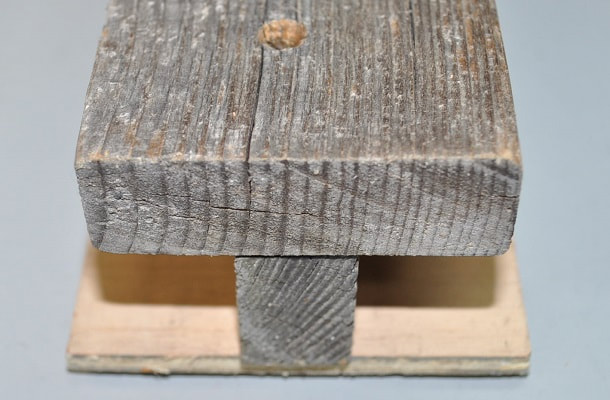
Here’s an end view of one of my “I” Beam wall joints. I use the same principle for my inside and outside corner joints. This joint consists of the top piece being 27” long by 2” wide and ¾” thick. It is fastened to a piece of scrap wood, 27” long by ¾” thick and a little wider than your walls are. For this style wall, for me, it is about 1”. Also, as these are some of the first walls I made…they are quite a bit cruder in accuracy than they are now. The bottom piece comes from scrap LUAN as it is cheap, thin and light.
Since I wanted the door to be about 7 ¼” wide, I trimmed 3 of the four header pieces to 1 ¾” wide leaving one the full 2”.
Since I wanted the door to be about 7 ¼” wide, I trimmed 3 of the four header pieces to 1 ¾” wide leaving one the full 2”.

|
|
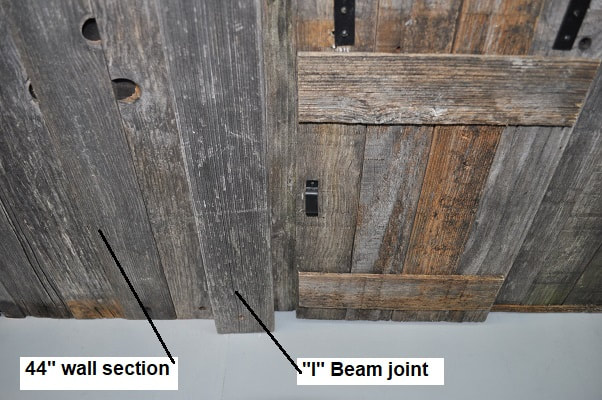
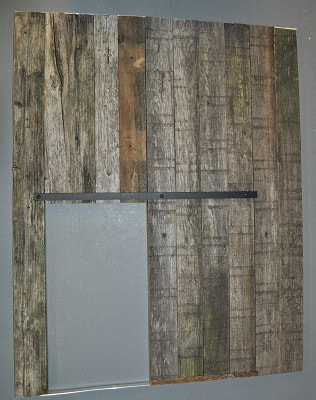
Here’s a view of the inside and outside of the finished wall.
I glued the edges of the four header pieces to make the first subassembly. Once dry, I glued a 27” piece to each outer edge. It looked like a big crocket wicket. Per other of my tutorials, I like my walls, with doors, to have an aluminum threshold. You CAN glue the remaining, and additional, 27” pieces to this subassembly but I simply clamped the pieces together as the finished wall and attached a ½” wide by 1/16” thick aluminum strip to the top and bottom.

There are TWO screws in each board. There are also extra holes in this strip as it is a previously used piece of aluminum.
I prefer using this aluminum strip method across any doorway to keep the wall from ever developing any twist due to wood warping.
Being SOLID wood, this wall is heavy compared to my other hollow or one-sided walls. The plus is that it is usable from BOTH sides with less work building.
With the wall completed, set it aside and start on the door.
I did not want my door to be 3/4” thick but I did want it to be viewable from both sides as the wall is. The only way I could see to accomplish this is to take enough of my weathered 2” x ¾” stock…rip it in half on a table saw…then plane these pieces to 3/16" thick. This “planning” isn’t a must if you have no planer, but you would need a GOOD table saw and a relatively new blade to get any accuracy.
Cut this 3/16” thick stock to deliver 8 pieces 2” wide by 13 ½” long for the door planks and 2 pieces 2” wide by 7 ¾” long for the horizontal braces. Pair up the 8 13 ½” pieces and glue the planed sides together. Now you have 4 pieces 3/8” thick for the vertical planks. Lay them on a flat surface and glue the 2 horizontal braces to them. Placing them inside a framing square is nice to keep everything square. I centered my horizontal planks by eye right and left and positioned them 1 1/2” from the top and 1 ¼” from the bottom. Do not get closer than the 1 ½” from the top as it may limit you on mounting the roller brackets.
NOTE: If I were making a door that was intended to look “NEW”, or I planned to paint or weather it artificially, the planks making up the vertical part of the door would be one piece…not two glued together.
|

|
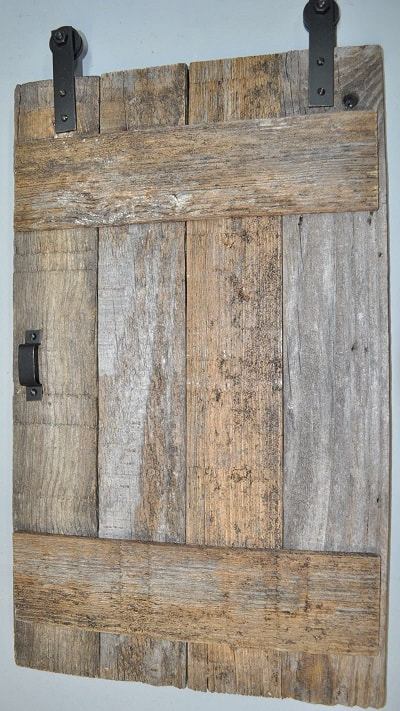
Here are an outside and inside view of the finished door.
Notice that I did not bother to paint the INNER surfaces of the rollers or the roller supports as they can never be seen during a shoot…unless you remove it from the track.
NOW FOR THE HARDWARE
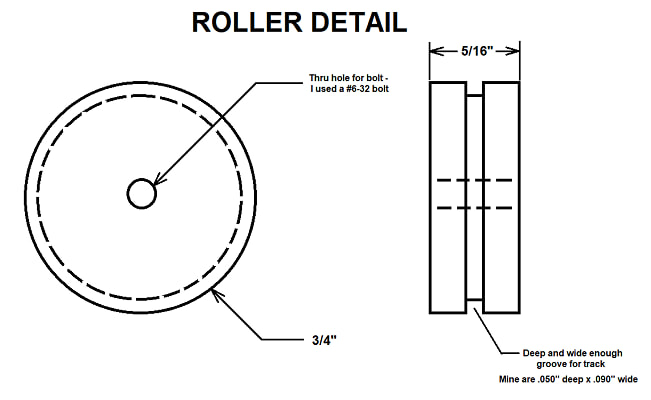
If you are handy with a 3D printer…this could work great for making the rollers. Even the brackets. For mine, I turned the actual rollers from a ¾” round aluminum bar and made the brackets from scraps of the ½” x 1/16” aluminum strip stock I keep around.
NOW FOR THE HARDWARE
If you are handy with a 3D printer…this could work great for making the rollers. Even the brackets. For mine, I turned the actual rollers from a ¾” round aluminum bar and made the brackets from scraps of the ½” x 1/16” aluminum strip stock I keep around.
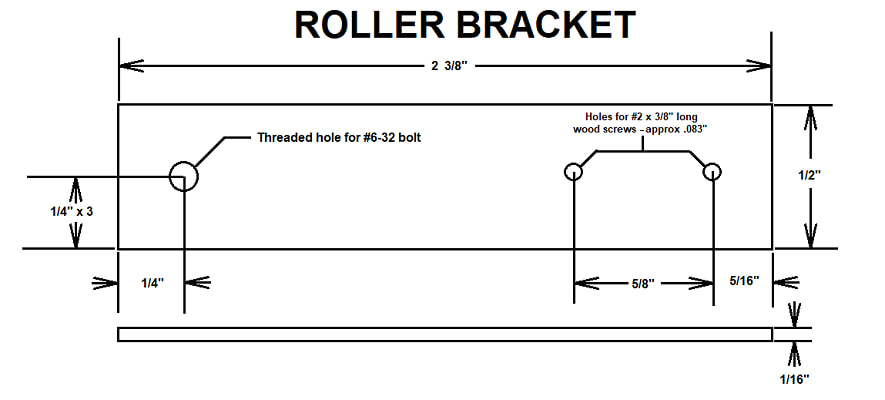
By threading the hole in the Roller Bracket, I needed only the nut on the outside to lock the bolt in place so the roller would function freely. If you do not have a tap set to thread this hole, you will need a nut on each side of the bracket.
I needed TWO #6 washers between the bracket and the roller to position it centered above the door. The groove in the roller needs to be near center of the door for balance and appearance.
I needed TWO #6 washers between the bracket and the roller to position it centered above the door. The groove in the roller needs to be near center of the door for balance and appearance.
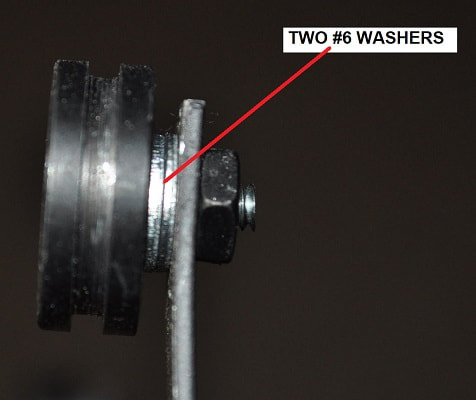
Mount these bracket as shown in my pictures. The outer edge of the brackets should be near one inch from the door edge. NOTE: They should be positioned so you can slip it easily onto the selected track material. About a 1/16” gap between the top of the door and the bottom of the track is a fair gap.
ADDING THE TRACK
Now a tricky part. Getting the position of the track so it is high enough so the door rolls freely the length of the track but NOT be so high it looks wrong at the bottom. If you install it a LITTLE low…it is a simply thing to cut a bit off the bottom of the door…but NOT too much.
Now a tricky part. Getting the position of the track so it is high enough so the door rolls freely the length of the track but NOT be so high it looks wrong at the bottom. If you install it a LITTLE low…it is a simply thing to cut a bit off the bottom of the door…but NOT too much.
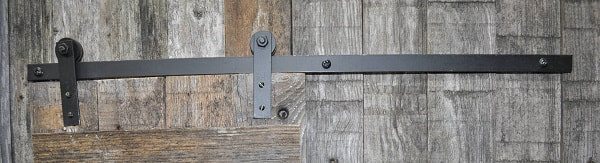
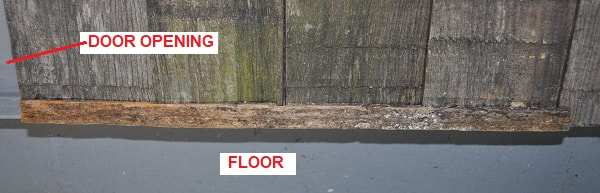
When hung, I set mine to have about 1/16” from the track to the top of the door and just over 1/16” from the bottom of the door to the floor.
Once you have the height worked out, mount the track to the wall with three screws. I used ¾” long #6 screws here. The track will need to be spaced OUT from the wall enough to allow the roller to straddle the track and not rub the wall. I could have turned proper spacers for this but instead I simply stacked up #6 flat washers until I determined that I needed 6 washers for each of the three screws.
Once you have the height worked out, mount the track to the wall with three screws. I used ¾” long #6 screws here. The track will need to be spaced OUT from the wall enough to allow the roller to straddle the track and not rub the wall. I could have turned proper spacers for this but instead I simply stacked up #6 flat washers until I determined that I needed 6 washers for each of the three screws.
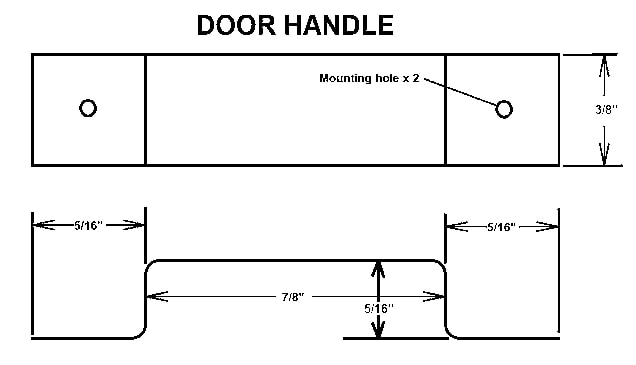
THE DOOR HANDLE
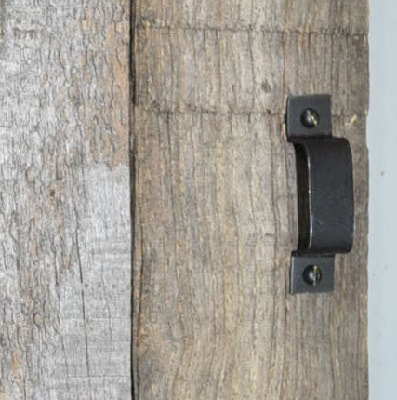
The door handle on each side is made from 1/32” thick scrap aluminum sheet (an old license plate actually). I cut a strip about 3/8” wide, bent it to have enough room for a hand to grab it comfortably. Then snipped the ends to length and drilled the mounting holes for more #2 wood screws. The gap for the hand is about 7/8” long and 5/16” deep with a 5/16” tab at each end for the screw hole. As shown below.
SCUFF BOARD
Lastly I installed a Scuff Board for the door to rub against to keep it from ever catching on a joint of the wall. This is simply a scrap planed down to 1/8” thick (the thinnest my planer goes). It measures 8 ¼” long by 3/8” wide and 1/8” thick. It is simply glued in place along the bottom, outside surface with one end even with the door opening.
Lastly I installed a Scuff Board for the door to rub against to keep it from ever catching on a joint of the wall. This is simply a scrap planed down to 1/8” thick (the thinnest my planer goes). It measures 8 ¼” long by 3/8” wide and 1/8” thick. It is simply glued in place along the bottom, outside surface with one end even with the door opening.
That pretty much does it. If there are any points I could elaborate on further, please let me know.
Please keep an eye out for this being featured in upcoming episodes of...
...The Great Warehouse Heist.
...The Great Warehouse Heist.