HOW TO MAKE CARDBOARD BOXES

I have been asked to post a tutorial for the many shipping boxes I use in my stories.
So here it is. Including the labels.
HOW TO MAKE CARDBOARD SHIPPING BOXES
MATERIAL LIST
Card Stock (I used Georgia-Pacific, 110 weight, premium card stock)(recommended for scrapbooking)
Thin Cardboard (like on the backs of writing tablets)
Glue (I used white Elmer’s glue)
½” wide clear tape
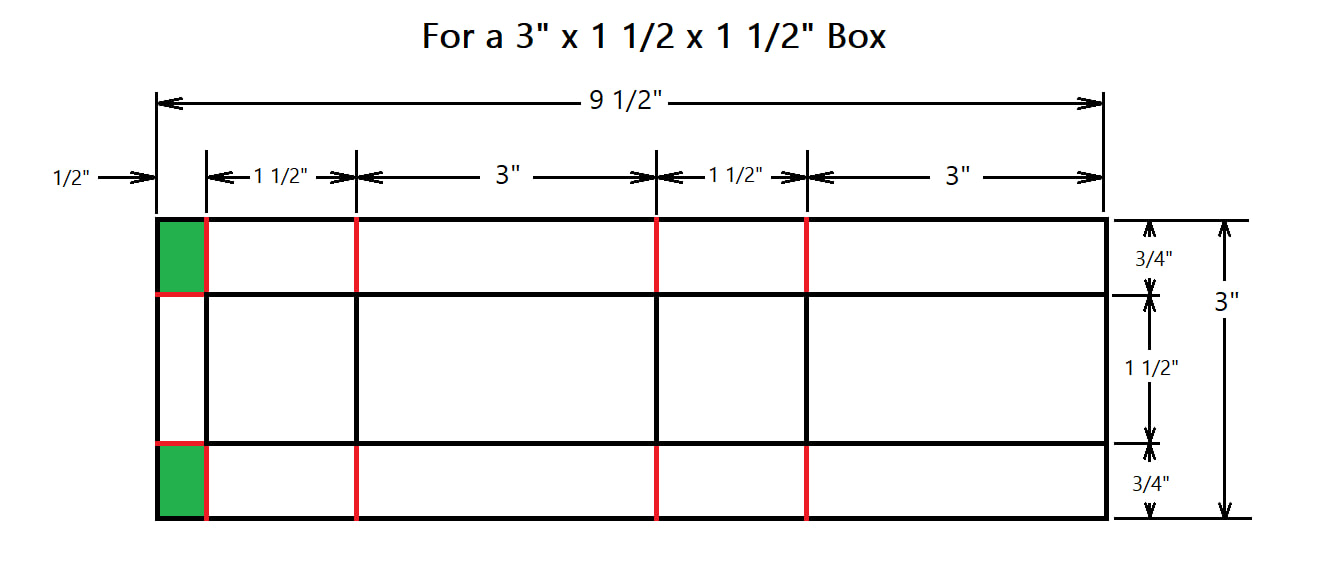
Obviously, the size of the final box is up to you. For the tutorial we will make the 1 ½” x 1 ½” x 3” box which is featured starting in The Great Warehouse Heist episode 29. This box equals a full scale box measuring 18” long by 9” square. It sounds small but fit the scene well.
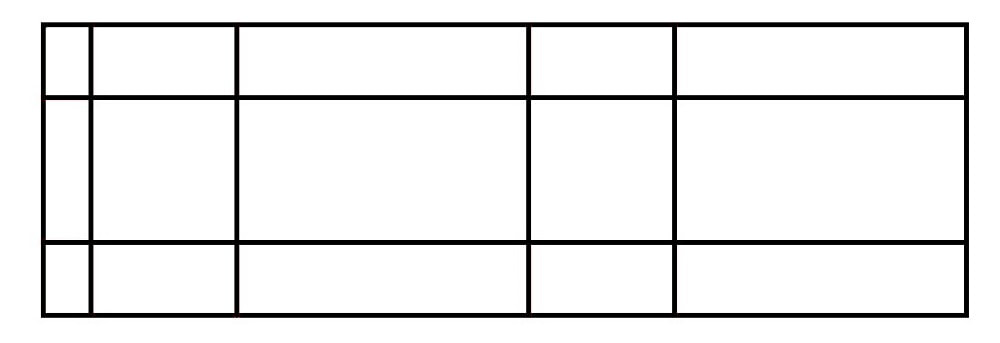
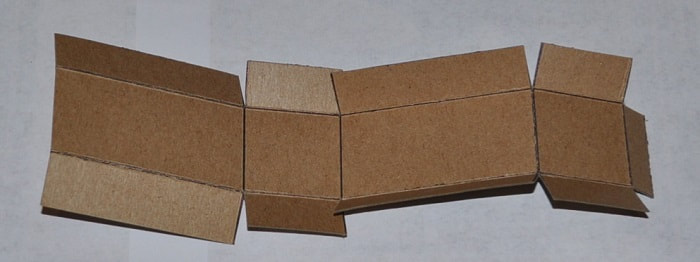
I’d suggest taking a scrap piece of paper and sketch out what the box would look like flattened out like in the drawing below. No matter the size of the finished box, you should end up with something at least resembling this sketch.
So here it is. Including the labels.
HOW TO MAKE CARDBOARD SHIPPING BOXES
MATERIAL LIST
Card Stock (I used Georgia-Pacific, 110 weight, premium card stock)(recommended for scrapbooking)
Thin Cardboard (like on the backs of writing tablets)
Glue (I used white Elmer’s glue)
½” wide clear tape
Obviously, the size of the final box is up to you. For the tutorial we will make the 1 ½” x 1 ½” x 3” box which is featured starting in The Great Warehouse Heist episode 29. This box equals a full scale box measuring 18” long by 9” square. It sounds small but fit the scene well.
I’d suggest taking a scrap piece of paper and sketch out what the box would look like flattened out like in the drawing below. No matter the size of the finished box, you should end up with something at least resembling this sketch.
Using a straightedge and a ballpoint pen, mark on the inside surface. Press firmly with the pen to create clear depressions in the cardboard on each line
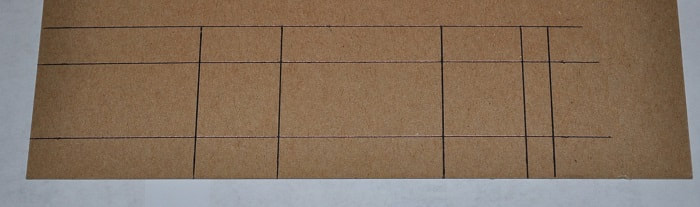
If you are going to seal it up and never view the inside then the lines will not matter. But if you are going to see the inside in pictures, you may want to mark all the line with a pen that no longer works. You will get the same indentations in the cardboard to aid in the proper bends without the ink line.
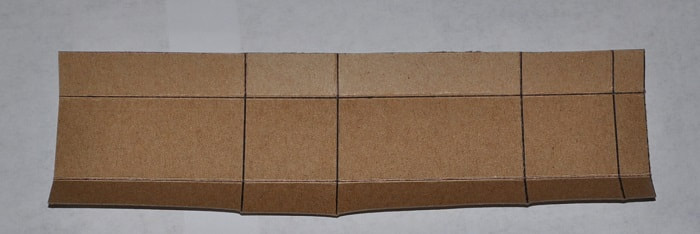
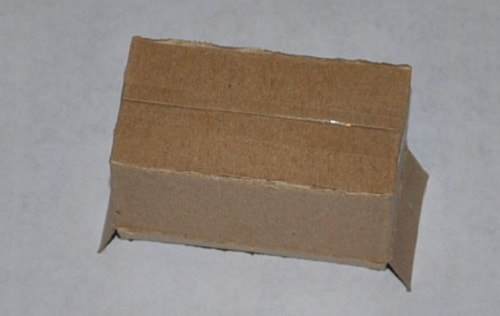
Cut it out on the outer lines only for now. Before cutting any other lines, fold the cardboard on the rest of the lines towards the side with the lines…the inside. If you pressed firmly enough with the pen, it should fold very precisely on each line. (SEE BELOW)
Cut it out on the outer lines only for now. Before cutting any other lines, fold the cardboard on the rest of the lines towards the side with the lines…the inside. If you pressed firmly enough with the pen, it should fold very precisely on each line. (SEE BELOW)
WARNING!
Remember that when you are working in 1/6th scale that ANY mistake in measuring, marking and folding is multiplied by 6. That being said…on you first box , at least, I would suggest making your 3/4” top and bottom flaps at least 1/16” wider. They can be more easily trimmed down later if needed rather than dealing with a 1/16” to 1/8” gap between these flaps when closed.
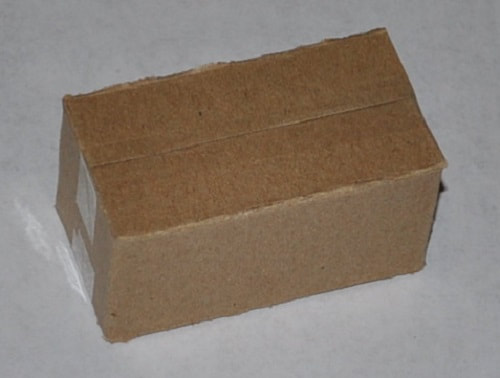
Next cut along each line that is RED in the drawing above. Discard the two rectangles that are GREEN. To make the finished box look truly cubical and not “puffy” on the top and bottom, again fold down at each fold and crease firmly. Depending on the spring-back of the cardboard, you may have to fold and cease them in both directions to remove as much spring-back as possible. Otherwise the box may not stack well with others and just look “wrong” when setting by itself.
The box we are making, shown below, has had all folds folded and creased both ways.
Remember that when you are working in 1/6th scale that ANY mistake in measuring, marking and folding is multiplied by 6. That being said…on you first box , at least, I would suggest making your 3/4” top and bottom flaps at least 1/16” wider. They can be more easily trimmed down later if needed rather than dealing with a 1/16” to 1/8” gap between these flaps when closed.
Next cut along each line that is RED in the drawing above. Discard the two rectangles that are GREEN. To make the finished box look truly cubical and not “puffy” on the top and bottom, again fold down at each fold and crease firmly. Depending on the spring-back of the cardboard, you may have to fold and cease them in both directions to remove as much spring-back as possible. Otherwise the box may not stack well with others and just look “wrong” when setting by itself.
The box we are making, shown below, has had all folds folded and creased both ways.
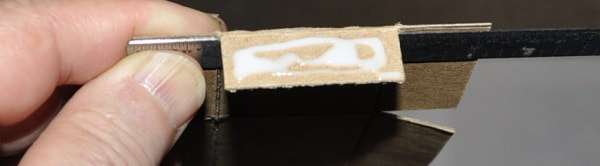
If you are content with the remaining spring-back of each fold, it is time for the first glue joint. Apply glue to the outside surface of the ½” wide flap.
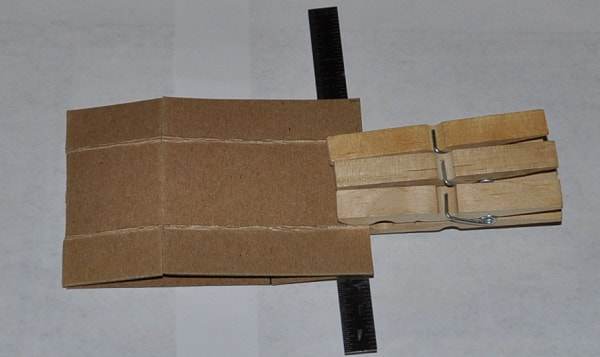
Fold the box in half and clamp as shown. Bulldog clips work well here or even a few clothes pins. Shown below.
WARNING!!!
Be sure to put something under the ½” flap before gluing, folding in half and clamping to ensure the glue does NOT get under the flap and ruin the glue joint. I simply used a ½” wide metal rule but wax paper or tin foil will work just as well. Anything the glue cannot soak into.
Be sure to put something under the ½” flap before gluing, folding in half and clamping to ensure the glue does NOT get under the flap and ruin the glue joint. I simply used a ½” wide metal rule but wax paper or tin foil will work just as well. Anything the glue cannot soak into.
Once this is thoroughly dry, you need to decide if this box is to ever be reopened. I typically glue and tape the bottom and only tape the top so the top can always be reopened if needed. If these are simply to be set on a shelf, I’d glue then top and bottom then add tape as a detail.
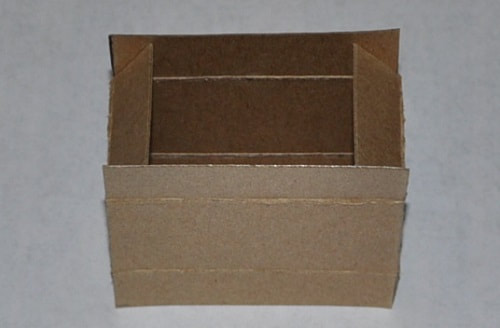
READY TO BE GLUED AND/OR TAPED SHUT
Fold in the flaps and apply a strip of ½” wide, clear tape so it goes down the sides ½” or so as shown below.
Fold in the flaps and apply a strip of ½” wide, clear tape so it goes down the sides ½” or so as shown below.
Repeat this process for the other side.
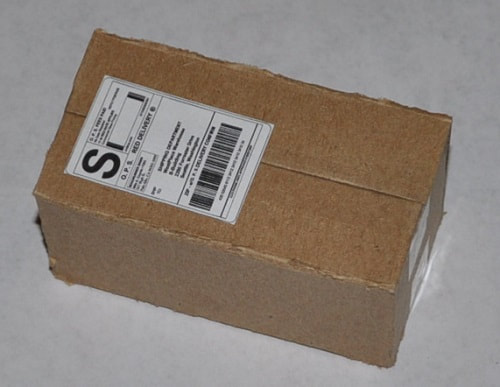
After printing your shipping label of choice…apply it to the box.
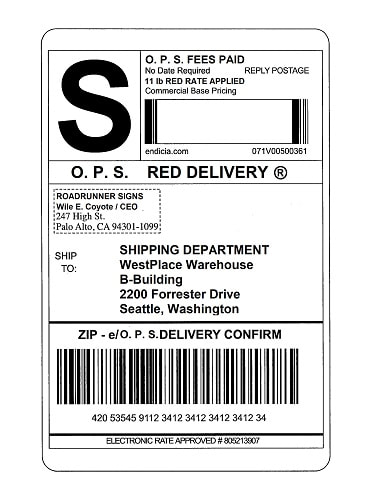
MY SHIPPING LABELS
I was amazed at how many people post their UPS shipping labels online. Using one as a guide, I changed the shipping company name from UPS to my made up shipping company OPS and a few other changes including made up shipper and receiver addresses. I was shocked when I printed them out in 1/6th scale, which is only about 15/16” wide, that with a magnifying glass I could actually still read these addresses.
One of my labels is shown below. I printed this on standard white peel and stick label stock and placed them on my boxes and crate.
Please keep an eye out for these being featured in current and upcoming episode of iCarly:Five Years Later... as well as The Great Warehouse Heist.