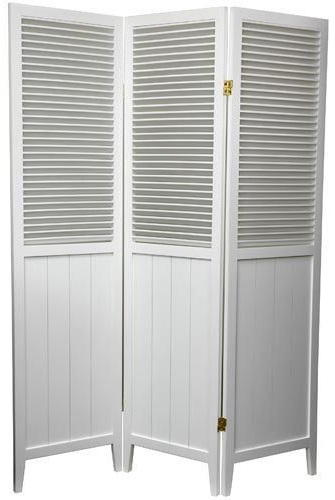
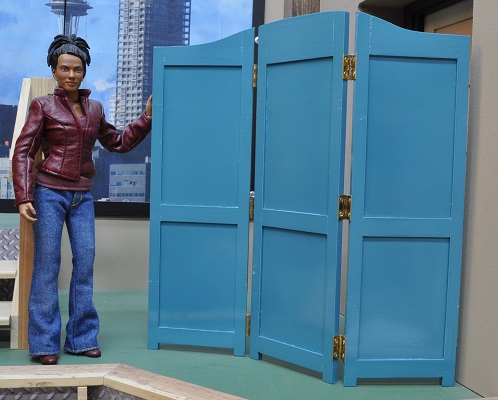
HOW TO MAKE CHANGING SCREEN (Modesty Screen)
|
|
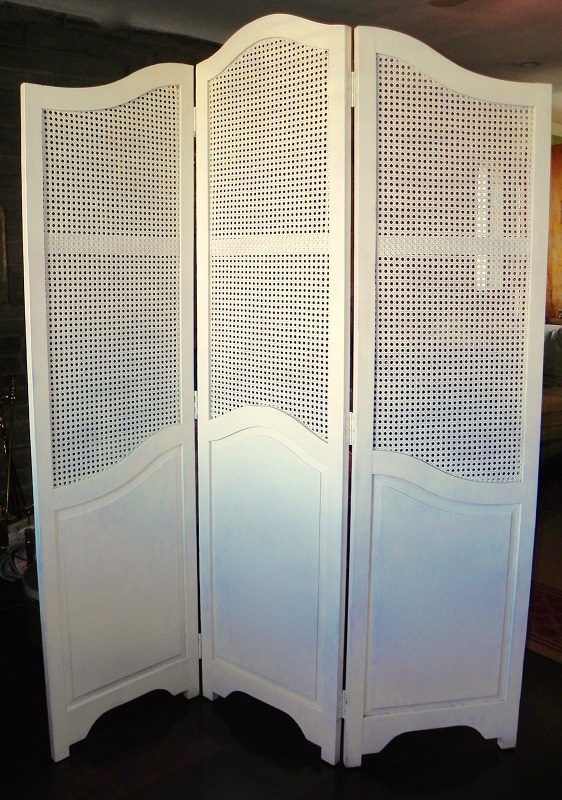
Above are a couple of pictures of what I was going for.
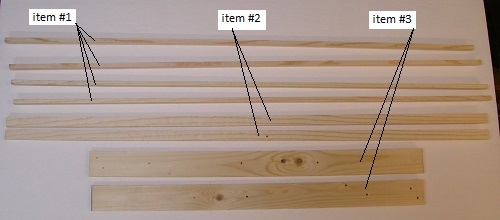
Parts List
1. 4 - ¼” x 3/8” x 28” vertical sides
2. 2 – ¼” x 9/16” x 28” bottom and center horizontal pieces
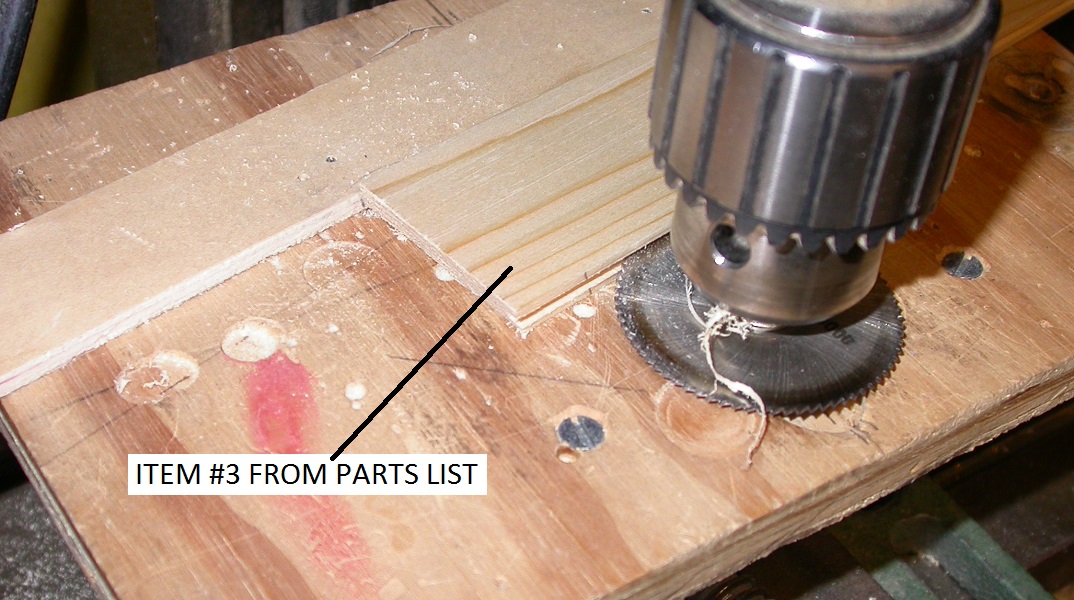
3. 2 – ¼” x 1 3/8” x 19” top horizontal pieces
4. 1 – 1/16” x 6” x 24” basswood sheet panels
I cut plenty of material as I was not sure if I’d settle for the original idea of three panels…or want four. The lengths of the above pieces are simply the lengths of some scraps I had around which I knew would make plenty. I liked these lengths instead of many shorter pieces as it made putting in the grooves much quicker. Each piece in group #1 made both sides of a single panel while the other pieces made all the cross pieces.
Parts List
1. 4 - ¼” x 3/8” x 28” vertical sides
2. 2 – ¼” x 9/16” x 28” bottom and center horizontal pieces
3. 2 – ¼” x 1 3/8” x 19” top horizontal pieces
4. 1 – 1/16” x 6” x 24” basswood sheet panels
I cut plenty of material as I was not sure if I’d settle for the original idea of three panels…or want four. The lengths of the above pieces are simply the lengths of some scraps I had around which I knew would make plenty. I liked these lengths instead of many shorter pieces as it made putting in the grooves much quicker. Each piece in group #1 made both sides of a single panel while the other pieces made all the cross pieces.
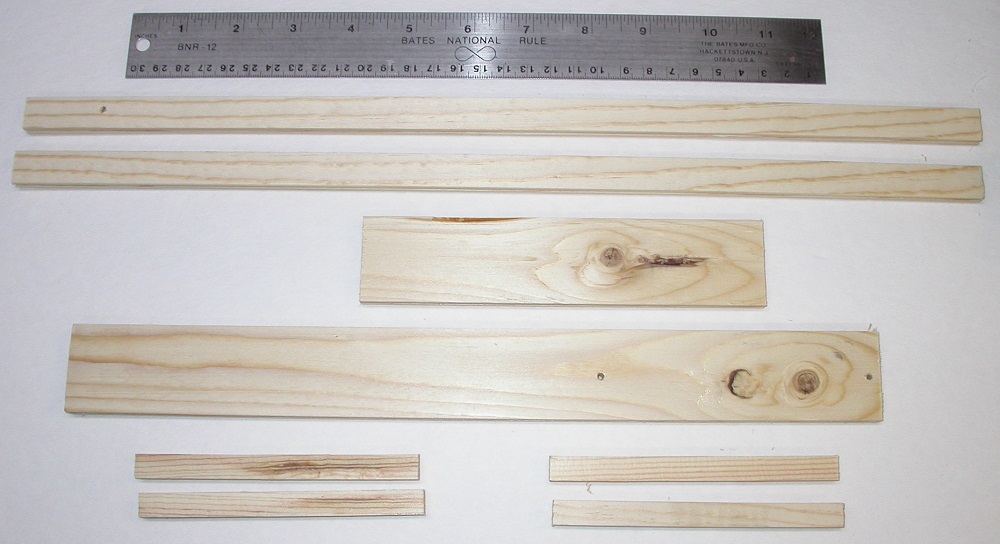
When I finished cutting all the pieces I needed, plus another set in case I still wanted the fourth panel (which I decided against), the picture below shows what I had left. Not bad as any one of these would be a job to replicate at this point.
CUTTING GROOVES FOR PANELS
Edges requiring a 1/16” groove…
Items in #1  in the parts list require a groove in only one of the ¼” edges
Items in #2 require a groove in one ¼” edge of one piece and in BOTH ¼” edges of the other.
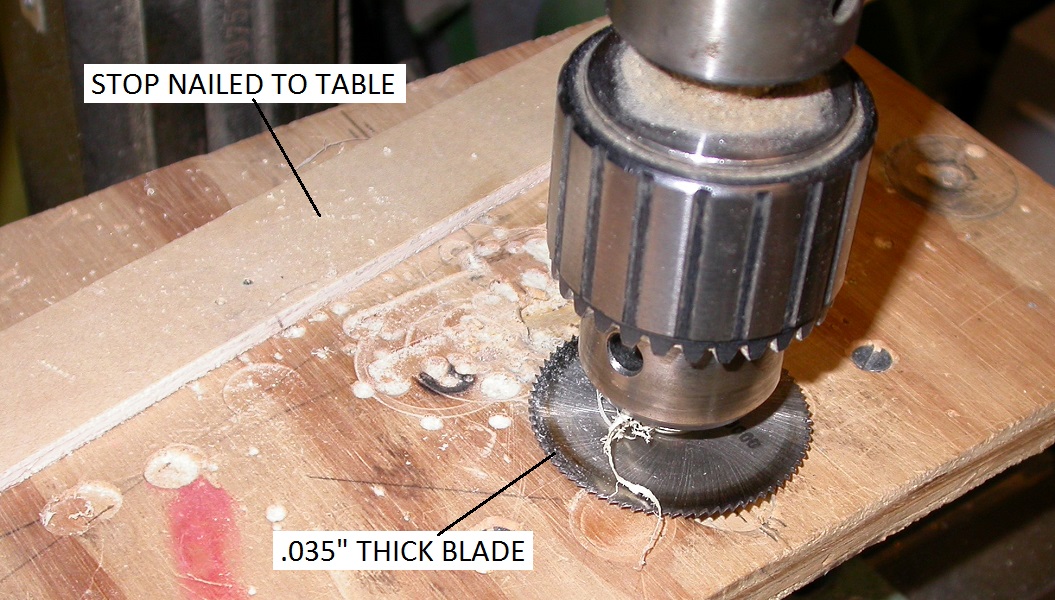
I set up a stop on the table of my table top mill and, using a micro saw blade of approximately 1/32” thick, I set the height to approximately the center of the ¼” side.
Edges requiring a 1/16” groove…
Items in #1  in the parts list require a groove in only one of the ¼” edges
Items in #2 require a groove in one ¼” edge of one piece and in BOTH ¼” edges of the other.
I set up a stop on the table of my table top mill and, using a micro saw blade of approximately 1/32” thick, I set the height to approximately the center of the ¼” side.
|
|
With the blade turning moderately slow, I hand fed the pieces of a group through the blade. Lowering the blade (do NOT raise the blade here) .010-.020” at a time, feed each piece through the blade…flip it over and feed it through again. This keeps the groove in the center of each piece. Continue lowering the blade and double feeding the pieces until you get a groove that allows easy insertion of the panel materiel. NOTE: I use this same process when making the wood doors seen in my room sets.
CUTTING PARTS TO LENGTH/SIZE
In order for ALL groups of parts to be the same size/length, I highly recommend adding a board to your table saw cross feed and clamp a piece if scrap wood stop to it to ensure each cut on each group are as near identical as you can get with wood. See the picture below.
CUTTING PARTS TO LENGTH/SIZE
In order for ALL groups of parts to be the same size/length, I highly recommend adding a board to your table saw cross feed and clamp a piece if scrap wood stop to it to ensure each cut on each group are as near identical as you can get with wood. See the picture below.
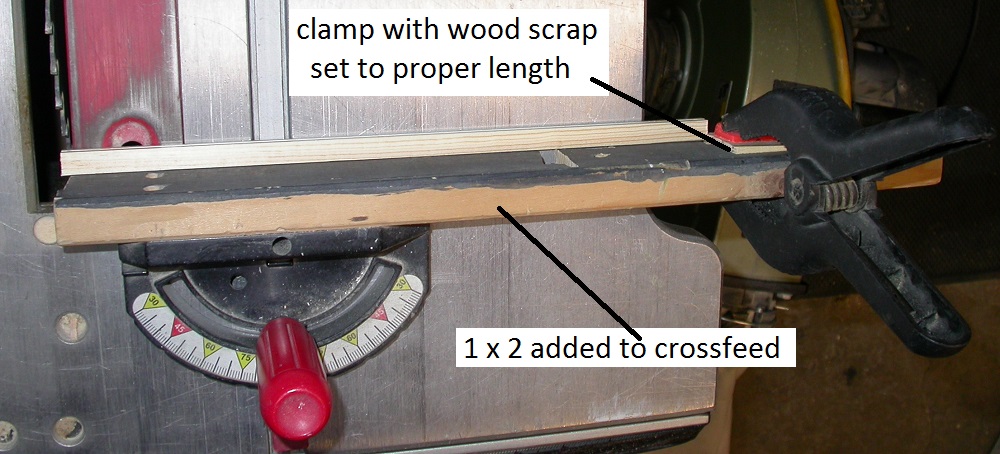
Here's a view from above for the simple stop I used for cutting all lengths the same.
The height, according to my research on these screens should be anything from 10 ¾” to 11 7/8” high. Due to the curvature I hope to put on the top of mine, the height will vary from 10 3/4" to 11 1/2”. But ALL panels will be made 11 ½” high and the curvature cut and sanded last.
That being said, I cut all the vertical edge pieces from item #1 material to 11 ½” long.
These screen widths seem to vary about from 54” for three panel screens and 72 inches for four panel screens, making 1/6th scale panels 3” wide. I would suggest cutting the needed panels from the 1/16” thick hobby sheet and then cut the horizontal pieces to fit the width left as the size of the panels is dependent on the depth you made your grooves. My grooves are just under 1/8” deep so I’ll lose almost ¼” of panel material in the grooves.
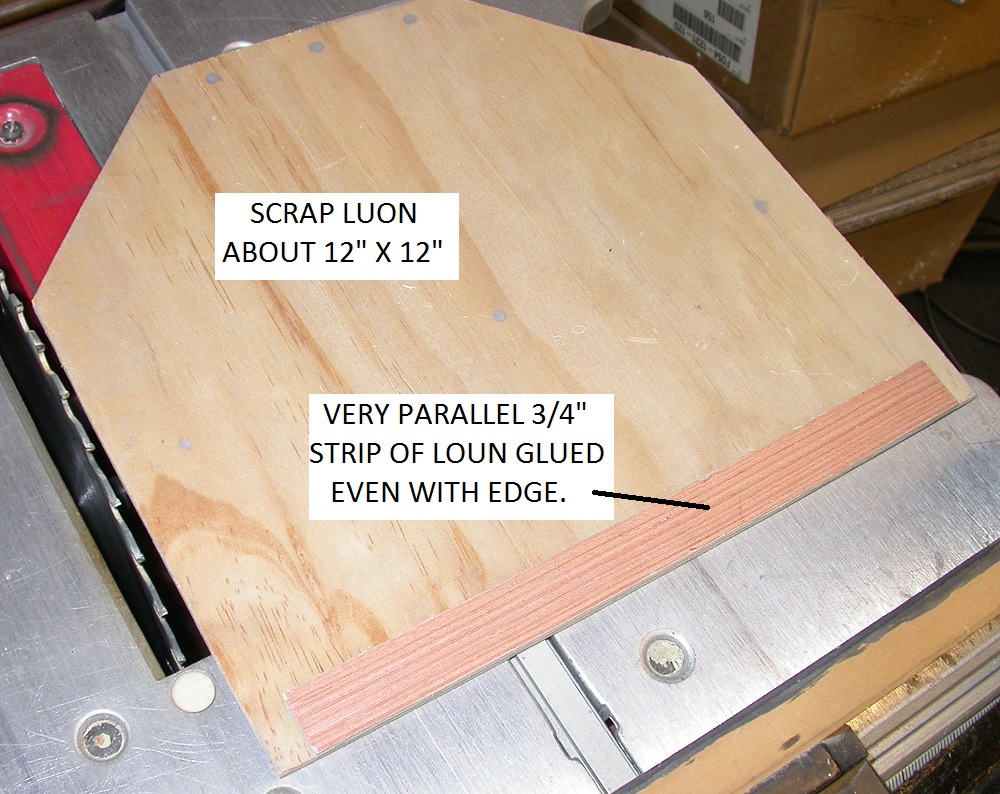
Most table saws do NOT cut thin materials well. The material often is allowed to slip under fences causing very bad cuts. It is simple to make a holder for the wood out of thin, scrap plywood. I used 3/16 Luon for mine as shown. With the thin sheet held in the jig, you can both rip and crosscut without the material drifting under a fence.
That being said, I cut all the vertical edge pieces from item #1 material to 11 ½” long.
These screen widths seem to vary about from 54” for three panel screens and 72 inches for four panel screens, making 1/6th scale panels 3” wide. I would suggest cutting the needed panels from the 1/16” thick hobby sheet and then cut the horizontal pieces to fit the width left as the size of the panels is dependent on the depth you made your grooves. My grooves are just under 1/8” deep so I’ll lose almost ¼” of panel material in the grooves.
Most table saws do NOT cut thin materials well. The material often is allowed to slip under fences causing very bad cuts. It is simple to make a holder for the wood out of thin, scrap plywood. I used 3/16 Luon for mine as shown. With the thin sheet held in the jig, you can both rip and crosscut without the material drifting under a fence.
I first crosscut the 1/16” basswood material twice to 5 1/16” long and once to 4.000” long. Being 6” wide, when these are cut in half, (I used a metal rule and a hobby knife to cut these pieces in half) this will make 4 top panels and two lower panels. Once these pieces are cut in half, one top panel will then need shortened to make the three of each needed. Again, the length of the horizontal pieces will be effected by the depth of your groves you cut. In order to get near equal amount of the panels in the grooves my horizontal pieces ended up being 2 3/4” long, making each finished panel 3 1/2” wide instead of the above mentioned 3”. I also used a stop on my crosscut to make these all the same length.
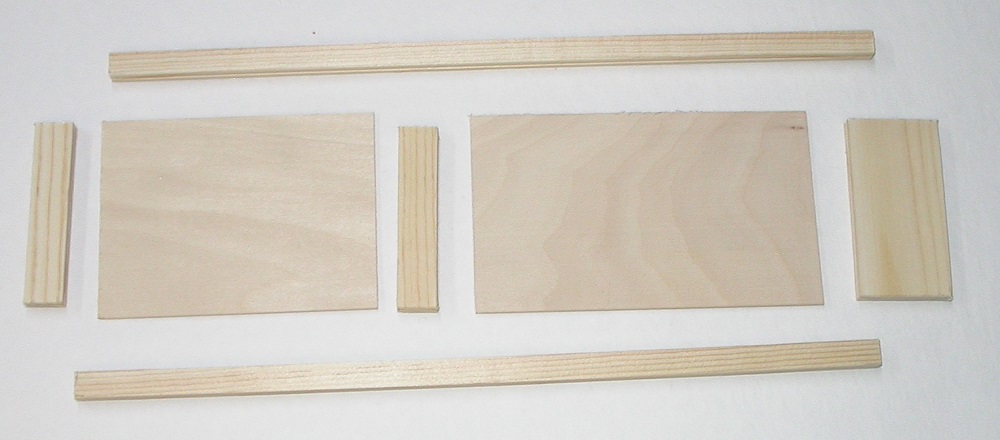
All wood pieces for one panel.
The top, bottom, left and right pieces are grooved only on one long edge while the center pieces is grooved along both long edges.
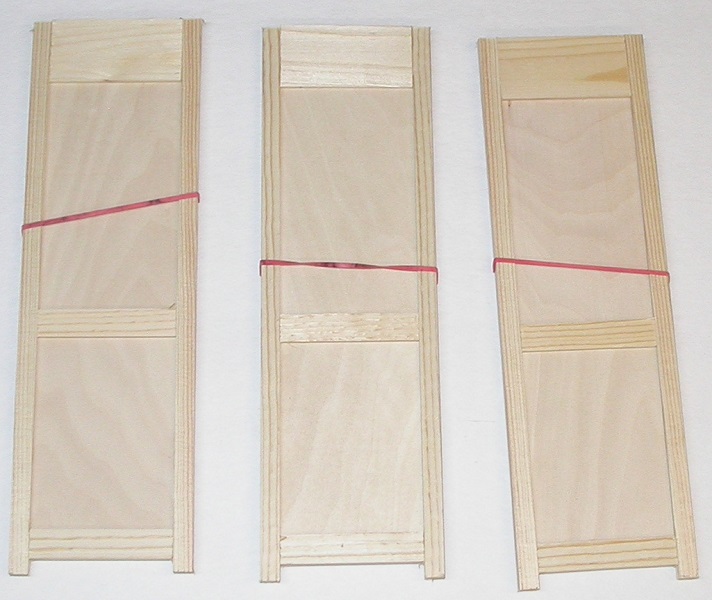
All three panels held by rubber bands. NOTE: The bottom boards do NOT touch the floor.
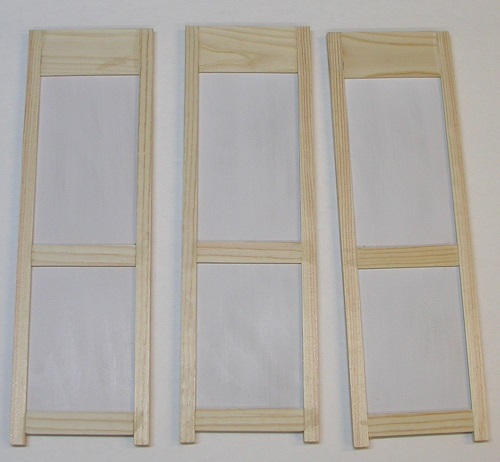
I gave each panel a light sanding with a palm sander both sides, wiped them down then sprayed each side with a good grade primer. While these were drying, I hand sanded all remaining parts to clean up any fuzzy edges from sawing.
Once the primer was dry and I was happy with the surface finish, all three panels can be glued together. Remember, the top curvature will be marked and cut after assembly to ensure a smooth line.
Mark the hinge screw locations and predrill holes for the screws to eliminate splitting the wood. Using brass 3/4” x 5/8” hinges, I located the bottom hinge ¾” from the bottom, the top hinge 1.400” from the top and the middle hinge centered between the first two. Assemble the three panels and hinges into the final configuration. Remember. One panel will fold to the front of the center panel and one will fold to the back for easy, flat storage.
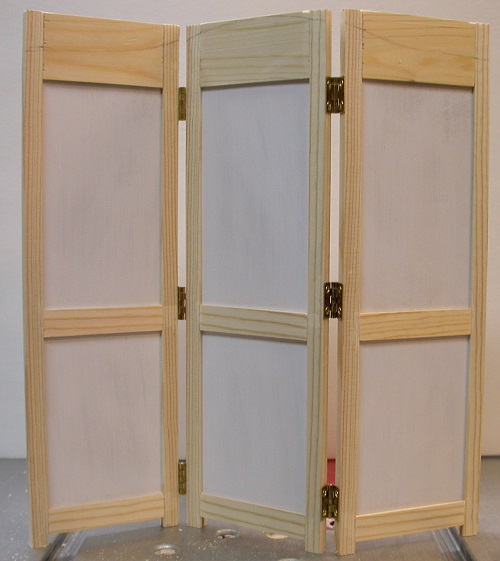
Above shows the panels correctly assembled with the 6 hinges. Mark the curvature of the top and cut off excess with a scroll saw then clean up with an oscillating spindle sander, as an assembled unit, with your largest drum if you have one. I used a 4” drum. This can be done on a simple drill press holding a sanding drum…just be careful.
Remove all the hinges, do any last minute sanding of the panels, then prime and paint. Once dry reinstall all hinges.
Remove all the hinges, do any last minute sanding of the panels, then prime and paint. Once dry reinstall all hinges.
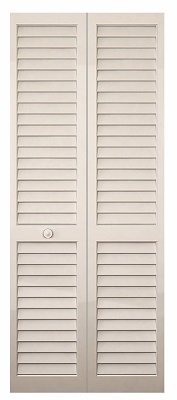
This was, of course, too plane for me and I do not have the talent required to paint flowers or whatever on the panels so I resorted to more trickery. I decided that louvers would look nice in the top sections and it would be simple enough to add them as cut outs done on photo paper…to get that glossy finish.
To start, I found a GOOD picture of a closet louvered door…looking straight at it to eliminate distortion. I chose one of the upper louvered sections. After cropping out this section it was simple enough to resize it to print out on photo paper to fit snugly in each location.
To start, I found a GOOD picture of a closet louvered door…looking straight at it to eliminate distortion. I chose one of the upper louvered sections. After cropping out this section it was simple enough to resize it to print out on photo paper to fit snugly in each location.
|
|
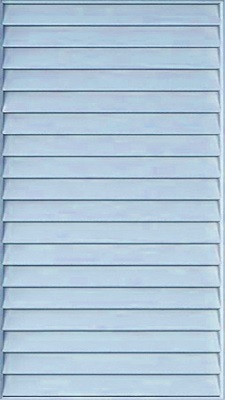
Here's my sample from the Internet Here's my useable louver
Mine started out as a black and white picture but, by adjusting the hue & saturation values, I was able to get a lighter shade of teal to contrast with the screen. I used two-sided tape to hold them in place but you could use glue as long as it does not soak through and ruin the paper…and the image of the louvers. Tape just seemed safer. If you are as much of a stickler for details, as I am, remember to install the pictures upside down on one side as that is how the louvers should look in real life.
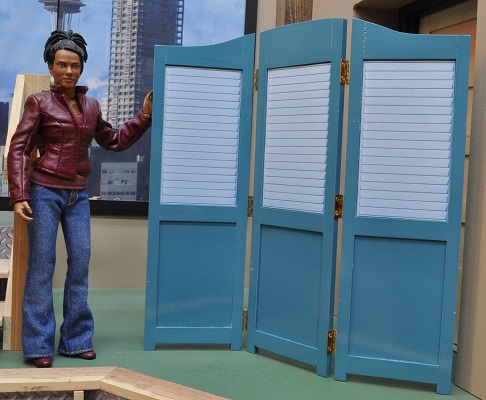
Finished overall size is…1/6th scale 69” tall x 1 ½” thick (unfolded) (5 1/4" thick folded) x 65 1/4" Max
Actual size 11 ½” tall x ¼” thick x 10 7/8" wide MAX
Actual size 11 ½” tall x ¼” thick x 10 7/8" wide MAX