HOW TO MAKE STORAGE BOXES - Commonly called Coffin Boxes
The other day I was about to order six more unassembled coffin boxes for my figures for storage. To my surprise, when I filled out the order I found the shipping for six boxes, costing $9.54 total, was over $18.00. So I increased the quantity to twelve, total cost of $19.08, to see if this was an error. The shipping increased to just over $19.00. I do not think I am “cheap” but I am smart with my funds. Especially as I am a few years into retirement. As nice as their boxes are, even having to assemble them myself…they are not worth it to me.
So I proceeded to do what I did several years ago…I made more of my own, using a good grade poster board at 78 cents a sheet. It is called Premium Poster Board measuring 22” x 28” and is about .018” thick. It turns out I can make TWO boxes from each sheet making them less than 40 cents each using the pattern shown below. I made my first ones from the cheaper grade poster board (about 33 cents a sheet but only big enough to make one box) and they DO work OK but are less impressive for rigidity.
So I proceeded to do what I did several years ago…I made more of my own, using a good grade poster board at 78 cents a sheet. It is called Premium Poster Board measuring 22” x 28” and is about .018” thick. It turns out I can make TWO boxes from each sheet making them less than 40 cents each using the pattern shown below. I made my first ones from the cheaper grade poster board (about 33 cents a sheet but only big enough to make one box) and they DO work OK but are less impressive for rigidity.
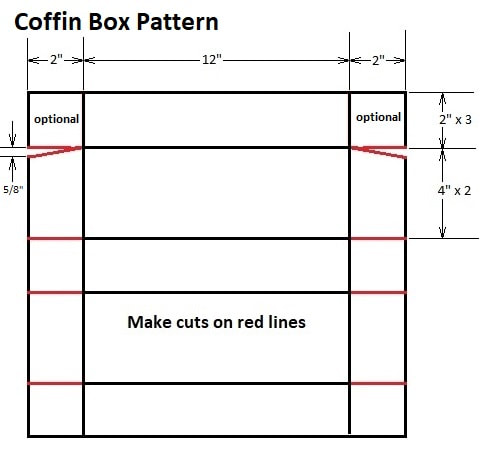
Using a good 18” rule, I marked each sheet as shown in the sketch giving me two 16” by 14” rectangles marked out at the cut and fold lines. I use a ballpoint pen to mark mine and press as hard as I can on the fold/cut lines. This crushes the cardboard at these points making the final folding much easier and sharper.
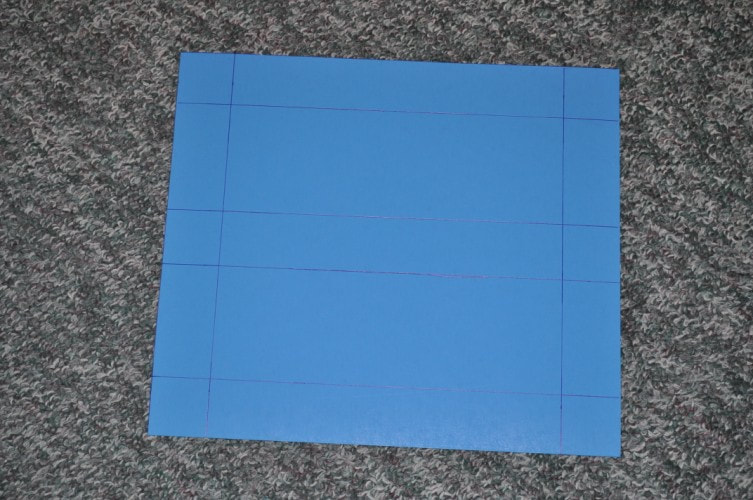
After cutting out the rectangles but before cutting and of the flaps, I used the 18” rule to help fold them at ALL fold lines. Each fold is creased down one way then folded the other way and again creased down. This removes most of the memory of the cardboard so, especially the LONG folds, they do not tend to bow out once assembled.

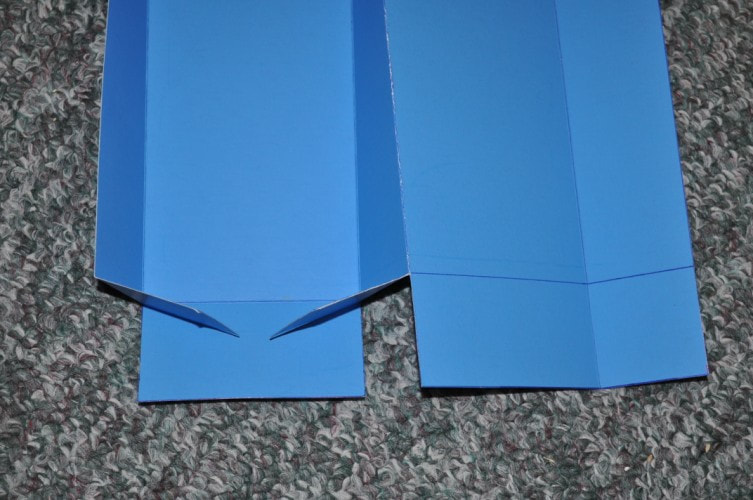
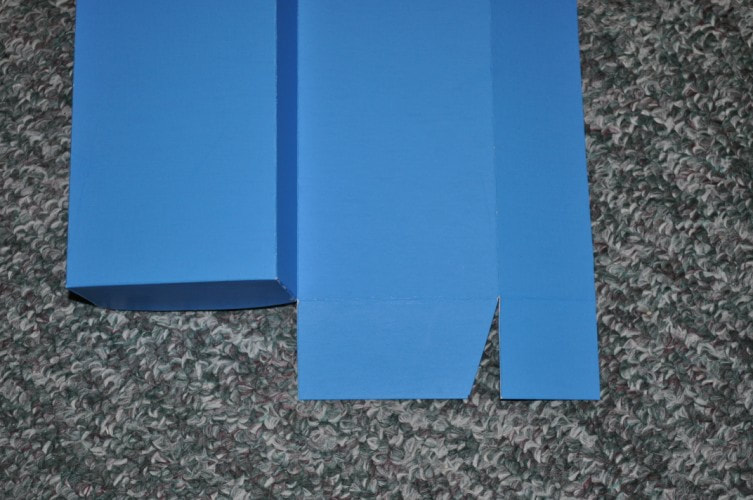
With all folds properly made, cut the flaps on the red lines of the sketch. The triangle marked on the long, 2” flap can be done now or after assembly. I did mine after as it makes little difference. Also, the 2” x 2” flap marled “OPTIONAL” may be completely removed but I’d suggest leaving them for now as, if you do not like them later, it is easy enough to cut off then.
Assembly is simple enough. Apply glue to a 4” x 2” flap, fold the two 2” x 2” flaps inside the box and tape as needed to give a nice square end. If laid out well and cut precisely, the two 2” x 2” flaps should but against each other to help make the ends a true 4” x 2”, like the outer flap
Assembly is simple enough. Apply glue to a 4” x 2” flap, fold the two 2” x 2” flaps inside the box and tape as needed to give a nice square end. If laid out well and cut precisely, the two 2” x 2” flaps should but against each other to help make the ends a true 4” x 2”, like the outer flap
|
|
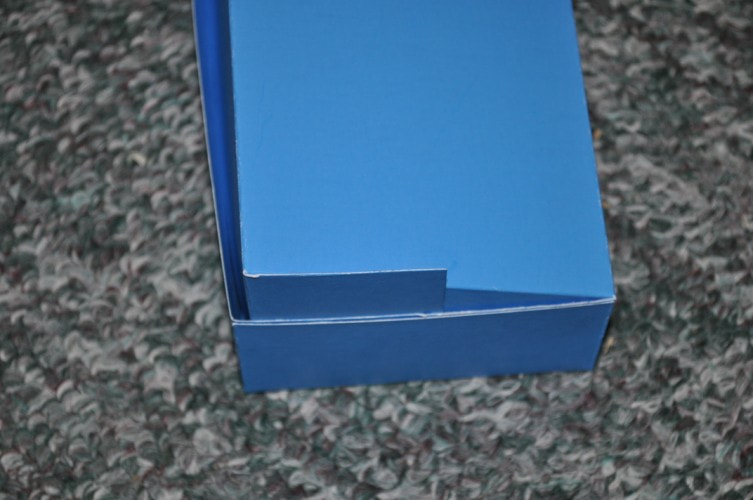
With both ends finished, if you didn’t cut off the triangle from the long flap…do it now.
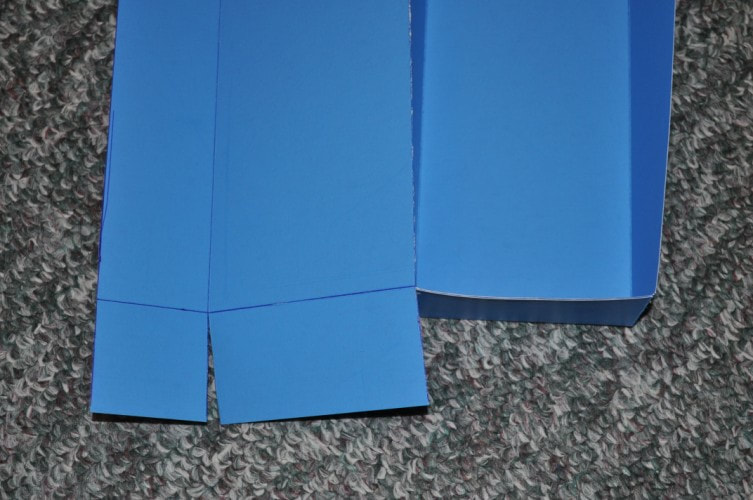
If you choose to leave the “OPTIONAL” flaps attached be sure, when closing, they are on the outside of the 4” x 2” lid flaps as shown below.
|
|
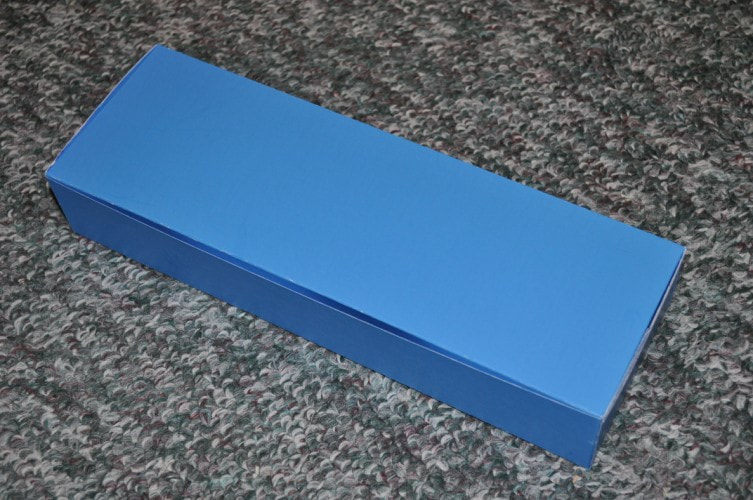
When fully closed, the "optional" flap is flush with the top and strengthens the box.