HOW TO MAKE A FOLD-UP STAGE
I’ve been asked a few time about the stage I use for my indoor shoots so here finally is the best answer I can provide.
My first stage that I made, since reentering the world of 1/6th scale figures back in 2008, amounted to a handmade, freestanding table that was 32 inches wide and 8 feet long. It did not take long to realize that the “stage” could NOT be freestanding and that 32 inches was NOT deep enough for my purposes.
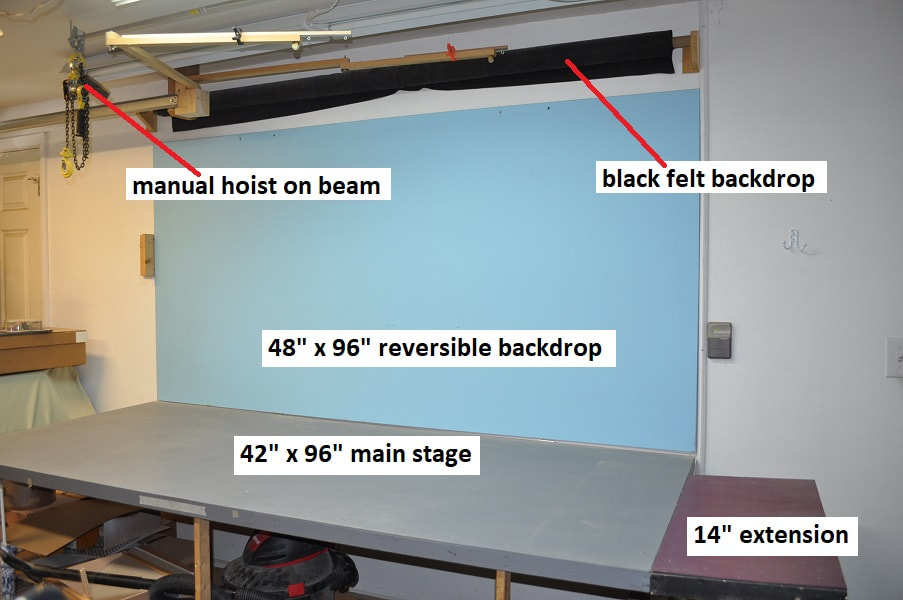
As you can see below, my current stage, which is used for ALL of my indoor shoots, started out as a 42” deep by 8 foot long table hinged to the wall at 33 inches high. Even with me being only 5 foot 8 inches tall (on a good day) I can reach the back corner. Most of my sets fit easily on this table. But I found I needed the 14” extension when I use the living room/kitchen set if I planned to use the hallway outside the front door.
The blue backdrop you see is a full sheet of 1/8” thick, 4’ x 8’ Masonite, painted sky blue on one side and flat black on the other for “fake” daytime or night time shoots on this stage. It is cumbersome but I find I can turn it over by myself. It is simply hung on the wall using two pan-head screws which slip through two oversized holes near the top of the sheet. That being said, I rarely turn it over anymore since I added the 8 foot long black felt backdrop you see rolled up out of the way. The manual hoist was used the last time I had my silver shuttle craft hovering off the ground in my Anything is Possible story as the shuttle craft weighs about 14 pounds
My first stage that I made, since reentering the world of 1/6th scale figures back in 2008, amounted to a handmade, freestanding table that was 32 inches wide and 8 feet long. It did not take long to realize that the “stage” could NOT be freestanding and that 32 inches was NOT deep enough for my purposes.
As you can see below, my current stage, which is used for ALL of my indoor shoots, started out as a 42” deep by 8 foot long table hinged to the wall at 33 inches high. Even with me being only 5 foot 8 inches tall (on a good day) I can reach the back corner. Most of my sets fit easily on this table. But I found I needed the 14” extension when I use the living room/kitchen set if I planned to use the hallway outside the front door.
The blue backdrop you see is a full sheet of 1/8” thick, 4’ x 8’ Masonite, painted sky blue on one side and flat black on the other for “fake” daytime or night time shoots on this stage. It is cumbersome but I find I can turn it over by myself. It is simply hung on the wall using two pan-head screws which slip through two oversized holes near the top of the sheet. That being said, I rarely turn it over anymore since I added the 8 foot long black felt backdrop you see rolled up out of the way. The manual hoist was used the last time I had my silver shuttle craft hovering off the ground in my Anything is Possible story as the shuttle craft weighs about 14 pounds
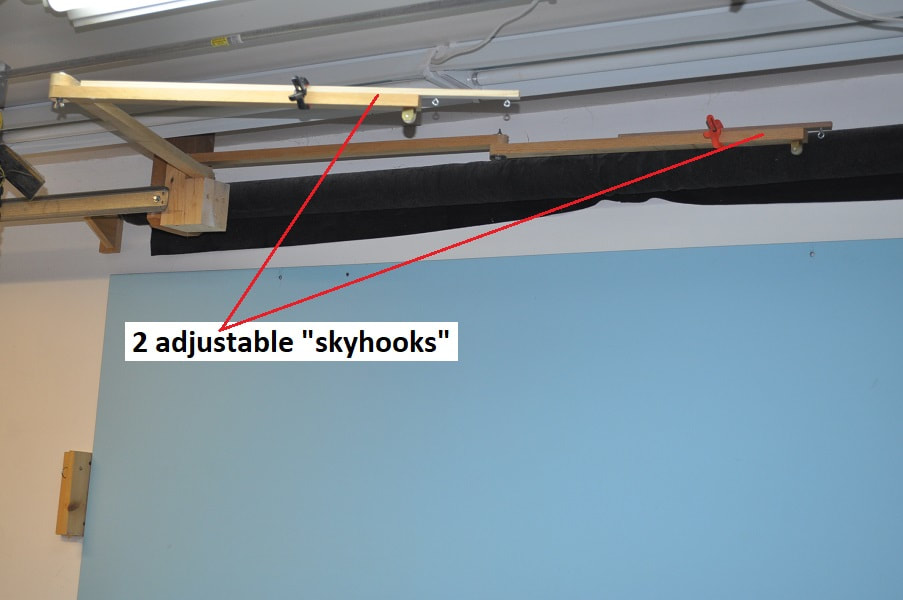
I built these two “skyhooks” shown below from scraps and attached them to the 2 x 8 that holds our garage door track. They can be positioned over any area of the stage for flying fairies, airborne sacks of garbage or the upcoming “skateboard shoot”. These are very light-duty.
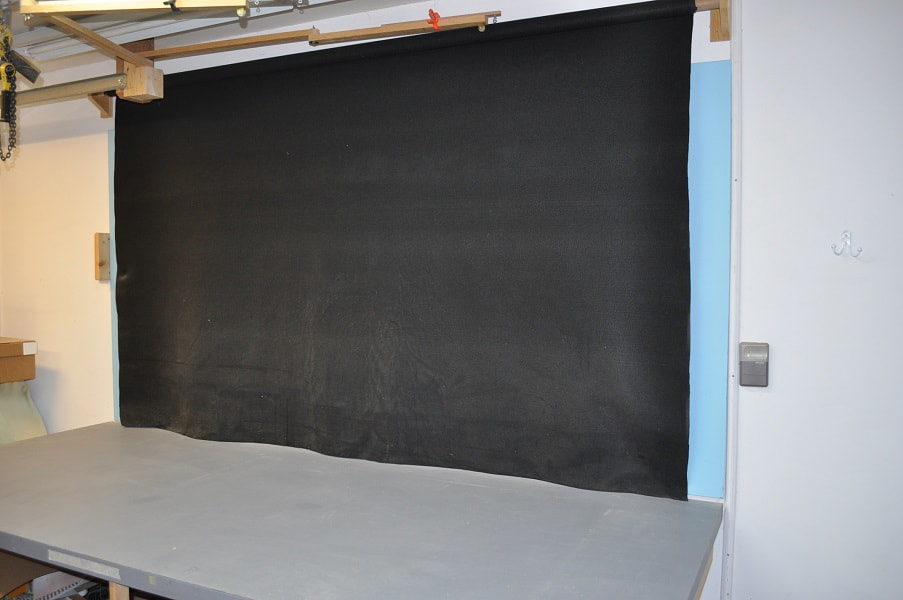
Below you can see the black felt backdrop lowered into position. It could stand to be cleaned a bit but it does look better even ASIS when I am not using a flash during story picture taking.
Between shoots, if I need the room, I can fold the stage up against the wall once the extension is removed.
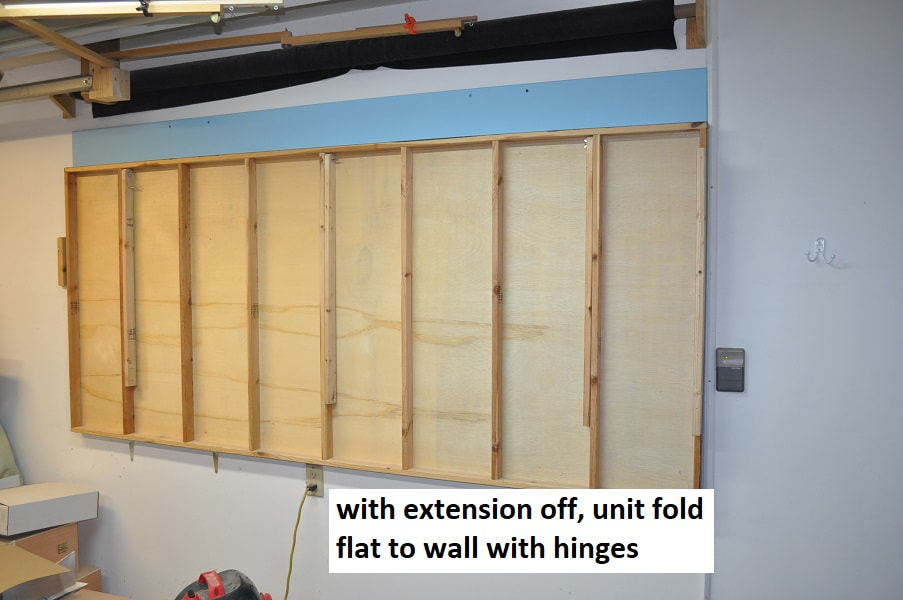
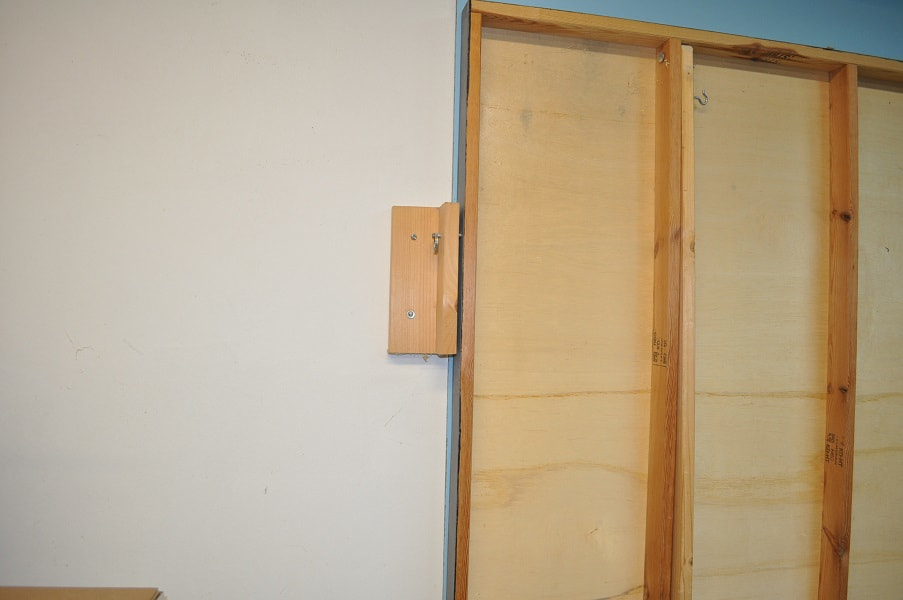
I made this simple latch to hold it to the wall at one end using a simple pin.
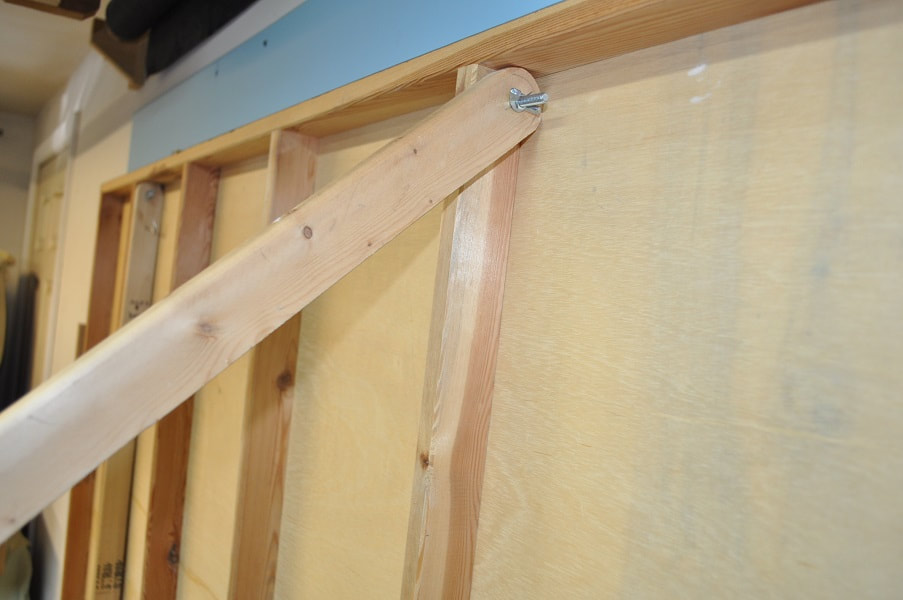
The three legs are simply 1 x 2s hinged in place with a ¼” diameter bolt and a wingnut that simply fold up into the framework.
I hope this answers any questions and possibly helps others like me who have limited room for their photo taking.