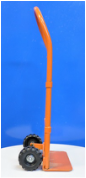
HOW TO MAKE A HAND TRUCK: Two Wheeled Cart
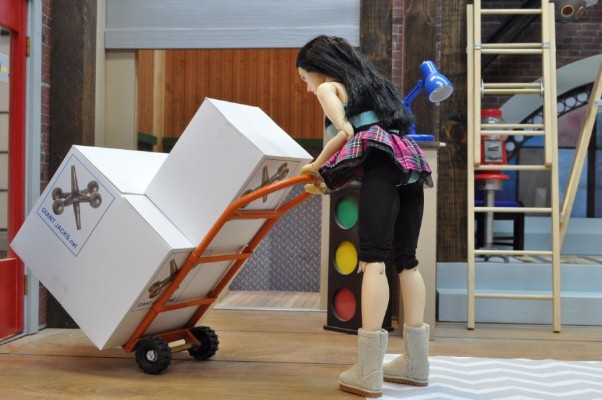
I found I had a need for a hand truck for my factory set...so I built this.
Once I showed it in an iCarly:FYL story, there was immediate interest in where I got it and how I made it. It is hard to write a tutorial after the fact but the construction is quite straightforward so I only hope with enough photos this project can be reproduced.
Once I showed it in an iCarly:FYL story, there was immediate interest in where I got it and how I made it. It is hard to write a tutorial after the fact but the construction is quite straightforward so I only hope with enough photos this project can be reproduced.
|
|
|
|
|
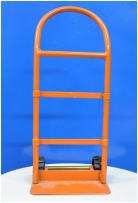
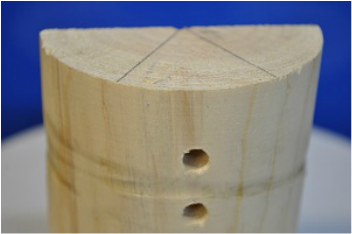
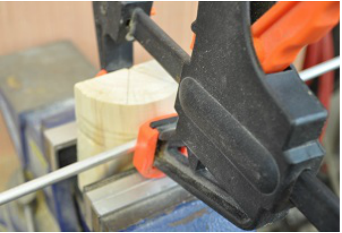
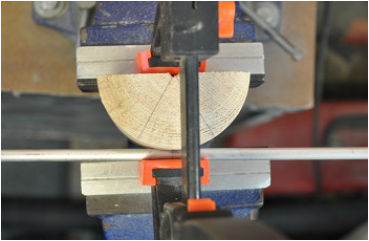
The main part of the truck is fashioned from ¼” solid steel rod. I just guessed plenty long on one side then bent the rod carefully (to avoid any kinks and to make the bend smooth) around a 2 ¾ dowel rod I turned on my lathe holding it tightly against the wood former with a clamp and pushing on each end equally until I had a smooth "U" with the two legs parallel.
Please note, I used solid steel just for the ease of bending without kinks as you can get with tubing. If you CAN bend tubing well...it would be preferred.
Please note, I used solid steel just for the ease of bending without kinks as you can get with tubing. If you CAN bend tubing well...it would be preferred.
|
|
2 ¾” dowel half Clamp ¼” steel rod to center
|
|
Clamp ¼” steel rod to center
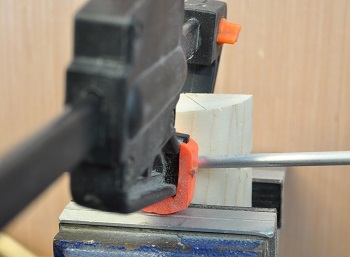
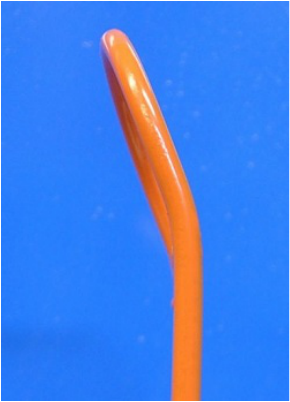
Within reason, any width would work but it effects most every other part from this point on in their length. And bending a ¼” rod around a 2 ¾” former, you end up with a hand truck about 25 1/2” wide in 1/6th scale. With this now in the shape of a very deep “U”, I clamped it in a vice and bent both legs, just below where the radius ended, to about 20 degrees for the handle. The two legs then could be marked and cut to final length of about 8 ¼” from their ends to the top of the radius. This is now ready to be soldered to the blade
Within reason, any width would work but it effects most every other part from this point on in their length. And bending a ¼” rod around a 2 ¾” former, you end up with a hand truck about 25 1/2” wide in 1/6th scale. With this now in the shape of a very deep “U”, I clamped it in a vice and bent both legs, just below where the radius ended, to about 20 degrees for the handle. The two legs then could be marked and cut to final length of about 8 ¼” from their ends to the top of the radius. This is now ready to be soldered to the blade
The bottom was made from a piece of 1/6” steel scrap cut to 3 ½” x 2” bending up ½” along one of the long edges. This was soldered to the handle ends as shown below.
I used some thinner scrap metal to experiment with to determine the depth of the blade and the height of the back.
I used some thinner scrap metal to experiment with to determine the depth of the blade and the height of the back.
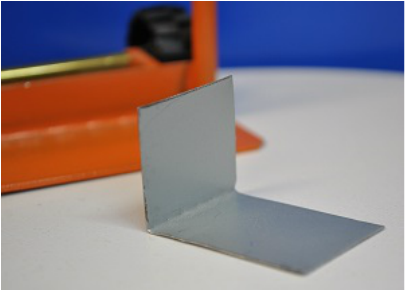
This one had the right depth but looked wrong at the back. ½” looked good and gave just enough to solder the axle supports to.
|
|

|
|
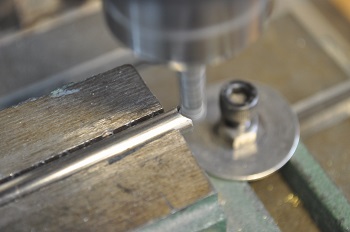
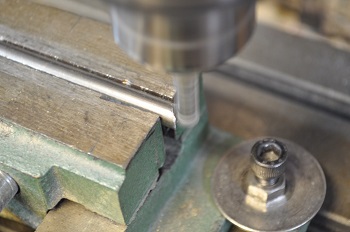
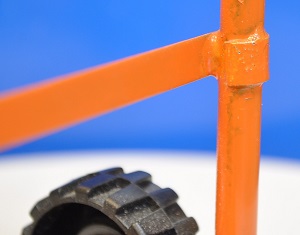
The top crosspiece is a section left from the one handle cutoff that I milled a 1/8” radius into both ends to match the handle so it looked like this. If you do not have access to a mill please skip down to ***

Just keep both end cuts in line with each other to match the uprights.
|
|
This could MUCH more easily have been the same strap material described below for the other cross braces but the piece was too small to keep for future projects…so I used it here.
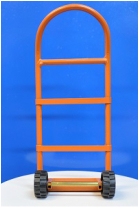
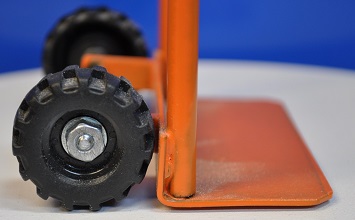
*** The lower two straps are simply 1/4" wide x 1/32” thick hobby grade strap material. Steel or brass would be fine. These were simply wrapped around the uprights and soldered in place
*** The lower two straps are simply 1/4" wide x 1/32” thick hobby grade strap material. Steel or brass would be fine. These were simply wrapped around the uprights and soldered in place
|

|
FRONT SIDE BACK SIDE
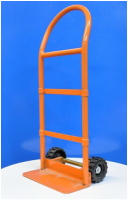
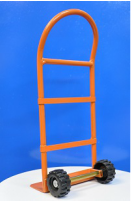
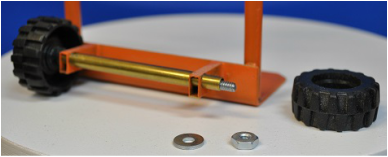
The wheels I got off a $1.00 cardboard kiddie book from a department store. In this case Target. Each wheel is about 1 3/16” in diameter and just over ½” thick which looks about right to me. I got four wheels off one book. Two went to this project and six went to another. Any toy car/truck, new or old will do if you like the wheels and can get them off. The size of the hole through these wheels can easily require you to adjust the axle size so judge accordingly.
The wheels I got off a $1.00 cardboard kiddie book from a department store. In this case Target. Each wheel is about 1 3/16” in diameter and just over ½” thick which looks about right to me. I got four wheels off one book. Two went to this project and six went to another. Any toy car/truck, new or old will do if you like the wheels and can get them off. The size of the hole through these wheels can easily require you to adjust the axle size so judge accordingly.
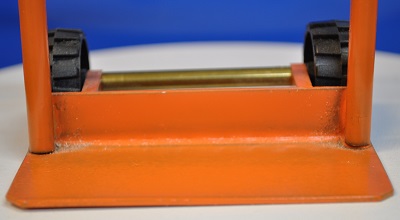
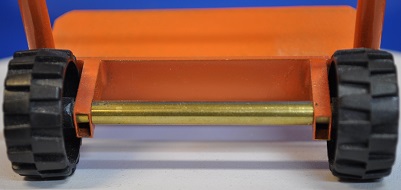
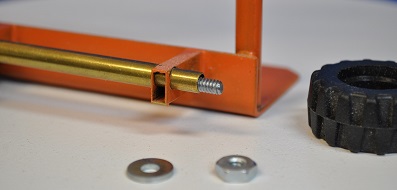
The axle is simply 6-32 threaded stock with a piece of brass tubing over it and threw the axle supports and a washer and nut on each end. I may change these nuts to acorn nuts someday.
|
|
The axle supports are 5/32 x 7/32 rectangular brass hobby tubing cut to just under .800” (11/16") long. I drilled the hole for the axle's brass tube in each and assembled the two supports on the axle tube without the wheels before soldering the supports to the bottom section to aid in alignment. Once you get one soldered in good just adjust the other if needed to keep it symmetrical.
All in all I think it came out quite well. If any point needs clarification…please let me know.
Also, keep in mind, if you do not have access to a HEAVY DUTY soldering iron you will need to use a torch which can be trickier if you are not familiar with them. As I made mine in the middle of the winter of 2014/2015 in an unheated garage there was no choice but to use a torch. Especially with the solid steel main frame.