HOW TO MAKE KITCHEN SINK & MORE
After a few requests from fans of our stories and sets, I went back through my archive of in process pictures to assemble this tutorial...way, way after finishing it. It's a good thing I tend to over document what I do and build. LOL Since this was written after completion, if there are any questions...please let me know.
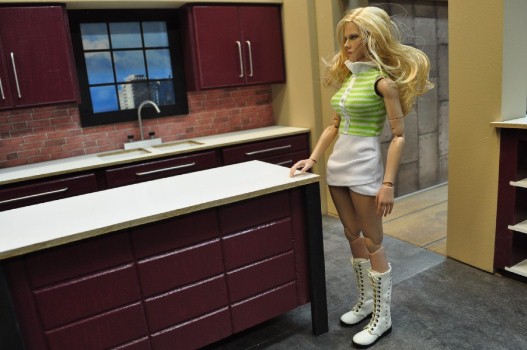
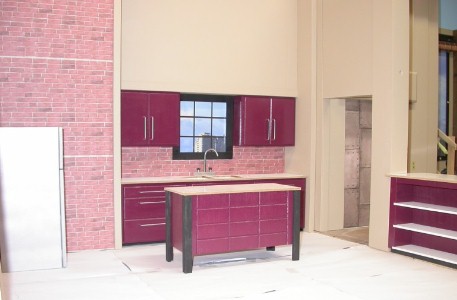
As our iCarly:Five Years Later sets grew in size and number…we needed a kitchen sink…and cabinets…and more walls.
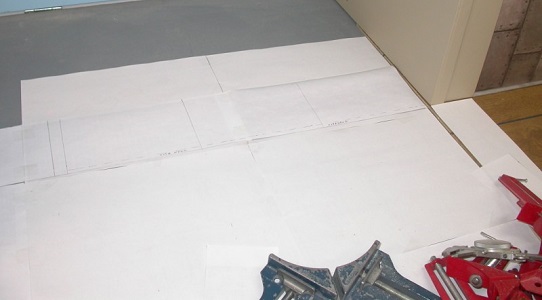
We first laid out the floor plan full size on taped together printer paper next to our living room set.
We first laid out the floor plan full size on taped together printer paper next to our living room set.
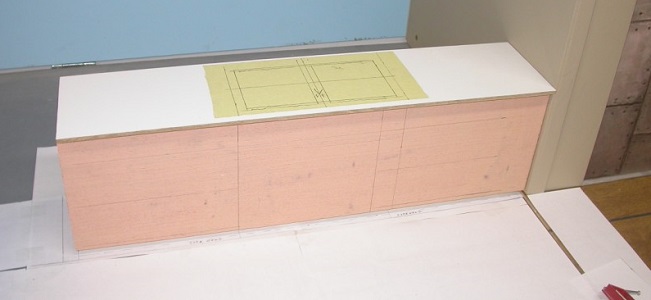
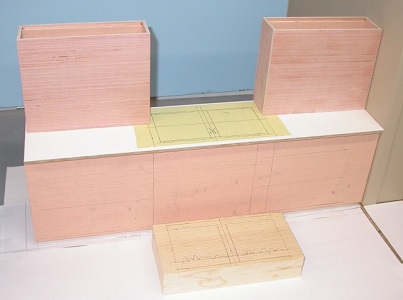
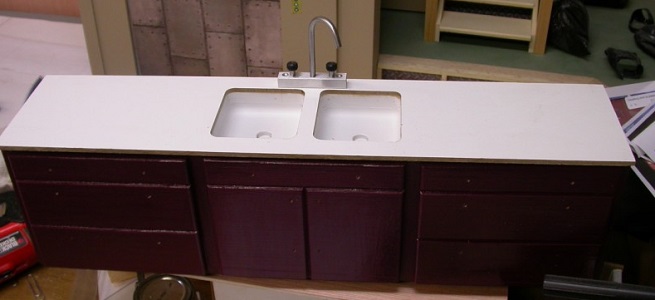
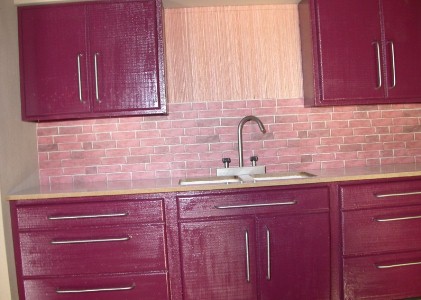
Next was to make the cabinet that would hold the countertop and sink. The cabinet is simply 3/16 Luon cut and glued together and the countertop is left over one-side-finished Masonite left over from lining under our own kitchen sink for my wife. The cabinet is marked on the front to signify the drawers on each side and the doors in the middle. I placed masking tape over the center section of the countertop to allow me to mark out exactly where the sink basins will be.
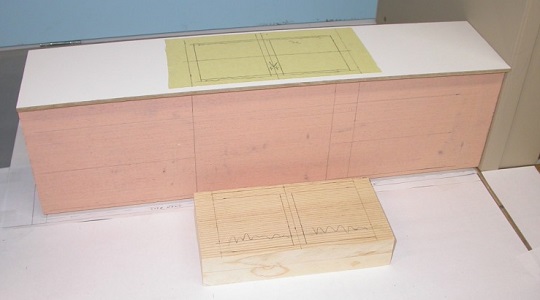
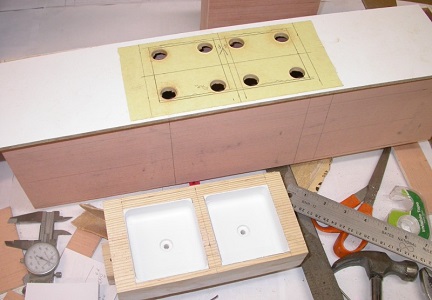
Now I need a block of wood small enough to fit between the front and back of the cabinet yet big enough that I can cut out two areas for the sink basins.
Before starting on the sink basins, I went ahead and made the cabinets for above the sink cabinet. They will mount to the back wall later.
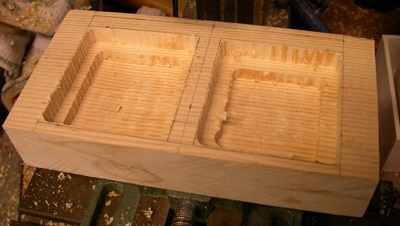
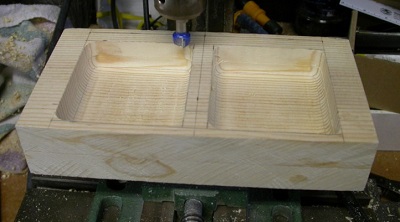
After mounting the wood block for the two basins in my small mill, I was able to use an end mill to hog out the bulk of the excess materials. Notice I left a step in each basin all the way around to allow for the radius I wanted where the sides meet the bottom of each basin. Switching to a round tip bit allowed me to clean up the outer edges of each basin and, as I lowered this bit into each basin, produce a nice radius around the bottom perimeter…like a real sink.
|
|
Before removing this block from the mill, I marked the center point of each basin and used a small Forstner bit to make the initial recess of each drain and then ran through the center of this with a 3/16” bit. Nearly done.
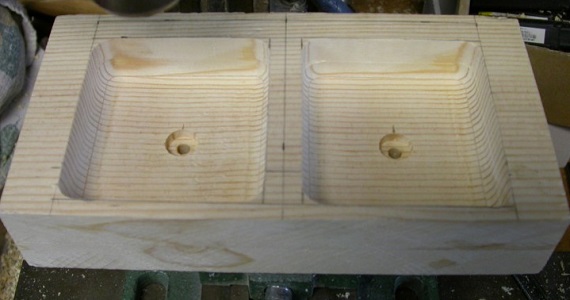
I placed masking tape over the top surface of this block to protect the “gluing” surface then primed and painted the insides. Set aside to dry.
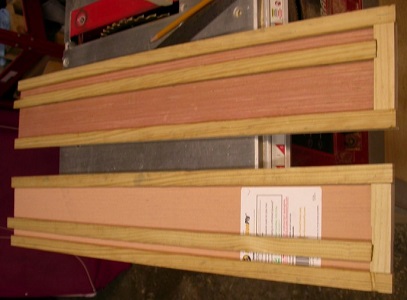
While I waited on this to dry, I started on the two walls that will go on each end of the sink cabinet. Once the glue dried enough on the wood strips added to these two pieces of Luon, I will add a matching piece to the top. Most all of my walls on these sets are about .700" thick, consisting of 3/16" Luon front and back with wood strips laid up between.
While I waited on this to dry, I started on the two walls that will go on each end of the sink cabinet. Once the glue dried enough on the wood strips added to these two pieces of Luon, I will add a matching piece to the top. Most all of my walls on these sets are about .700" thick, consisting of 3/16" Luon front and back with wood strips laid up between.
This part can make or break your project. Especially mine as I had NO extra pieces for this countertop without buying more. With great care I marked out where the basins should end up when properly installed. Then, with even more care, I bored out all eight corners with a small Forstener bit. Whatever bit you use for this, be careful not to damage the bottom side of the countertop.
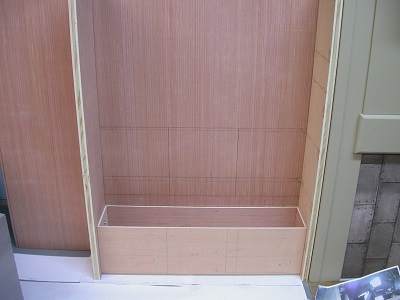
With the side walls attached to the back wall and the cabinet, I marked off the approximate locations for the upper cabinets.
I used a scroll saw to cut the bulk of the excess materials from the sink openings then carefully glued this block to the bottom of the countertop. Watch out for any glue that may ooze into the sink basin and wipe it out.
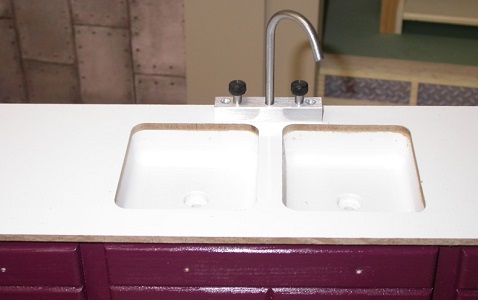
Using a router bit designed for Formica countertops, set it to a depth equal to that of the countertop material and clear out the remainder of material from the sink openings. This bit, if properly set, will open the countertop up until it is even with the basins.
The faucet is all personal preference. I used a scrap of aluminum for the body (Cut and milled to size and shape), hobby tubing for the spout and bolts with plastic heads from the specialty drawers in most good lumberyards for handles. There are many tubing benders on the market to help bend the tubing without kinks.
The faucet is all personal preference. I used a scrap of aluminum for the body (Cut and milled to size and shape), hobby tubing for the spout and bolts with plastic heads from the specialty drawers in most good lumberyards for handles. There are many tubing benders on the market to help bend the tubing without kinks.
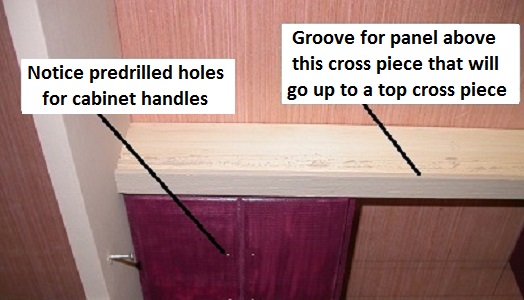
I removed the lower cabinet in order to start painting it and give me a chance to add the upper cabinets. Start with the cross piece shown which is what the tops of the cabinets will go against.

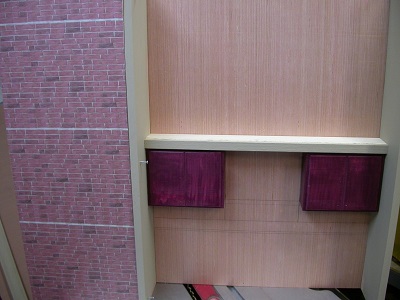
With only one coat of paint on the upper cabinets, I fitted them into place and added the brick wall to their left. Please notice that ALL doors and drawers on these cabinets are NOT functional. They are simply cut to size, sanded and glued in place…then all is painted.
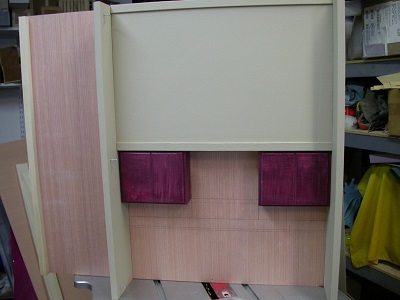
Before the doors and drawer fronts were glued in place, they were all drilled for mounting of the handles which were fabricated from jumbo paperclips. In order to simplify enclosing the area above the upper cabinets, I cut a groove in the top of the bottom cross piece for a simple Luon panel that would be simply trapped between the top and bottom cross piece.
Below you can see the panel installed above the upper cabinets though the brick wall has been temporarily removed.
The cabinets got a second coat of paint, the handles were inserted into the holes and a fake window was installed between the upper cabinets with a picture of Seattle visible along with a bit more brickwork.
|
|
For the floor I used four 18” square vinyl tiles.