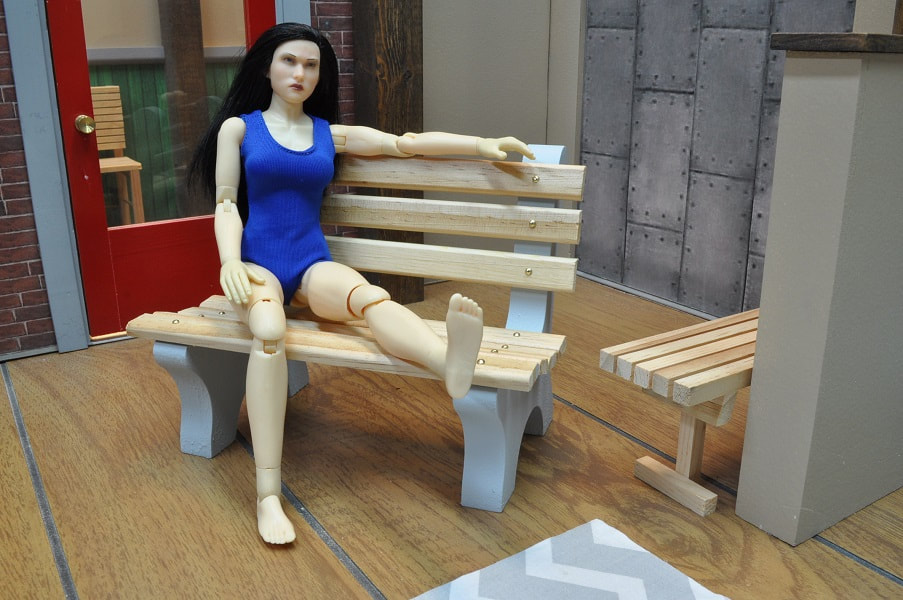
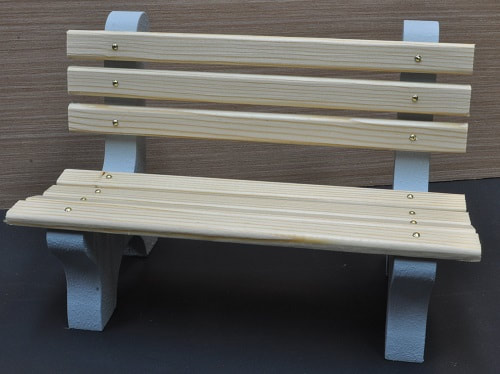
HOW TO MAKE A PARK BENCH - Style #1
Meant to appear as two cement vertical supports and wood slats.
PARTS LIST
5 ½” x 9” x ¾ wood stock (pine) for the two vertical supports
5/8”(I USED .666” WIDE) x ¼” x 8-10” seat/back slats – 7 required
15 gage x 5/8” linoleum nails (brass plated) for attaching slats to supports
sealer (I use KILZ sealer) mainly to hide wood grain of vertical
supports
Clear Finish if you want natural look to slats
Paint Grey for vertical supports (cement
color)
a color for the seat/back slats if
not natural
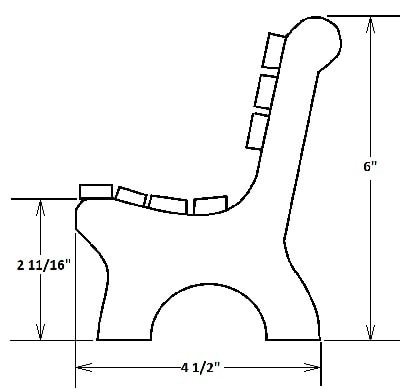
I started by locating a good end view of a bench and turned it into a pattern.
I printed this sketch on a piece of card stock to make a pattern better than regular paper and cut it out.
5 ½” x 9” x ¾ wood stock (pine) for the two vertical supports
5/8”(I USED .666” WIDE) x ¼” x 8-10” seat/back slats – 7 required
15 gage x 5/8” linoleum nails (brass plated) for attaching slats to supports
sealer (I use KILZ sealer) mainly to hide wood grain of vertical
supports
Clear Finish if you want natural look to slats
Paint Grey for vertical supports (cement
color)
a color for the seat/back slats if
not natural
I started by locating a good end view of a bench and turned it into a pattern.
I printed this sketch on a piece of card stock to make a pattern better than regular paper and cut it out.
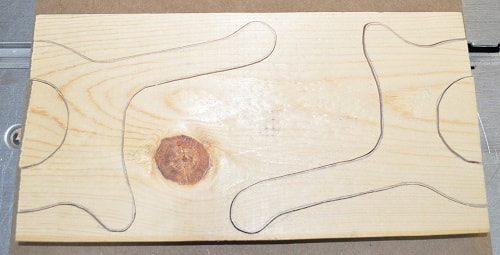
On the piece of pine, trace the pattern twice lining up the bottom of the feet to the ends of the piece of wood and cut out.

|
|
Pattern laid out on a 5 ½” x 9” piece of wood. This piece of scrap 1 x 6 worked out well
even with that huge knot in it. I cut even
with or just outside the lines to allow
adequate material left for sanding later.
See below.
even with that huge knot in it. I cut even
with or just outside the lines to allow
adequate material left for sanding later.
See below.
I used two 1 ¼ wire brads to secure the two rough pieces together then used a drum sander to clean up all edges, aside from the bottom of the feet, so they were identical.
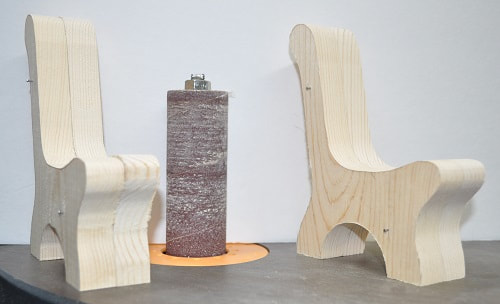
The pair on the left are not sanded. The pair on the right are sanded.
Fill and sand the holes from the brads. Lightly sand the sharp edges.
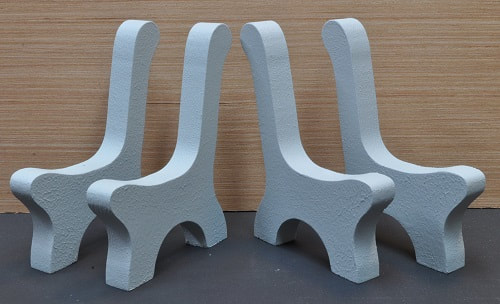
Apply sealer/primer to these pieces to ready them for the grey paint. This may take two or more coats to hide any wood grain so they will end up looking like they are made of cement. Personally, I am not a fan of brush marks from paint brushes on most of my projects and if a project is small, like this, it does not justify using a small 4” roller I use on my walls and such…so I simply use a swatch from a terrycloth towel to blot the paint after applying it with a brush to stipple the finish making it look as if it were rolled which removes any and all brush marks. My bench supports have two coats of primer. I use the white KILZ brand.
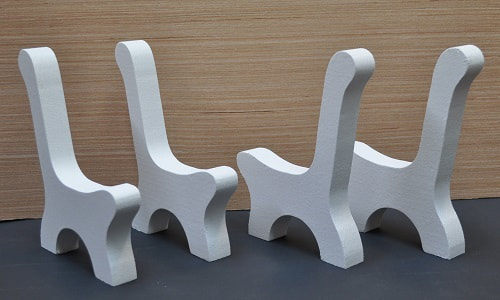
Here are two sets of supports primed flat white and ready to paint grey.
Once dry, I applied the grey (cement color) paint to these supports using the same process of applying the paint with a brush then going over the complete surface with a swatch of terrycloth material to again stipple the grey finish.
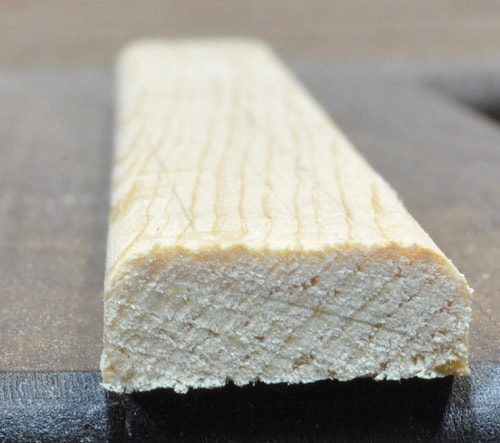
I wanted the slats to be well rounded on the front and back edges so I used a 1/8” radius router bit on these edges only. Much easier than hand sanding. I ran a piece of scrap pine through my planer to .666” thick (just over 5/8” – this makes them very near a full 4” wide in 1/6th scale). This piece of scrap was about 2” wide and 28” long. After ripping this piece into strips about 5/16” wide, I lightly planed both sides then routered the two edges of each. If I didn’t have a planer, I would have aimed closer to the needed ¼” thick and simply sanded them.
After building my first bench, I found it much easier to apply the two coats of clear acrylic finish to these strips before cutting them to length. Once dry, I cut them to length and applied finish to the cut ends simply with a Q-tip.
Once finished or painted, these slats CAN simply be glued to the supports but I chose to use linoleum nails as they greatly resemble the bolt heads used on many park benches around here. They are available in brass coated and silver. As big as these nails are, pilot holes are required in the slats. Using a #49 drill bit, I set up two stops on my mill/drill press table so that the slat holes will end up on center and 7/8” from the end. This will center the nail into the support and give a consistent overhang. I used ½” overhang on an eight inch long bench and ¾” on a nine inch long bench. For a longer bench, I would allow even more overhang. Even though my first hole was within .003” of being on center, I still recommend flipping the slats over for the second hole rather than rotating it so that you drill into the opposite side of the slat on the second hole. This will keep the same long side against the stop so that if you ARE off a noticeable amount, it will all be towards the same edge. Simply a cosmetic thing but it would bother me if I could see it in the end product.
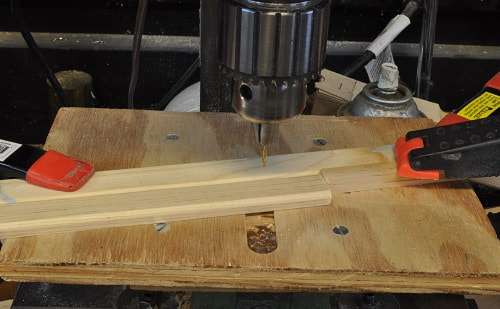
The jig used to drill mounting holes in slats.
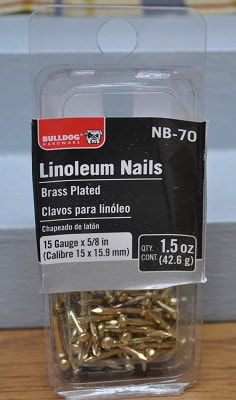
Linoleum nails used for mounting slats.
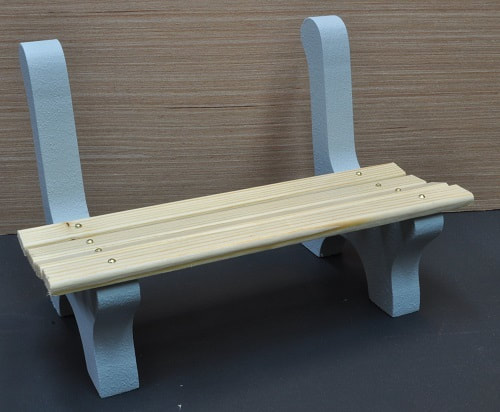
Install the front seat slat first…even with the front edge of the support with ½” overhanging at each end. I was able to drive these in without pilot holes into the supports on my first bench but pilot holes would have made it a lot easier and were used on the next two. With the nails set tightly in place, use a small square to ensure the slat and supports are indeed square.

This is a 9” long bench with ¾” overhang.
Position a slat to the back of the seat area as shown and secure with the two nails…mind the correct overhang at each end. The gap between the front and back slat should be about 1 5/8”.
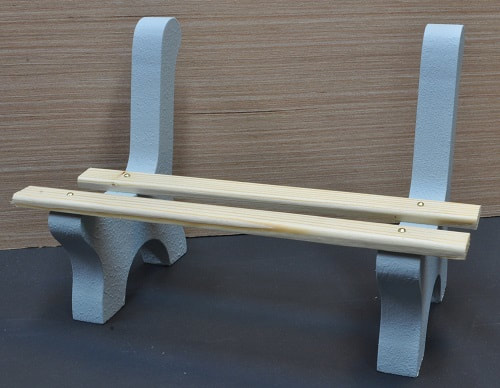
Evenly place the remaining two seat slats between these, even up the ends and secure.
For the back slat installation, I did indeed use pilot holes into the supports for each nail. Lay the bench on its back and position the top slat even with the start of the top radius of the supports. I drilled the first pilot hole and installed only one nail so I could better verify the correct location for the second nail. I carefully measured the distance from the back seat slat to this slat at the single nail. Hold the other end at this distance, drill the pilot hole and install the second nail.
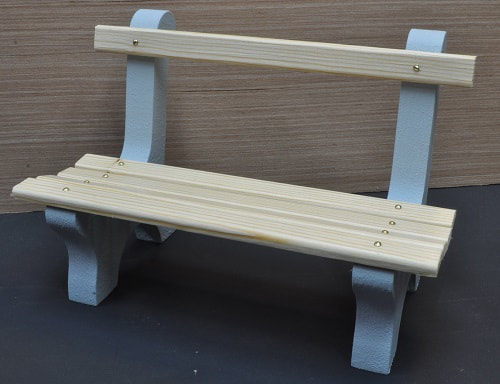
The distance between this slat and the bottom slat is just over 1”. Hold the bottom slat at this location, drill the pilot holes and install the nails.
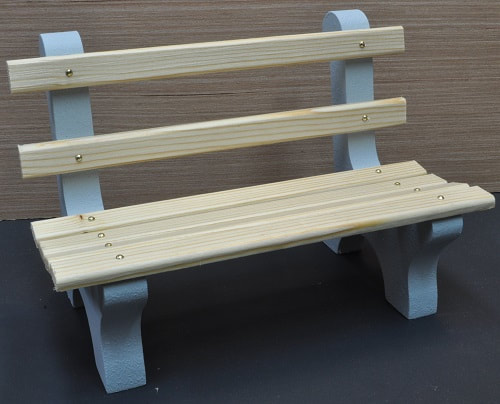
Center the third back slat between these, drill the pilot holes and install the nails.
NOTE: When drilling these pilot holes, use care not to drill completely through the supports.
Please keep an eye out for these being featured in an upcoming episode of iCarly:Five Years Later...