HOW TO MAKE PENCILS

1/6th scale pencils in use.
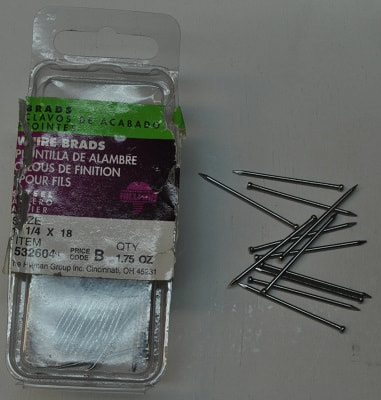
Pencils are a nice item to have around for your shoots. Especially for teenagers when they are doing their homework and again when Sam and Franklin were marking out the wood for the two skateboard ramps in my iCarly-based story. But I cannot justify spending as much a $9.99 a piece for them through ebay. The best price I saw was five for $7.99 but that is still too much if you have the drive to make them. I had these brads in my cabinet and all the needed paints were already in my hobby supplies so basically mine were free.
Requirements
1 ¼ - 18 gage brads (a pencil is 7 ½” long and .300” in diameter or…1 ¼” long and
.050 in diameter, which is the diameter of an 18 gage brad.)
Paint – yellow for the shaft – spray paint
orange for the eraser – brush paint
brown for the sharpened end – brush paint
black for the VERY tip of the point – brush paint
silver for the area between the eraser and the shaft – brush paint
Start by setting out the number of brads you wish to convert into pencils.
The head needs to be removed as close to the underside of the head as possible to keep them as long as possible. Use a file or grinding wheel to square up the cut end.
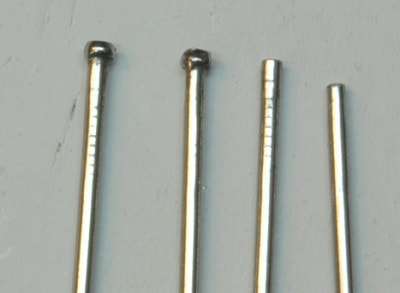
Two stock Two modified
Insert each brad, point end out, into a drill or drill press chuck and use a fine file to remove the flats from the point so they look more like a sharpened pencil. I did not do this to my first group and regretted it as it could not be fixed once painting was started.
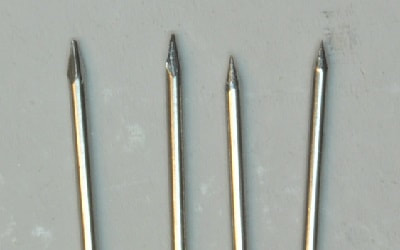
Two stock Two modified
Gently tap each pointed end into a soft piece of scrap wood for the initial painting. The pie4ce of scrap wood I chose was about two feet long so, with the pencils all driven in at one end, I could now hold the scrap, turning it as needed to spray paint the pencils from all angles.
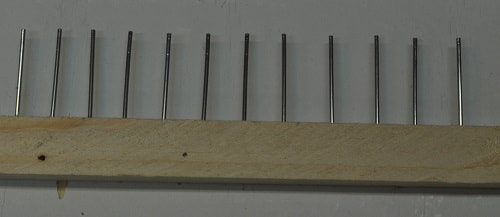
Ready to Paint
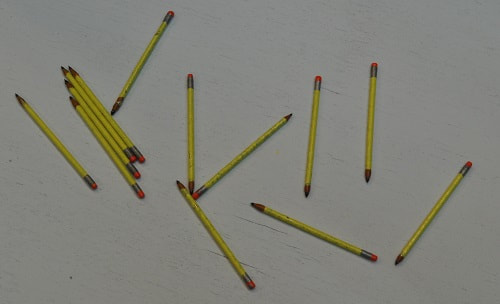
Use spray paint here as brush painting will be too thick. I used yellow as it is simply more accepted/recognizable for pencils.
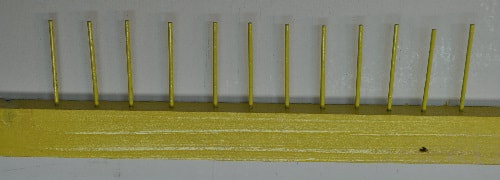
Here they are painted and ready for the painting of the two ends.
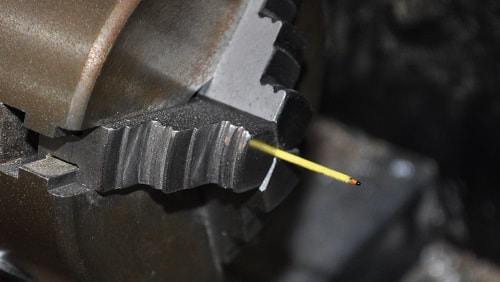
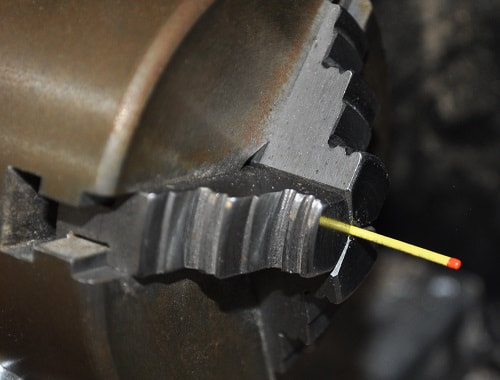
I find it easier to paint the ends by placing them one by one in a drill chuck (I used my small bench lathe but it is the same principle), turn them at a very slow rate and apply the paint with a brush. After painting the points brown and then the very tips black, set them aside to fully dry.
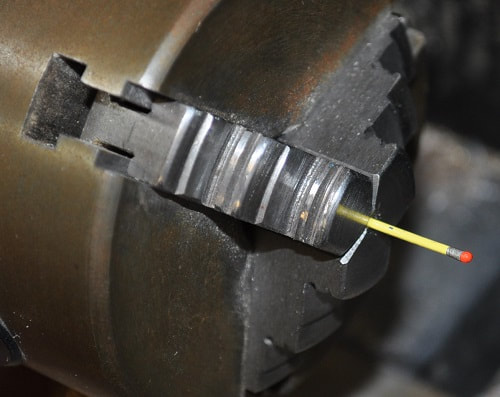
Once this is dry, the same process is used to paint all the blunt ends orange. Let dry. It is then a simple matter to paint the silver band between the yellow and the orange.
|
|
Eraser Painted Silver Band Painted
I used a small brush for the orange eraser but used the tip of a tooth pick to apply the silver. I feel the tooth pick gave a much better control with the silver paint.
No, they are not perfect…but I didn’t spend as much as $129.87 @ $9.99 each off ebay on these 13 pencils and they still look good in pictures. As I mentioned, everything I used, including the paints, was already in my supplies.
Please keep an eye out for these being featured in past and upcoming episodes of iCarly:Five Years Later...