HOW TO MAKE A PARK POND

I would suggest making any pond like this out of 1/8” tempered Masonite. But for mine, I used ¼” Masonite as I was given 2 full sheets a couple decades ago and never found a better use for them…so the material was FREE. It will just be heavier.
For the foot bridge I made in the previous tutorial I needed a section of this project to be about 20” at the widest point for it to go under the bridge properly. What sticks out from under the bridge is up to the imagination and your storage capabilities for when it is not in use. For my first attempt at this, I chose to limit the size to a section of the full sheet of about 4’ long and 3’ wide. Anything much smaller than that…why bother and anything much bigger as one piece, would be a handful to move and store.
I also chose to make it to be a pond area with a tributary that would go under the bridge. If you try to make a “river” looking affair here it would have to be several sections long…like the country road I made earlier in order to not see the abrupt end of the river in your pictures. I may find it necessary to make an extension for the tributary but the joint between the two pieces would be hidden under the bridge. We’ll see. Moving on. (Yes, I did make this and it is covered later on.)
As this is a freeform project, aside from the approximate 20” tributary, I did not go into a lot of detail here as the shape and size is solely up to the builder…and its intended use. Since I did include a retaining wall around the pond and tributary it definitely has the “man-made” feel to it but I did not want it to be TOO symmetrical…like a swimming pool. With a section of the full sheet marked off to my desired limits, I started by locating the tributary length and width. Once that was established just off center of a 3’ side, I carried it out far enough to allow for the bridge. I then sketched out the pond itself in the remaining area. I simply used a black sharpie to get the rough shape. Once you are happy with the rough guidelines, start cutting it out with a saber saw with a fairly fine blade so as not to fuzz up the Masonite too much. I ended up with something that, if stood up on the one straight side, looked like a small mushroom cloud…or a tree.
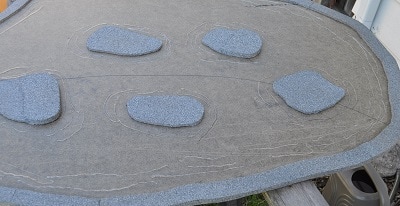
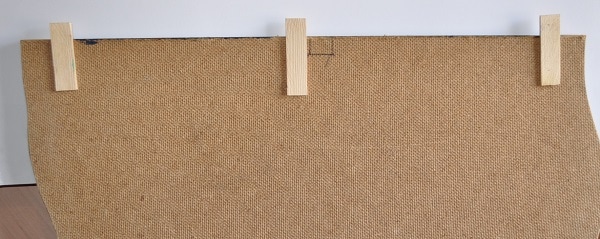
The scraps from cutting it out should give some very good pieces to start laying out the barrier wall. I placed the scraps on top of the pond shape, clamped them in place and marked the outside edge onto them. They had to be positioned so that the new line was at least an inch, the desired width of my barrier wall, from the rough inner shape of the scrap. Cut along this line with a saber saw or a scroll saw, if you have one. Check these pieces for fit on your pond. Reasonably close counts as I smoothed up my edges later with a drill and a 2” sanding drum. Once this fit is close, draw another line about an inch from the outer edge and cut along this line. I ended up with about 5 or 6 pieces to close up the outer edges of my pond. I used simple butt joints where these pieces met. I did clean up the inner edges of these pieces on a drill press using the 2” sanding drum prior to gluing them in place. Once these pieces were glued and clamped in place, I ended up with what you see below.
For the foot bridge I made in the previous tutorial I needed a section of this project to be about 20” at the widest point for it to go under the bridge properly. What sticks out from under the bridge is up to the imagination and your storage capabilities for when it is not in use. For my first attempt at this, I chose to limit the size to a section of the full sheet of about 4’ long and 3’ wide. Anything much smaller than that…why bother and anything much bigger as one piece, would be a handful to move and store.
I also chose to make it to be a pond area with a tributary that would go under the bridge. If you try to make a “river” looking affair here it would have to be several sections long…like the country road I made earlier in order to not see the abrupt end of the river in your pictures. I may find it necessary to make an extension for the tributary but the joint between the two pieces would be hidden under the bridge. We’ll see. Moving on. (Yes, I did make this and it is covered later on.)
As this is a freeform project, aside from the approximate 20” tributary, I did not go into a lot of detail here as the shape and size is solely up to the builder…and its intended use. Since I did include a retaining wall around the pond and tributary it definitely has the “man-made” feel to it but I did not want it to be TOO symmetrical…like a swimming pool. With a section of the full sheet marked off to my desired limits, I started by locating the tributary length and width. Once that was established just off center of a 3’ side, I carried it out far enough to allow for the bridge. I then sketched out the pond itself in the remaining area. I simply used a black sharpie to get the rough shape. Once you are happy with the rough guidelines, start cutting it out with a saber saw with a fairly fine blade so as not to fuzz up the Masonite too much. I ended up with something that, if stood up on the one straight side, looked like a small mushroom cloud…or a tree.
The scraps from cutting it out should give some very good pieces to start laying out the barrier wall. I placed the scraps on top of the pond shape, clamped them in place and marked the outside edge onto them. They had to be positioned so that the new line was at least an inch, the desired width of my barrier wall, from the rough inner shape of the scrap. Cut along this line with a saber saw or a scroll saw, if you have one. Check these pieces for fit on your pond. Reasonably close counts as I smoothed up my edges later with a drill and a 2” sanding drum. Once this fit is close, draw another line about an inch from the outer edge and cut along this line. I ended up with about 5 or 6 pieces to close up the outer edges of my pond. I used simple butt joints where these pieces met. I did clean up the inner edges of these pieces on a drill press using the 2” sanding drum prior to gluing them in place. Once these pieces were glued and clamped in place, I ended up with what you see below.
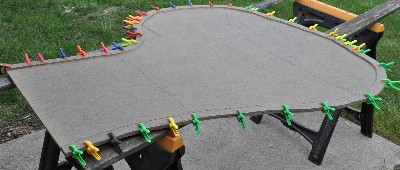
With this now fully dried I stood it on edge and used a drill and sanding drum to make the outer edges of the pond and retaining wall match. A second person is helpful here.
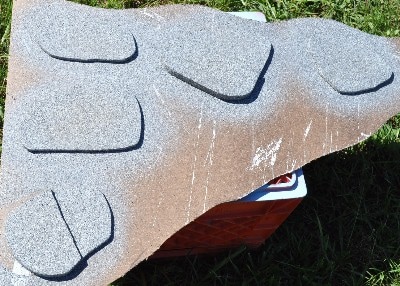
I took some of the scraps and cut out a series of Stepping Stones for the pond. Each was a different shape and two of them were made as two layers as shown in the second picture below. These stones ranged from 6-8” long at their biggest and various widths and shapes. These are currently coated with two coats of Rustoleum STONE texture paint.
I took some of the scraps and cut out a series of Stepping Stones for the pond. Each was a different shape and two of them were made as two layers as shown in the second picture below. These stones ranged from 6-8” long at their biggest and various widths and shapes. These are currently coated with two coats of Rustoleum STONE texture paint.
|

|
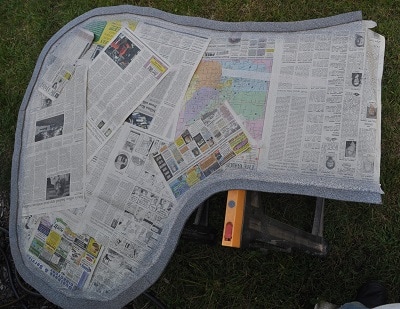
Below is the pond with the interior masked off with newspaper and masking tape out to the inner edges of the retaining wall. The outer edge, the top and the inner edge of the retaining wall is then painted with the STONE texture spray paint. It is recommended to let this paint dry overnight for maximum strength.
When you are pleased with the coverage on the retaining wall, remove the masking tape and newspaper. Experiment with placement for the stepping stones, then apply amply glue to secure them into place.
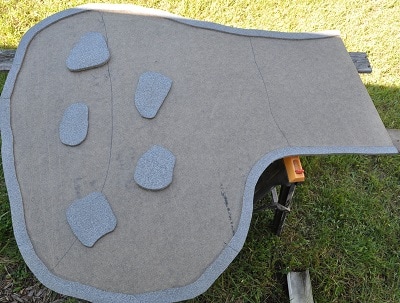
Using a hot glue gun, add streaks of glue around the pond and the stepping stones for water turbulence. This is not necessary but looks nice when done.

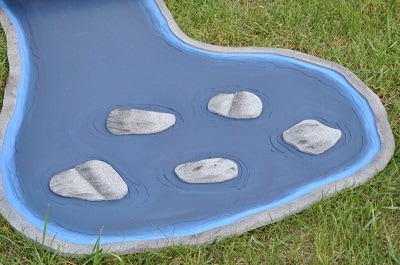
When the glue on the stepping stones is dry start, applying the DARK BLUE paint (I used Americana Navy Blue here but it could have been darker) to the interior surface, staying about an inch from the edges of the pond. While this is still wet, if possible, start applying the MEDIUM-BLUE (I used Americana Sapphire Blue here) in the area around the pond parameter blending the two shades where they meet as best you can.
|
|
It took two coats of the dark blue to get satisfactory coverage.
I also used a small piece of a sponge to add some shading to the stepping stones and the retaining wall with flat black paint.
I also used a small piece of a sponge to add some shading to the stepping stones and the retaining wall with flat black paint.
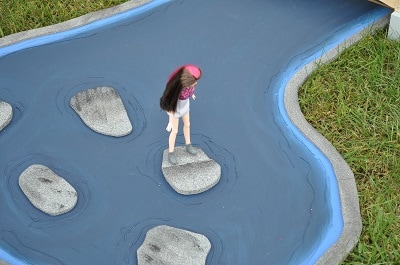
You can stop here…but I wouldn’t. Now to make the water POP. All that is left now is to apply one or two coats of a gloss finish to the water. This can be the GLOSS Mod Podge or, better yet, use a GLOSS water based varnish or urethane. The varnish or urethane is normally thinner and easier to work with.
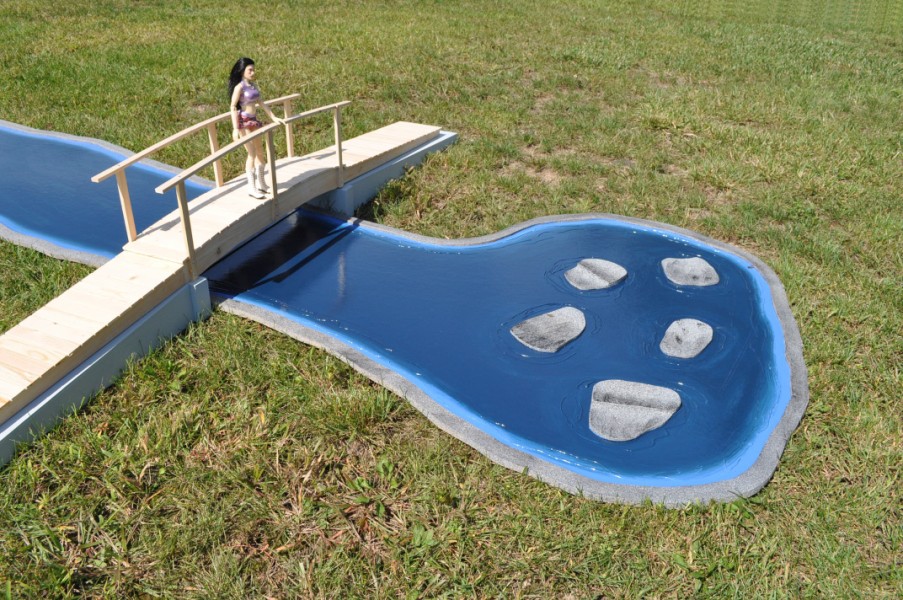
I used a water based polyurethane that went on a bit “milky” looking but dried crystal clear. I applied TWO coats and look how the water shines and even shows reflections of the bridge in its surface.
TRIBUTARY EXTENSION
On our first trial shoot with this pond and our park foot bridge, I felt the tributary just had to be longer. I intended to make a short extension of about 3 feet for the tributary and placing the joint under the bridge. But since the sheet of Masonite is 4 feet wide I opted to leave it at that length for the tributary extension and, if it proved to be too much excess, it can always be cut down later.
Here it is cut out, lined up to the pond section and with the retaining walls glued in place. Again, the sides are simply freeform lines. The only critical point is where the two parts meet and that should be very forgiving being located normally under the bridge.

Once the tributary was painted and dry, I added some interlocking tabs to the bottom of each side of the joint to hold the two halves inline with each other when in use as shown above.
Lastly, I wish to thank all those who posted AMAZING How-To videos on youtube for set designs for Role Playing Games like Dungeons and Dragons. I adapted some of their techniques, to a degree, to create this pond and am grateful.