HOW TO MAKE A RETRO REFRIGERATOR

As with the sliding door first featured in our The Great Warehouse Heist story, Episode 47 posted December 8th 2020, this Retro Fridge has also had several requests for a tutorial. But again, as I do not plan to actually make another, I feel I can offer an in-depth overview with enough pictures that it could be reproduced.
To start with…it is made as a complete six sided box. Not the traditional back half and door sections as many would do. If done right, there is NO possibility of the door not matching up with the back half perfectly.
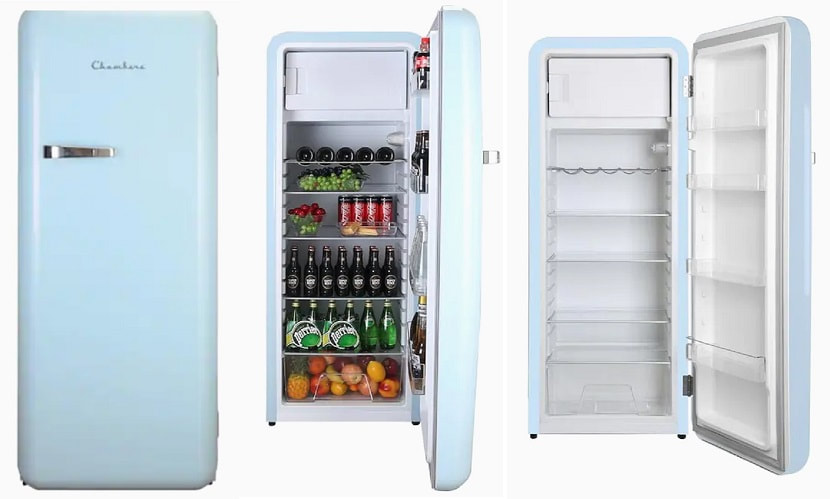
I did a little online research at a local appliance store and based my build on this unit.
To start with…it is made as a complete six sided box. Not the traditional back half and door sections as many would do. If done right, there is NO possibility of the door not matching up with the back half perfectly.
I did a little online research at a local appliance store and based my build on this unit.
MAIN CABINET PARTS LIST
10” x 4 3/8" x 7/16” right / left sides(2)
3 1/8” x 4 3/8" x 7/16’ top / bottom(2)
10" x 4" x 1/4" front(1)
9 1/8” X 3 1/8” X ¼” back(1)
freezer bottom SEE that section
freezer door SEE that section
freezer door handle SEE that section
five mini hinges for freezer and main door about 3/8” x 5/16” laid flat (ebay)
feet SEE that section
NOTE: When assembling the right, left, top and bottom sides it is IMPORTANT that these parts fit together VERY well. Joint cuts MUST be square to allow it to be assembled without clamps…other than possibly a rubber band or two or a bit of masking tape. You do not want to put these parts under any stress as the glue dries so a good benchtop disk sander can be essential in touching up ends as needed. I cannot stress enough that if you DO use bar clamps and such…when you separate the door from the main cabinet later, it is likely that the edges will not line up as nicely as they would otherwise. Now that I’ve scared you all…moving on.
CABINET ASSEMBLY
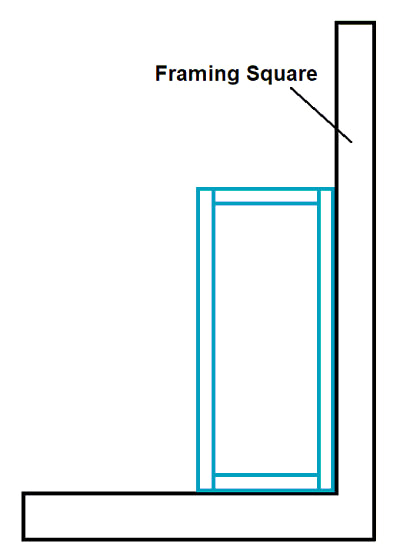
Stand the four sides on edge on a flat surface. If you like, place a sheet of wax paper down first. I positioned two adjacent sides against a framing square to help hold the assembly square. Apply glue to each joint and, if needed, hold this assembly together with Rubber bands or masking tape.
Stand the four sides on edge on a flat surface. If you like, place a sheet of wax paper down first. I positioned two adjacent sides against a framing square to help hold the assembly square. Apply glue to each joint and, if needed, hold this assembly together with Rubber bands or masking tape.
Once dry, check that the front and back surfaces of this assembly is in the same plane. It should not wobble if you press down on any corner. Minor irregularities may be corrected by simply rubbing it against a full sheet of coarse sandpaper. For major irregularities it may take the use of a bench mounted belt sander or even carefully running it through a table saw set with the blade only to the thickness on a side…running it through once on all four sides. If this does not make total sense, it will later as this is how you will separate the door from the back.
When you are comfortable with the flatness of the front and back edges…glue the front and back sides to this assembly. Again, holding it in place with only ruber bands or tape. NO CLAMPS!
NOTE: The front is glued to the outer edges of the sides while the back must fit comfortably INSIDE the four sides. So glue the back in place first so you can press it back out flush with the edges if needed...then glue the front in place once this has dried. The fit of the back and front should be good enough that all that is needed to hold them in place, if that, is a bit of mashing tape or rubber bands.
This box should now measure about 10” x 4” x 4 5/8"
Once this is dry, set up a table mounted router with a ½” radius router bit. Test the cut of the bit on a piece of scrap. A 2 x 4 scrap works good here. With it set to a near enough perfect radius, Apply this radius to all four FRONT edges and all four SIDE edges. DO NOT radius the four back edges.
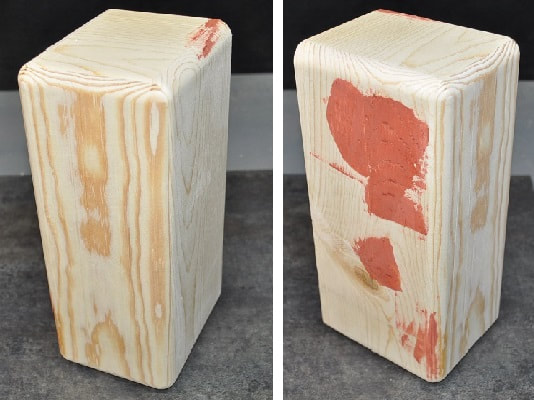
Sand all six sides, filling any flaws in the wood as you go. Plastic wood, available at most any department or lumber store works well but you may find Spotting Putty, found in the auto department works well too and generally cures faster than plastic wood. That is why you see the RED blotches on mine at this stage.
Sand all six sides, filling any flaws in the wood as you go. Plastic wood, available at most any department or lumber store works well but you may find Spotting Putty, found in the auto department works well too and generally cures faster than plastic wood. That is why you see the RED blotches on mine at this stage.
You now have a sealed box that is the right height, the right width but is the width of a table saw blade too deep. Now set you table saw height to the thickness of the sides…plus a little. If your box depth IS as mine…about 4 11/16” and your saw blade removes 1/8”, set your rip fence to 3 ½”. With a GOOD saw blade installed, carefully run this box through the saw with the flat BACK side against the fence. Be ready to grab the door section on the last cut so it does NOT fall into the blade.
By having good fitting joints and NOT using clamp, there should be ZERO spring back of the wood after these cuts and the door will matchup perfectly to the back. The inside surface of the door and cabinet can now be smoothed up by rubbing on a full sheet of sandpaper.
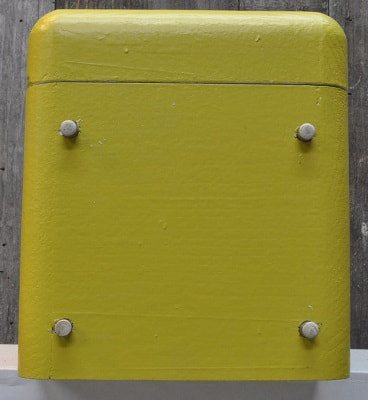
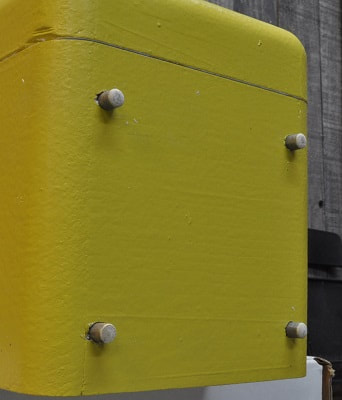
After two coats of primer, inside and out, to help hide the wood grain, I went ahead and painted the inside white and the outside a retro yellowish color I had in my supplies as I did not plan to buy the greenish color shown in my sample pics from the store. It took two coats as I painted with a brush since the weather was too cold for spray paints…and their fumes.
By having good fitting joints and NOT using clamp, there should be ZERO spring back of the wood after these cuts and the door will matchup perfectly to the back. The inside surface of the door and cabinet can now be smoothed up by rubbing on a full sheet of sandpaper.
After two coats of primer, inside and out, to help hide the wood grain, I went ahead and painted the inside white and the outside a retro yellowish color I had in my supplies as I did not plan to buy the greenish color shown in my sample pics from the store. It took two coats as I painted with a brush since the weather was too cold for spray paints…and their fumes.
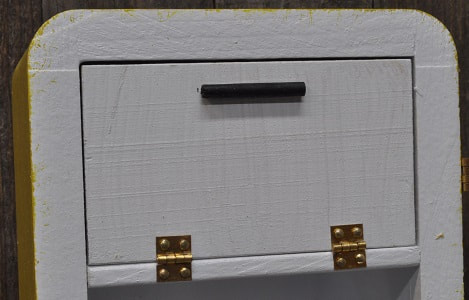
HINGES
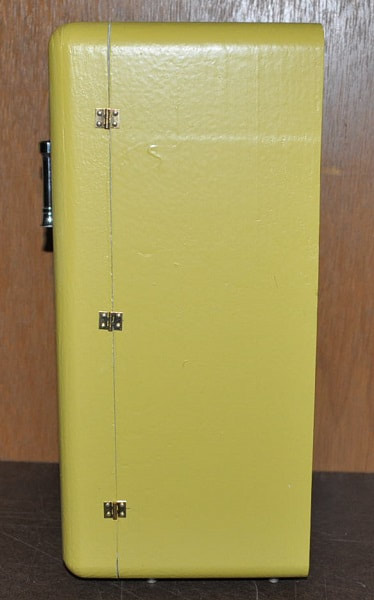
With the paint now very dry, set the door on the back section and position the three hinges down the one side and install. If ALL sides look good at this point, you still can have it open to the right or left…until you add the freezer, shelves and feet. But if one end has issues…make it the bottom and you will have to decide which side will get the hinges and which side will get the latch now.
With the paint now very dry, set the door on the back section and position the three hinges down the one side and install. If ALL sides look good at this point, you still can have it open to the right or left…until you add the freezer, shelves and feet. But if one end has issues…make it the bottom and you will have to decide which side will get the hinges and which side will get the latch now.
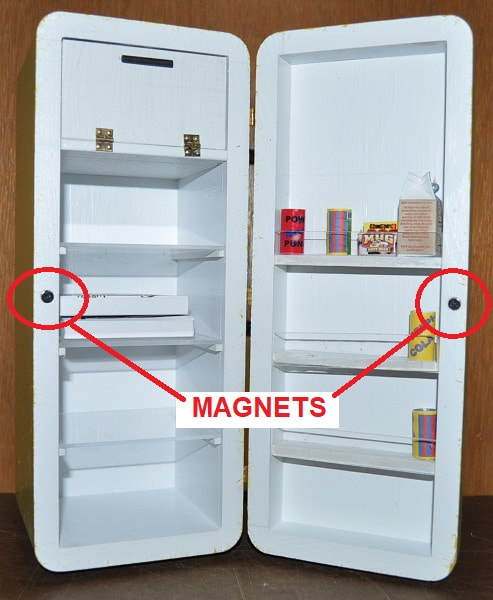
THE DOOR LATCH
The door latch amounts to two small rare earth magnets installed in the door and the cabinet. Depending on the diameter of magnets determines the drill bit size to use. I find the drill bit can be as much as 1/64” smaller than the magnet and they still easily press into the wood. If this is not an option for you, you may have to glue them into their holes.
I centered my magnet location in the two mating sides right and left and at the center of the height at 5”. Drill the two holes a little deeper than the magnets are thick. My magnets are typically .234” x .110” and I press them into a .228” (# 1 Drill Bit) hole. Touchup any issues around the holes if needed. Press a magnet into each hole. Obviously be very careful with the polarity on the magnets or they will push the door open rather than hold it closed.
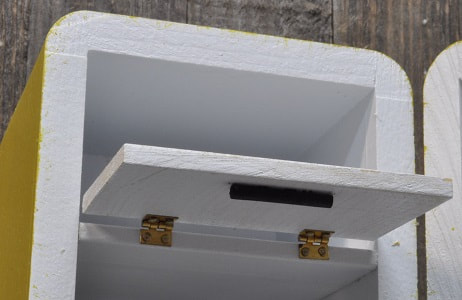
THE FREEZER AND FREEZER DOOR
PARTS LIST
3 1/16” x 1 ¾” x 3/16” Freezer door – LUAN
3 1/16 x 3 ¼” x 3/16” Freezer Bottom - LUAN
1” long 1/8”dia dowel Freezer Handle
2 – mini hinges
PARTS LIST
3 1/16” x 1 ¾” x 3/16” Freezer door – LUAN
3 1/16 x 3 ¼” x 3/16” Freezer Bottom - LUAN
1” long 1/8”dia dowel Freezer Handle
2 – mini hinges
|
|
|
|
Cut each piece as you go and custom fit each part starting with the freezer bottom. The door has to be a bit narrower than the bottom for it to function. When you are comfortable with the fit of the bottom piece and the door seems at least close…paint these pieces and let dry. Attach the two pieces with the hinges as shown. This is a LOT simpler than trying to make the hinges invisible. The bottom piece should fit snugly enough to hold itself in place to check function of the door. If it is too loose, simply add a bit of paint to the right/left edges until drag is felt. When the function seems fine…glue in place trying to keep the bottom surface perpendicular to the back. Paint and add the handle with a bit of glue.
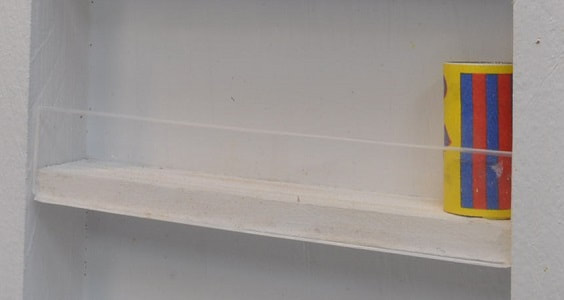
SHELVES – MAIN CABINET
PARTS LIST
3 – 3/18” x 3 1/8” x 1/16” Shelf – clear plastic
6 – 3 1/8” x 1/8” x 1/8” Shelf Supports -wood
PARTS LIST
3 – 3/18” x 3 1/8” x 1/16” Shelf – clear plastic
6 – 3 1/8” x 1/8” x 1/8” Shelf Supports -wood
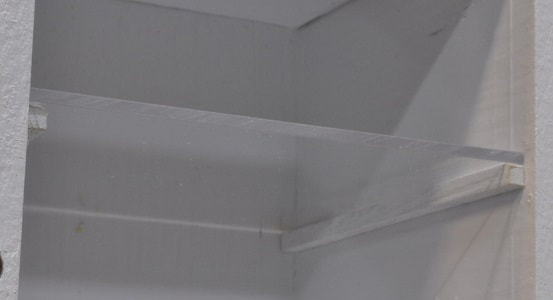
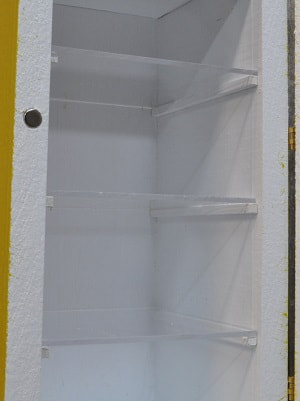
The shelves in the main cabinet are 1/16” plastic sheet available at most lumber yards for window replacement cut to approximately 3 1/8” square. This is my inside width and 1/8” short of the cabinet depth. They each rest on 1/8” square wood pieces glued to the sides. I divided the inside height into four sections of about 1 3/4” each. Cut the six needed support pieces…paint all but one side, to give the glue more to grab, and install as desired. Placement is rather critical so the shelves are not visible crooked from the front.
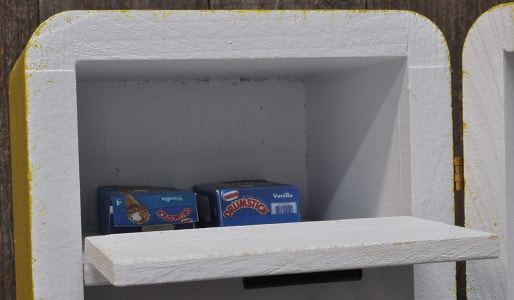
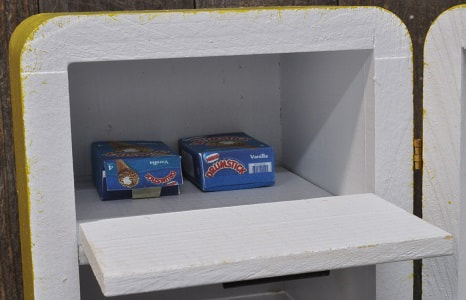
SHELVES – DOOR
PARTS LIST
3 - 3 1/8” x 11/32” x 3/16” Shelf – LUAN
3 - 3 1/8” x 5/8” x 1/16” Shelf Front – clear plastic
PARTS LIST
3 - 3 1/8” x 11/32” x 3/16” Shelf – LUAN
3 - 3 1/8” x 5/8” x 1/16” Shelf Front – clear plastic
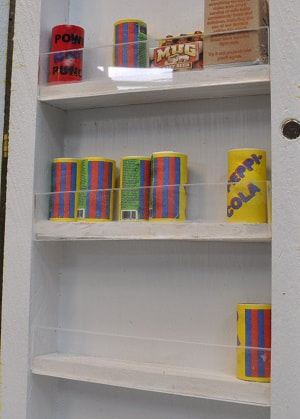
The three shelves in the door are made from 3/16” LUAN. They need to be about 3/32” narrower than the depth of the door to allow for the clear plastic shelf front. Custom trim each one to length so they fit the door snugly enough to hold their place during gluing. Paint the shelves and glue in place.
When dry, trim the plastic pieces to length if needed and glue in place.
When dry, trim the plastic pieces to length if needed and glue in place.
THE FEET
PARTS LIST
4 – 3/8” long 3/16” diameter dowel FEET – wood
PARTS LIST
4 – 3/8” long 3/16” diameter dowel FEET – wood
|
|
I simply marked the bottom of the main cabinet ½” in from all sides to establish the locations of the four feet. Using a depth limiter (A piece of scrap wood on the drill bit), drill the four 3/16” holes so as NOT to go through the bottom piece
I painted a short section of 3/16” wood dowel silver then cut off four pieces about 3/8” long for the feet. Press them into the holes. Glue if needed. Mine were quite snug and needed no glue. Set it on a flat surface and check for woggle. If it cannot be corrected by pushing the longer foot further into the hole…place a full sheet of sandpaper on a flat surface and rub them against it until there is no wobble.
I painted a short section of 3/16” wood dowel silver then cut off four pieces about 3/8” long for the feet. Press them into the holes. Glue if needed. Mine were quite snug and needed no glue. Set it on a flat surface and check for woggle. If it cannot be corrected by pushing the longer foot further into the hole…place a full sheet of sandpaper on a flat surface and rub them against it until there is no wobble.
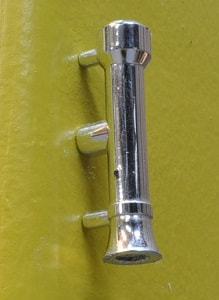
THE DOOR HANDLE
|
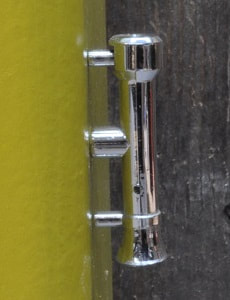
|
Good luck here. I thought I was going to have to mold and cast something custom out of metal to be content here but…digging through some select bits and pieces from years ago, I found the air horn from an old Radio Shack Wild Horse semi-truck. And I recognized its potential as a “retro handle”. It was a simple matter to sand off the flared end of the horn…touch up this end and paint it silver for the bottom end. It is held to the door with the one original screw from the truck. You are on your own here but there has to be SOMETHING out there that would look acceptable. Possibly a cut up, bent coat hanger or other common item. Again, this may be where a 3D printer may well be useful.
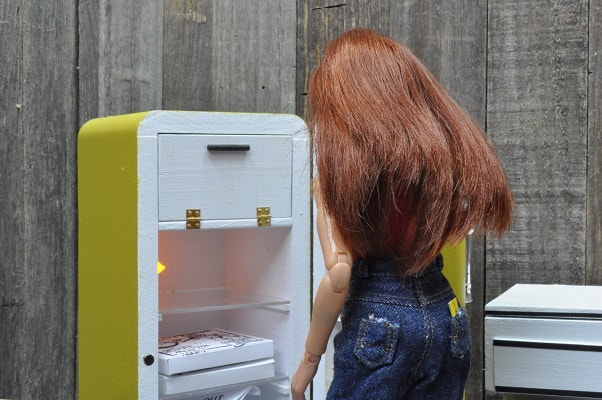
THE LIGHT INSIDE
And there’s the age old question…”Does the light go OFF when the door closes?” On this fridge…the answer is “Only if you turn it off manually” as it is simply a tiny electric “Tea Light” from the Dollar store, set on its edge with the bottom against a side wall. This was quickly improvised during the shoot as before I took the first picture, it just looked WAY wrong on my monitor when Nashira opened it. I thought the Tea Light looked great.
And there’s the age old question…”Does the light go OFF when the door closes?” On this fridge…the answer is “Only if you turn it off manually” as it is simply a tiny electric “Tea Light” from the Dollar store, set on its edge with the bottom against a side wall. This was quickly improvised during the shoot as before I took the first picture, it just looked WAY wrong on my monitor when Nashira opened it. I thought the Tea Light looked great.
That pretty much does it. If there are any points I could elaborate on further, please let me know.
Please keep an eye out for this being featured in any upcoming episodes of...
...The Great Warehouse Heist where the girls visit their office / break room.
...The Great Warehouse Heist where the girls visit their office / break room.