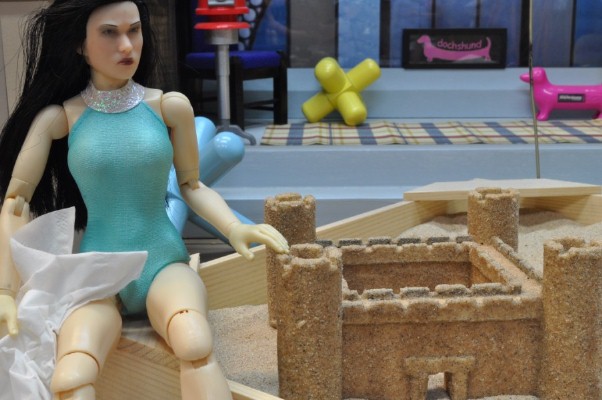
HOW TO MAKE A 1/6th SCALE SAND CASTLE
To start off, I am not much of one to work in Styrofoam as I need my props to generally stand up to a lot of use as well as being stored and unstored often. That being said, this tutorial could more easily, for many, be made with Styrofoam or balsa or hardening clay for that matter. For me, it is primarily pine boards for the main walls and 1” wood dowel rod for the towers. Let’s begin.
This castle was intentionally made this size to comfortably fit in one half of the sand box used in a story so adjust the size to fit your needs.
MAIN WALLS…
I made my walls from a piece of scrap pine board that I planed down to 9/16” thick. The board was then cut to 1 5/8” wide for the wall height.
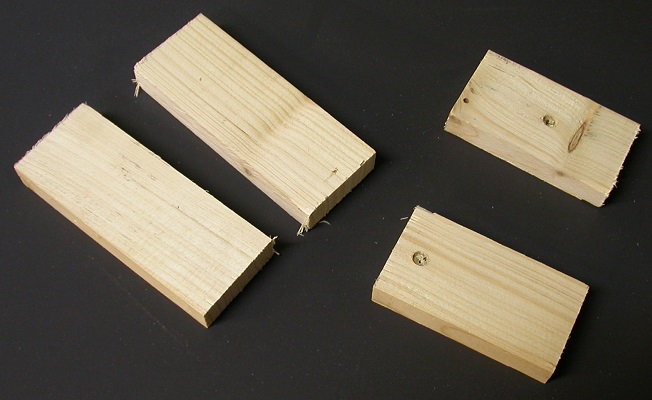
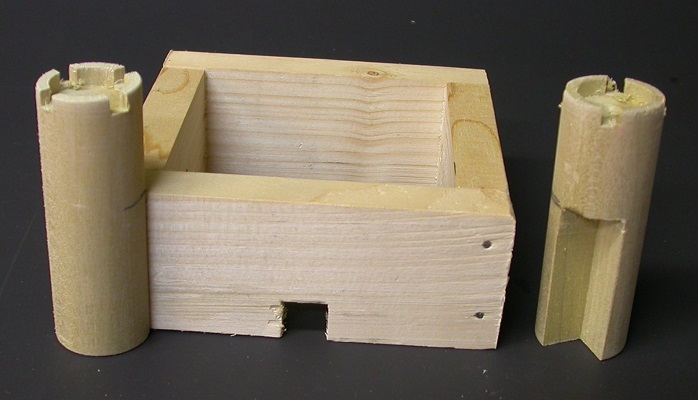
Cut this into two 4 1/8” lengths and two 3” lengths. I cut the door in the center of one of the long lengths on the table saw to just under ½” wide and ½” deep then cleaned it up on my tabletop mill to the full ½” x ½” opening.
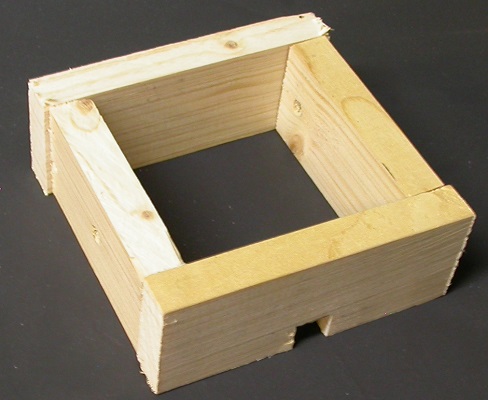
Nail/screw and or glue these pieces together.
TOWERS…
I made the towers out of a 1” diameter, wooden dowel. Using the table saw, I cut off four pieces at 2 7/8”. I used a ¾” Forstner bit in my metal lathe to add a recess to one end approximately 5/16” deep as shown. This can be done on a drill press but this maintained the recess on center and was easy to control depth.
Holding them two at a time in the vice of the mill, I removed areas to make the parapets with a 3/16” mill bit. Cutting only in and out and right and left, each tower ends up with four sections removed
This next part is a bit tricky getting this cut properly lined up. I set my vice to 45 degrees and blocked up the bottom of the vice with scrap wood to give me a repeatable height location for each tower. I wanted the towers to meet the wall corner in line with one of the tower top cutouts. I drew a line across the bottoms of the towers inline with one of the cutouts. I then laid out a 90 degree corner along this line as shown. After extending one leg of this 90 degree corner across the end, I placed this line level with the mill table and secured in the vice. Cutting in 5/16” into the dowel for a length of 1 5/8” minimum so that the corner of the removed material lands on the original line drawn will make the towers seat properly to the wall corners with one minor adjustment covered next
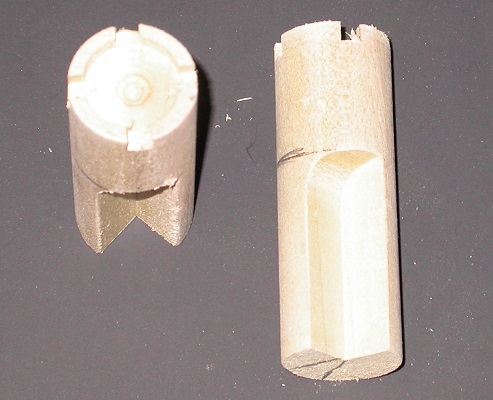
As you can see in the picture, one side of the removed material leaves the radius of the mill bit. This either needs removed with a chisel or the corner of the main wall needs sanded away to allow for this. I chose to use a chisel on the tower
|
|
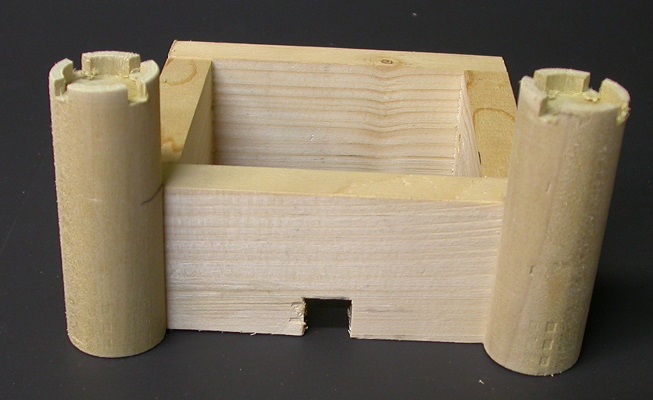
All four towers can now be glued in place. The trim around the castle door is simply thick poster board about ¼” wide. Cut and glue in place. The poster board I used was just under 1/16" thick.

The parapets around the top wall are also this same thick poster board. I stacked up the pieces I was to use for the parapets, placed them between two thin pieces of wood to protect the outer sides and used a 3/16” mill bit to cut in the parapet outline. As there are eight total…four for the inside of the walls and four for the outer edge of the walls…this made them all the same. These can be cut out with a hobby knife but this was easy enough…if you have access to a mill. Cut these strips to length and glue around the inner and outer areas of the wall so they stick up about 1/8” above the wall top.
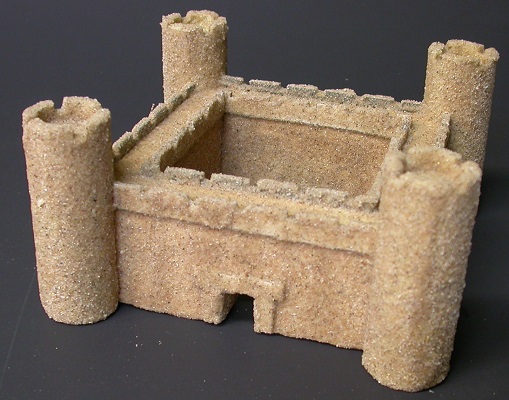
All that is left now is to cover the structure, section by section with white wood glue and sand. I use "playsand" as it is cleaner than other sands. I started with the towers, using a small hobby paint brush to coat each tower with the glue then cover each one in turn with sand...gently pressing the sand into the glue. Once the towers were all coated and dry, stand the structure on one side and coat the top outer and bottom inner walls with glue and sand...pressing the sand into the glue. Rotate the structure 90 degrees and repeat this process on the remaining three sides. Once this is dry, coat the inside surfaces of the doorway and press sand into the glue as best you can. Lastly, place the castle right side up and coat the top of the main walls, the inner and top areas of the parapets with glue and sand. Once this is dry, shake/tap off any loose sand and you are done.
All that is left now is to cover the structure, section by section with white wood glue and sand. I use "playsand" as it is cleaner than other sands. I started with the towers, using a small hobby paint brush to coat each tower with the glue then cover each one in turn with sand...gently pressing the sand into the glue. Once the towers were all coated and dry, stand the structure on one side and coat the top outer and bottom inner walls with glue and sand...pressing the sand into the glue. Rotate the structure 90 degrees and repeat this process on the remaining three sides. Once this is dry, coat the inside surfaces of the doorway and press sand into the glue as best you can. Lastly, place the castle right side up and coat the top of the main walls, the inner and top areas of the parapets with glue and sand. Once this is dry, shake/tap off any loose sand and you are done.