HOW TO MAKE 1/6th SCALE SKATEBOARD RAMPS
Here’s one that got away from me. As I was archiving several tutorials, I found this one never got posted. Yes, it should have been posted back in July of 2018 when episode 298 of iCarly:Five Years Later story…well episode 299 where you actually see anything...was posted
So here it is.
So here it is.
|
|
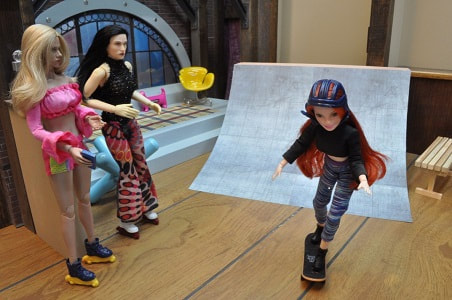
As young Paige promises to demonstrate her skateboarding skills on iCarly in episode 238 of our story iCarly:Five Years Later it seems we needed some ramps to be featured in several episodes starting with 299. After a little poking about on the Internet, I found a pattern intended to be used with four foot by eight foot plywood sheets. I adjusted it a bit as some Luon scraps I had around were just a bit undersized for length. The ramps will still be near enough four feet high in 1/6th scale but a bit shorter on the slope as well as the top platform.
PARTS LIST… (each ramp)
2 – 8” x 11 1/4” Luon Sides
1 - 2” x 15 3/8” Luon Top
5 - .333” x .666” x 15” pine main cross pieces
(NOTE - .333” x .666” equals a 1/6th scale 2 x 4)
17 - .333” x .333” x 15” pine ramp surface supports
(for partial built ramp only)
1 - 15 ½” x 14”approx. heavy poster board ramp surface
½” x #19 brads
Wood glue
2-sided carpet tape to attach poster board and printouts
3 pieces - Card Stock (optional) to be printed and applied to ramp
FYI: Luon is an inexpensive 3/16” thick plywood sold at most lumberyards.
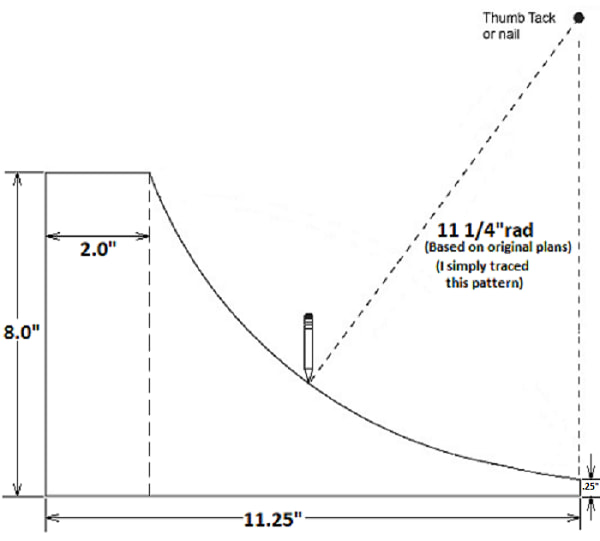
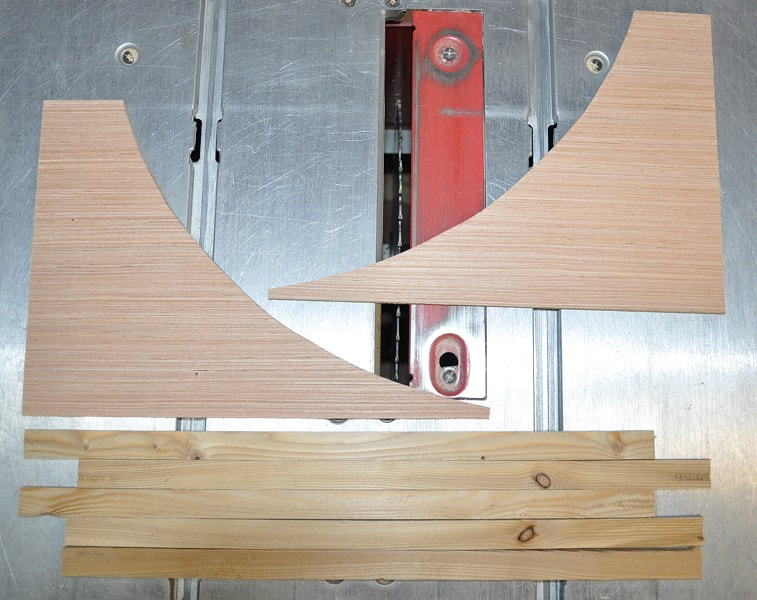
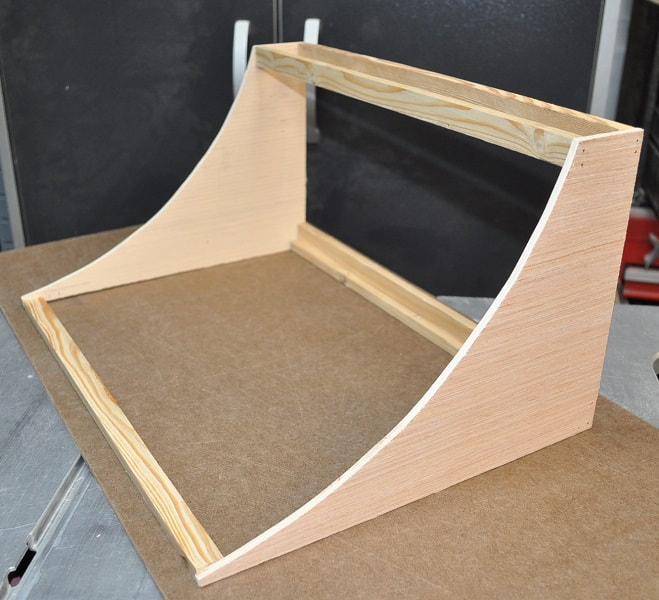
After transferring the needed curve to one side piece, I clamped the two sides together then drove two brads through them in a location that will not interfere with cutting the curve on a scroll or band saw.
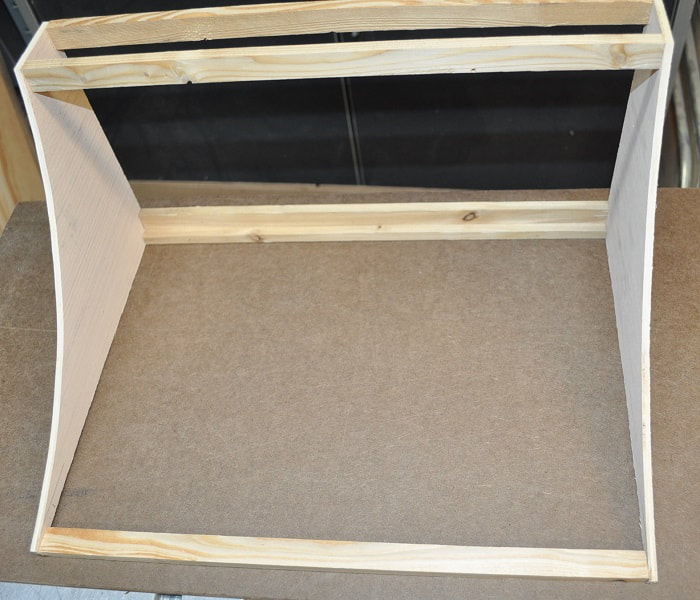
Attach two of the cross pieces to form an “L” for the lower back cross piece with glue and ½” brads. I drilled pilot holes for the brads with a #60 drill bit. This may not be necessary but it gives the brads a nice straight start into the cross pieces.
The front cross piece needs to be beveled on the top front edge to match the curvature of the ramp sides.
I used two ½” #19 brads on each end to attach the cross pieces to the sides as shown.
The front cross piece needs to be beveled on the top front edge to match the curvature of the ramp sides.
I used two ½” #19 brads on each end to attach the cross pieces to the sides as shown.
|
|
For the simple finished version, it is simply a matter to apply poster board to the ramp curvature. I used grey or silver.
In order to apply it easily and not have to worry about any glue softening it and making the glued surface look off, I applied two sided carpet tape, cut to thin strips, to the four edges. Cut the poster board a little oversize to be trimmed later. Remove the backing from the top strip of tape and loosen the top edge of the sides and expose ½ - ¾ inch so you can grip them easily later. Get at least one corner loose on the bottom strip but do not remove yet. Carefully apply the poster board to the top strip, watching closely the fit along the top edge. Either have it perfect or a little high. With the poster board secure along the top, carefully remove the backing from the other three strips. A second person would be helpful here. CAREFULLY smooth the poster board onto the remaining strips. Use a new, single-edge razor blade to trim the excess poster board from the TOP and SIDE edges ONLY. The bottom edge must be left long to make the transition from the floor to the ramp. For mine, I found X.XX” worked well.
Once this is trimmed, apply two-sided carpet tape to the entire curved surface. As shown below.
Poster Board installed and covered with 2-sided carpet tape.
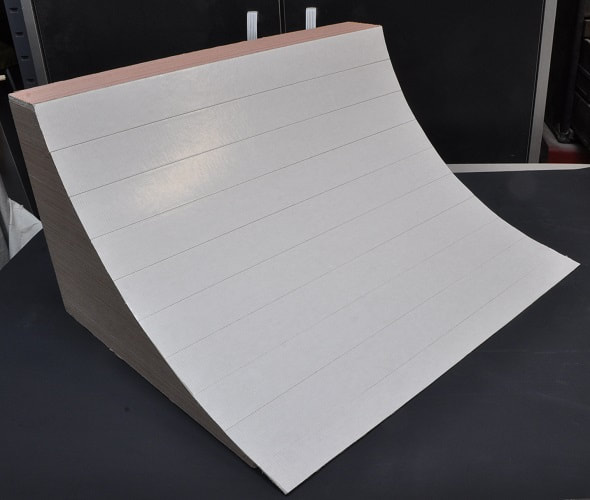
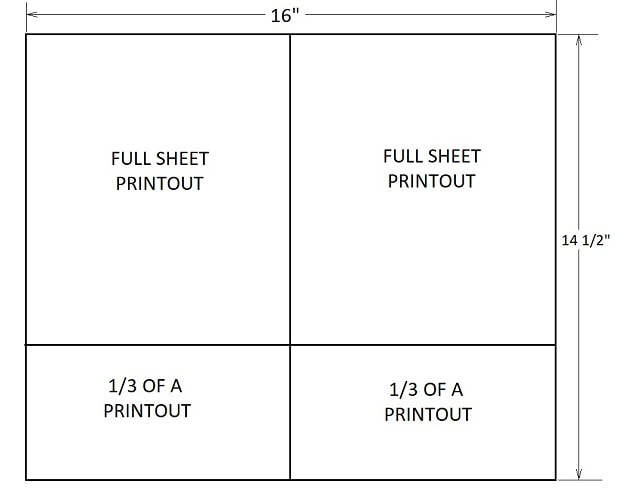
Set this aside for now. I wanted the ramp surface to look like multiple pieces of sheet metal were applied to form this one surface. I located a picture of the texture of sheet metal I liked then resized it so it would print out and fill a letter sized sheet of paper, which worked out well as 1300 x 975 pixels. I then picked a grey a bit darker than the picture and divided the image into 9 panels as shown. My dividing lines are 3 pixels wide. I wanted them to look like seams…not gaps. I printed three copies of this on card stock for each ramp. After trimming the top, bottom and the two adjacent sides of two printouts, these were taped together on the back side with scotch tape. This will cover the ramp from the top to about ¾ of the way down. The bottom area is covered by cutting two sections from the third printout, trimming the side and taping them together into a strip. Then secure this to the bottom edge of the other two full pages as shown in the sketch below.
I would again suggest getting help attaching this assembled printout to the ramp. Remove the backing from the top two tape strips and loosen and fold down the right or left corner of the remaining strips so they will be easy to remove later. CAREFULLY attach the printout squarely to the top strip of tape. If it is a little high, that is fine as this is much easier to trim later than the poster board was. BEWARE: Once this printout makes contact with the tape it will be nearly impossible to remove to realign. With one person holding the printout off the ramp, remove the remaining backing from the tape strips and smooth the printout into place. Trim the edges with a single-edge razor blade or sharp hobby knife.
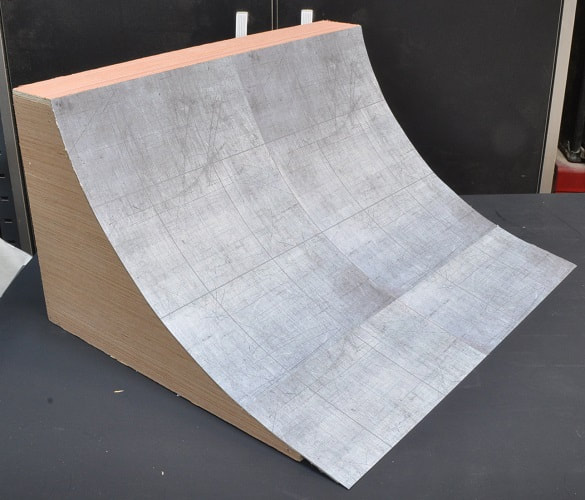
Metallic surface applied
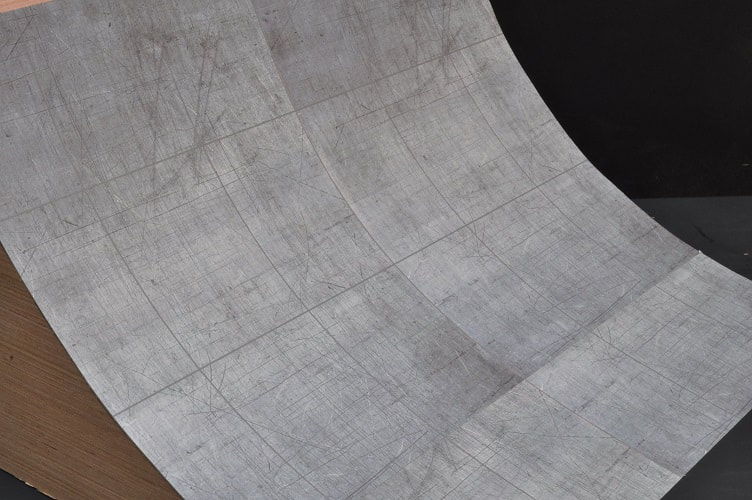
Close-up of ramp surface
FOR A PARTIALLY BUILT or IN PROCESS RAMP…
Follow the same process as above but do not add the poster board or two sided tape.
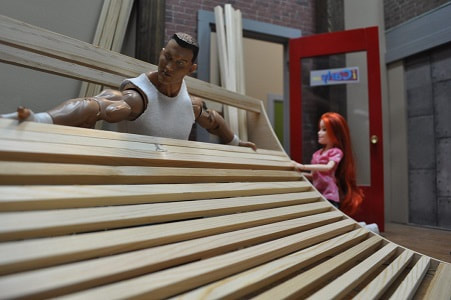
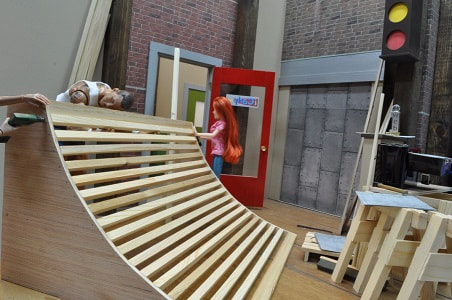
Instead, apply a series of .333” x .333” x 15” boards so they span the opening, either touching or nearly touching, to give the appearance of strength and something the final surface will be attached to. Make sure their outer surfaces are even with the top edges of the side pieces.
Follow the same process as above but do not add the poster board or two sided tape.
Instead, apply a series of .333” x .333” x 15” boards so they span the opening, either touching or nearly touching, to give the appearance of strength and something the final surface will be attached to. Make sure their outer surfaces are even with the top edges of the side pieces.
|
|
As always, if I may clarify any point in this tutorial, please do not hesitate to ask.