HOW TO MAKE MODERN SNOW SHOES - Style 1
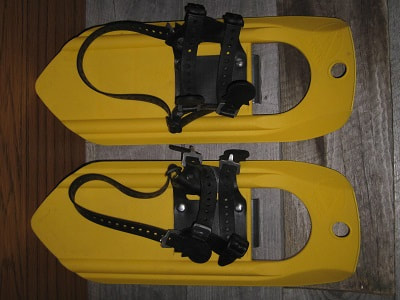
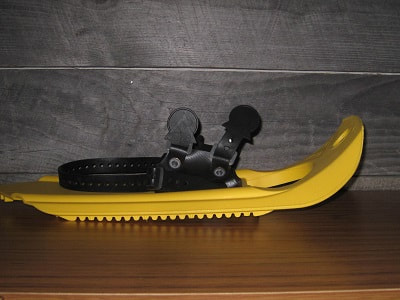
With a photo shoot in the planning stage for this fall/winter (whenever we get our next good snow) I found we needed two pairs of snow shoes. But not just any snow shoes. I was sure they had evolved greatly from what the normal person my age thinks of. And they have. With a few searches on ebay, I found ones with a tubular frame and well as these, made of some sort of durable plastic. This is what I patterned mine after and my biggest compromise is going to be on the boot straps...
|
|
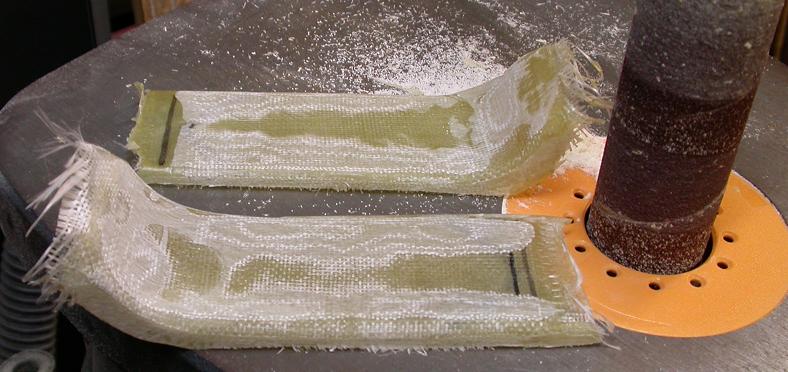
The shoe itself is 100% fiberglass laid up 5 layers thick and based on the newer style from those in the old movies.
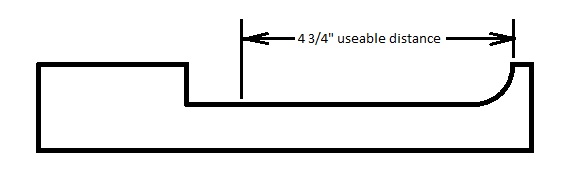
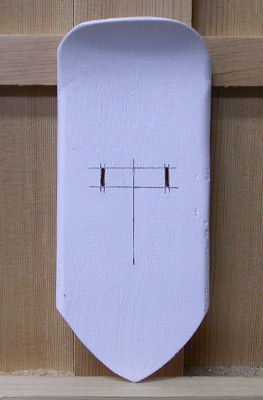
I first made a form to lay the fiberglass on. This is block of wood 2 inches wide and shaped as shown below. The front radius is 1.5” and the depth of the cut out is .75” I made it extra-long to the left just to give a good handle for holding or clamping while laying up the fiberglass fabric. The used sides were routered to a ¼” radius as well.
I first made a form to lay the fiberglass on. This is block of wood 2 inches wide and shaped as shown below. The front radius is 1.5” and the depth of the cut out is .75” I made it extra-long to the left just to give a good handle for holding or clamping while laying up the fiberglass fabric. The used sides were routered to a ¼” radius as well.
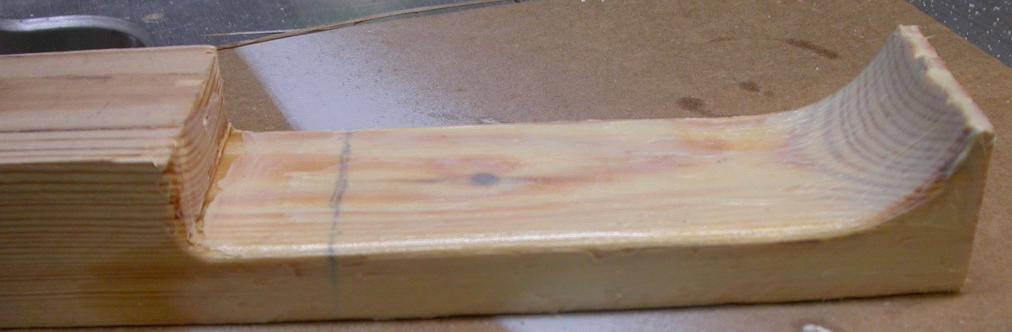

For a release agent I simply covered the usable area of the form with grease as thinly as possible.
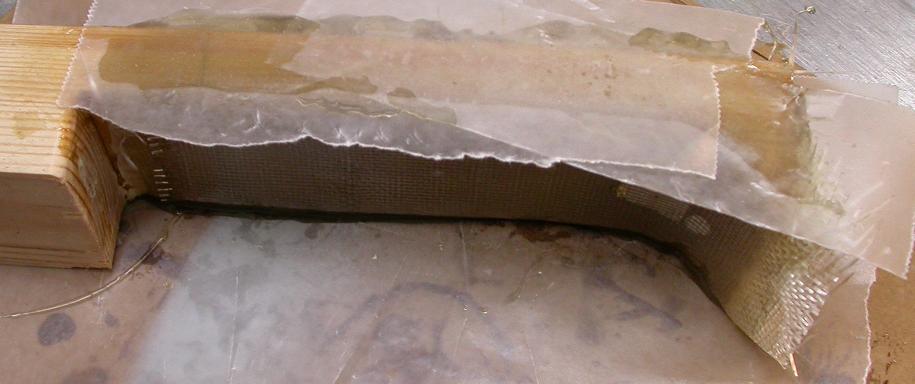
I did one snowshoe stopping at 2 layers, ensuring the sides stayed tightly in place then laying up the last 3 layers while I did the second snowshoe laying up all 5 layers at the same time. I did not see a benefit in the first way. In order to keep the sides in place while the fiberglass resin cured, I placed pieces of wax paper directly on the sides then placed flat boards on each side.
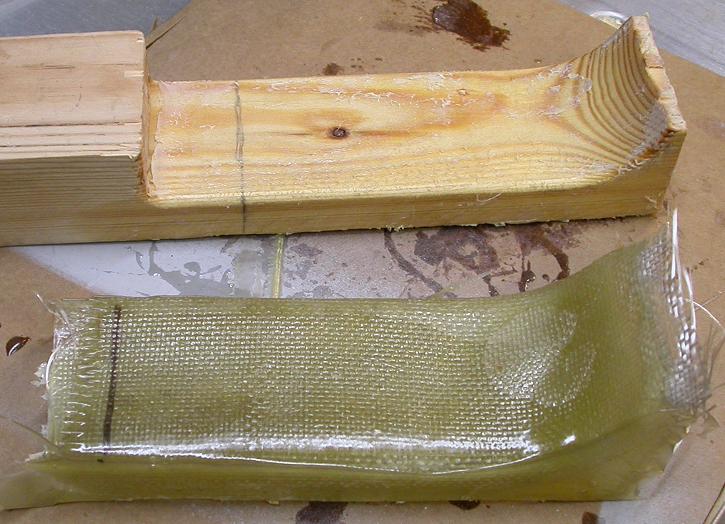
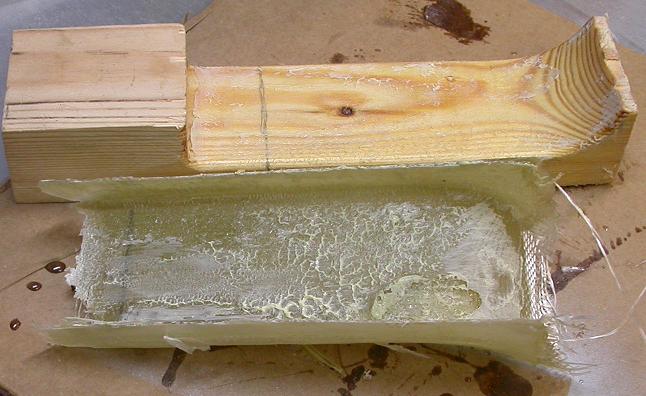
Once this was cured it was just a matter of using compressed air to blow between the fiberglass and the front radius of the form to pop it off.
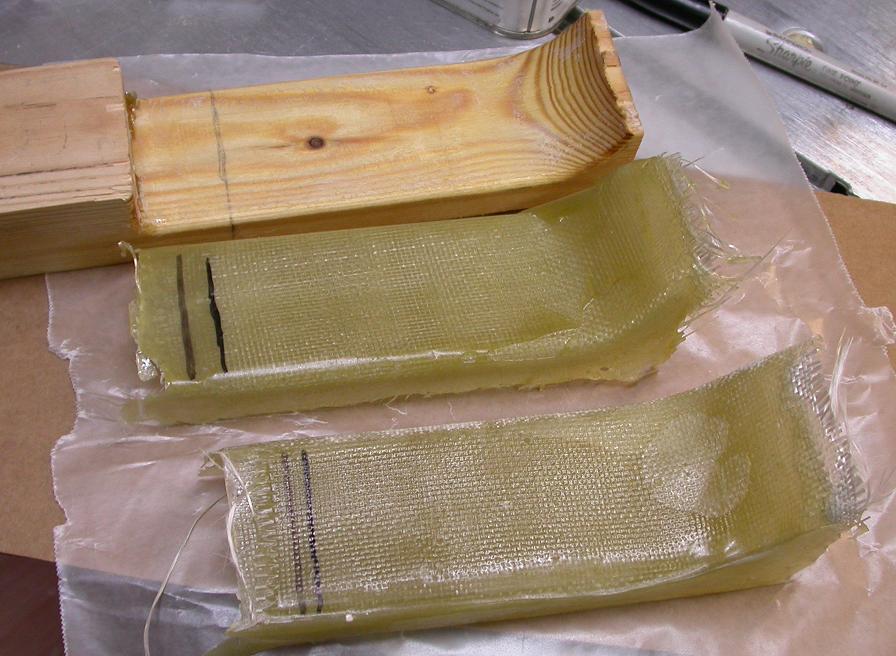
After a little light sanding on an oscillating spindle sander on the top surface, I removed the excess from the side edges until the hang down was about .200”. Shaping of the back and front were done with a homemade disk sander.
After a little light sanding on an oscillating spindle sander on the top surface, I removed the excess from the side edges until the hang down was about .200”. Shaping of the back and front were done with a homemade disk sander.
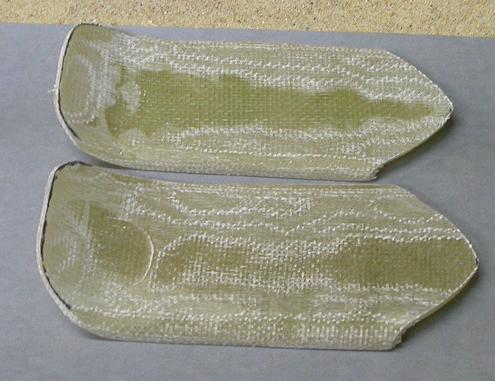
After a bit of hand sanding and spot filling, the snowshoes are now ready for priming as it is easier to see any flaws when they are one color.
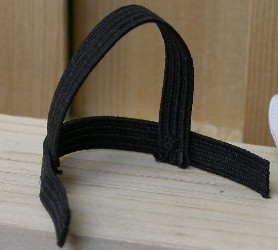
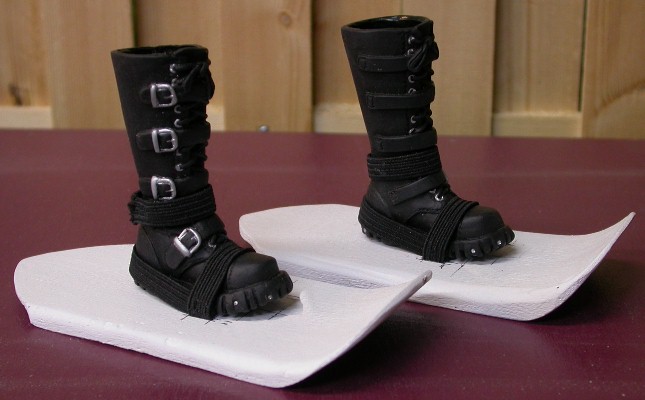
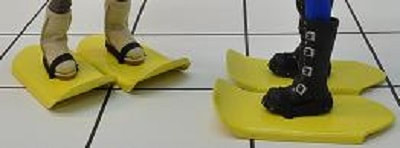
Next is to fabricate the straps to hold them on. This took a couple tries to get something that looked acceptable and was still user (me) friendly. Pick what type of boot the figure will be wearing to figure out how they will strap to the boots.
Using the boots I have pictures, for each shoe, you will need two strips of ¼” elastic. One at 2 13/16 long and one at 3”. Sew the ends of the shorter strip to the longer one so that 11/16” of the longer one sticks out as shown.
Using the boots I have pictures, for each shoe, you will need two strips of ¼” elastic. One at 2 13/16 long and one at 3”. Sew the ends of the shorter strip to the longer one so that 11/16” of the longer one sticks out as shown.
With a pair of straps cut and assembled, mark the snow shoes at a distance of 2 1/2” & 2 ¾” from the back end. This is the width of the slots needed to accept the loose ends of the straps. Again, for the boots pictured, I want the slots to be centered yet ¾” apart as shown. I used a #60 drill bit (.042”) to drill a series of holes between these lines then carefully ran the drill bit back and forth through the slot to clean up and bumps from the drill to make the slot.
|

|
The plan is for the toe of the boot to go under the shorter loop and the heel of the boot to rest in the longer loop.
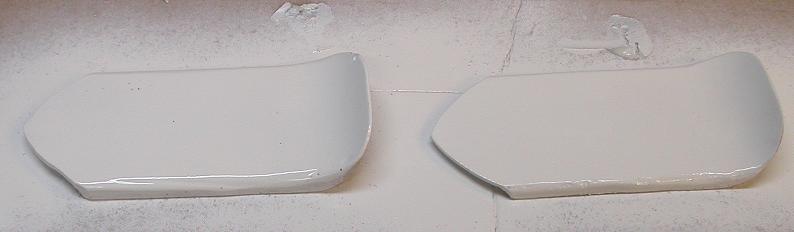
Now for the final painting. – Remove the straps from the slots and set aside. Do any final sanding and priming.
|
|
To secure the straps, I simply insert the ends into the slots, folded them over each other on the bottom of the snow shoe and glue the elastic to each other.