HOW TO MAKE A TRAMPOLINE
PARTS LIST
3/8" wood dowel – 2 @ 22” Main framework
2 @ 18” Main Framework
7/16” brass tubing – 8 @ 5 ¼” legs (verticals)
4 @ 5 3/4” legs (horizontal)
15/32” brass tubing – 8 @ 1 ” leg top bracket
8 @ 1 ¼” leg top bracket
8 @ 1 ½” corner joints(Main Framework)
1/16” round, black elastic (10yds approx.) jump mat “springs”
pleather or Naugahyde (20” x 16”) jump mat
1/8” cord(nylon preferred, 76” approx.) jump mat
Blue Pleather “spring” cover/pad
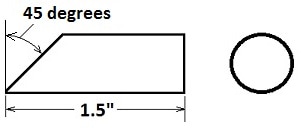
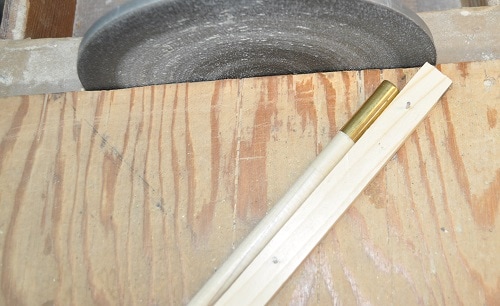
CORNER JOINT FABRICATION
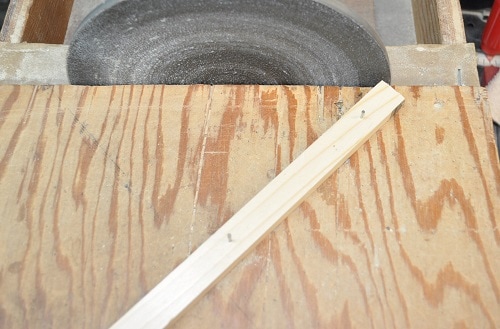
Cut eight lengths of 15/32” tubing to 1 ½” long. Cut a 90 degree angle on one end of each as shown below to begin fabrication of each corner joint.
It was easy enough to use brads to fix a guide to my disc sander table set to 45 degrees, slip a 1 ½” length of tubing onto a 7/16” dowel and feed it into the sander until the surface was a true 45 degree.
Warning…they DO get hot.
|
|
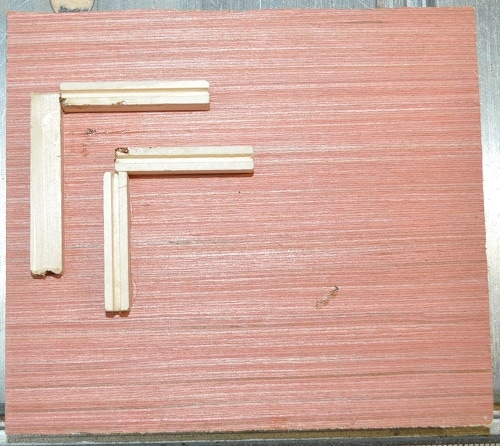
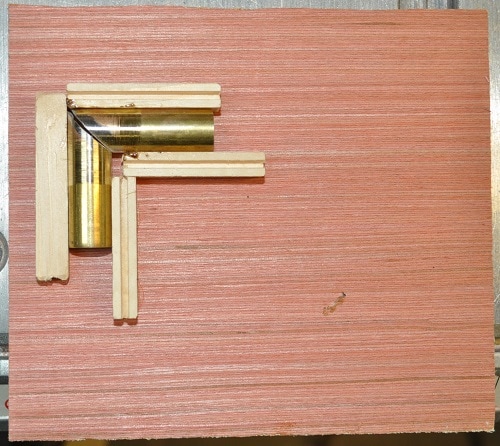
Carefully align two of these parts to form a clean, true 90 degree corner. It is advised to make a jig to hold these parts in their proper 90 degree position to make soldering them easier.
|
|
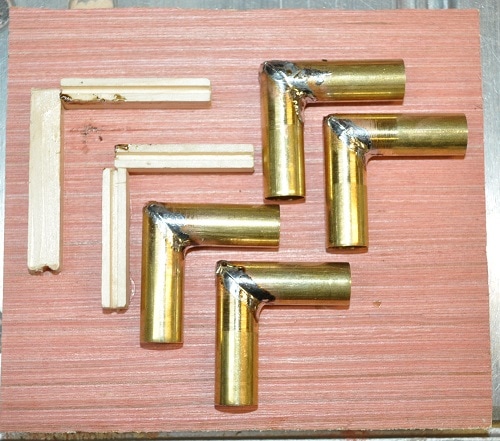
The jig is simply a scrap of Luon with scraps from another project glued to it. I used a square to hold the outer two pieces at a true 90 degree. Once this was dry, I placed two pieces of tubing against them and glued the inner pieces in place. The angles I sanded onto the ends of these pieces were not a perfect 45 degree but were close enough that the solder filled in the gap quite well. Below are the finished four corner joints.
LEG FABRICATION
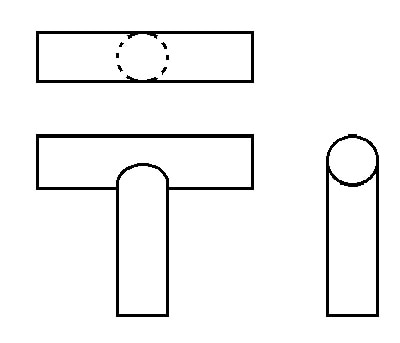
For each leg, from the 7/16 tubing, cut two pieces 5 ¼” long and one 6.0” long. Angle both ends of the longer pieces and one end of the shorter pieces to 45 degrees. Use care on the longer pieces so that the two ends create a 90 degree angle as shown below in the sketch. I used the same process for these angles as I did to make the corner joint pieces.
For each leg, from the 7/16 tubing, cut two pieces 5 ¼” long and one 6.0” long. Angle both ends of the longer pieces and one end of the shorter pieces to 45 degrees. Use care on the longer pieces so that the two ends create a 90 degree angle as shown below in the sketch. I used the same process for these angles as I did to make the corner joint pieces.
Solder these three components together keeping the joints at 90 degrees. The jig used for the corner joints can be reused here to maintain the required 90 degrees though you will have to shim the tubing (cereal box cardboard should do the trick) to get the snug fit.

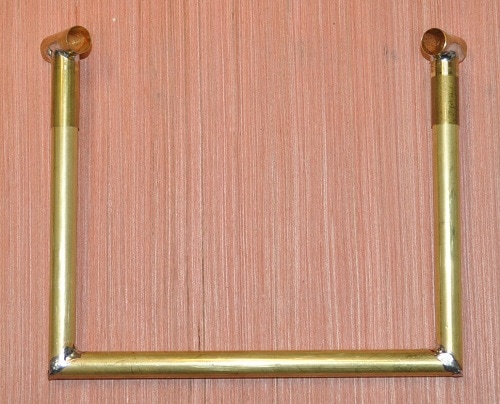
Two leg members ready to solder
The Leg Top Brackets are NOT soldered to the legs…merely slipped over the tops. This allows for the angle to be adjusted accordingly to the main frame.
Cut eight pieces of 15/32” tubing to 1 ¼” long and eight pieces 1.0” long. The 1 ¼” pieces will need a ¼” radius cut into one end. This can be done with a hacksaw and a file but is much easier to do with a mill and a ½” endmill. If using a mill, insert a wood dowel into the tubing to keep the bit from grabbing and damaging the part. Plus this makes it easier to clamp the piece tighter in a vice without crushing it.
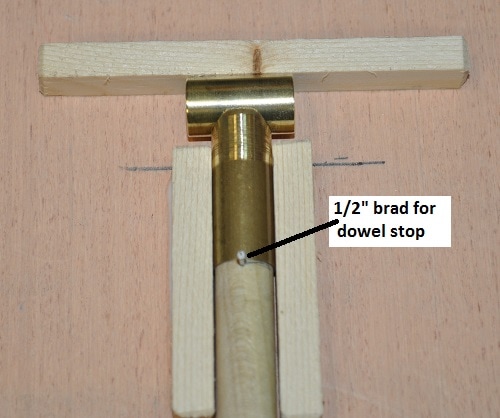
Solder one 1” piece, on center, to these radius ends to form the leg top brackets as shown. Again, a simple jig to hold the components perpendicular to each other is advised here. I drove a ½” brad into the dowel holding the bottom piece so I could apply upward pressure on the joint while soldering.
|

|
Leg Top Bracket ready to solder All Leg Top Brackets finished
One finished leg assembly with Leg Top Brackets in place
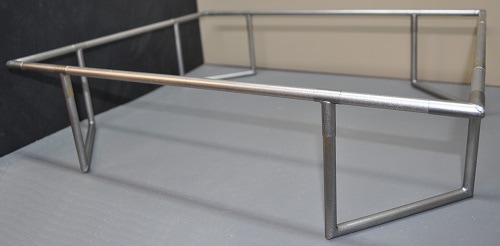
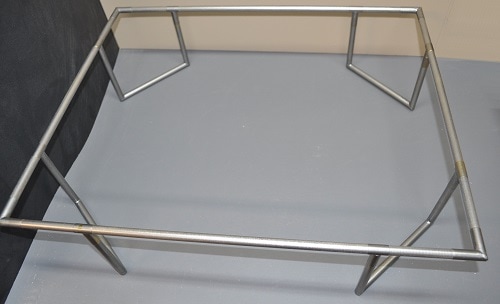
COMPLETE FRAME ASSEMBLY
Slip two Leg Top Brackets on each side of the Main Framework. Assemble the Main Framework using the Corner Joints. I wanted to use brass tubing for the main frame but could not justify the extra $30.00 for the stock needed. Lay the Main Framework on a flat surface. Slide the Leg Top Brackets to the proper location, equal distance from the corner, to allow the leg assemblies to be slid in fully. Turn this final assembly over.
|
|
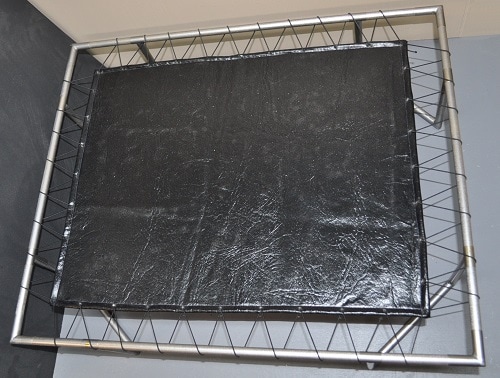
FABRICATION OF THE JUMP MAT
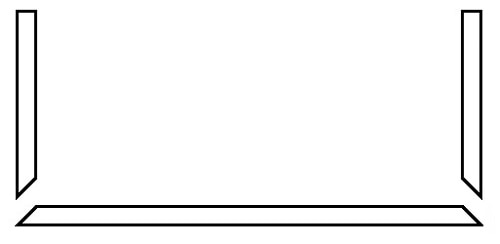
Cut your material to 20” x 16”. Fold over the edges and sew a ½” hem all the way around giving you a final mat size of 19” x 15”. Or 9 ½ foot by 7 ½ foot. To make the edge more durable regarding the pull to be applied by the elastic straps, I trapped a length of 1/8” nylon cord in the hem. This gives the elastic something additional to pull against aside from just the fabric. Once the mat was sewn, I marked out the positions for the elastic to be laced to it. I punched 11 holes on the sides and 9 on the ends with a small punch from a leather set as shown in the sketch below. These holes are approximately 1/16” in diameter.

Lacing this to the Main Framework is interesting to say the least. It takes about four feet to do the longer sides of mine and about three and a half feet for the shorter sides. I simply started one run with a nearly new package and the second run with a brand new package. These packages are sold as 5 yards long but were closer to 16 feet…not fifteen. I straightened out and bent a jumbo paperclip into a needle of sorts to make lacing this up a LOT easier. I could push it through each hole, feed the elastic through the “needle” and pull it back through without hurting the fabric.
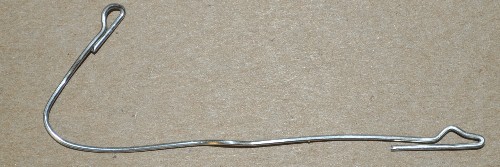
I started in one corner, with the Main Framework and Jump Mat upside-down on a table and worked my way down one of the longer sides with a length of 1/16” round, black elastic. Then, using another length of elastic, start down the other longer side. At this point, it is “best guess” at how tight to get the elastic. Just aim for 1 ½”- 2” gap between the Jump Mat and the Main Framework. Once both longer sides are laced up, work your way down both of these sides again snugging up the elastic to provide a reasonable amount of support to the Jump Mat. Now, using the same lengths of elastic, work your way down the two shorter sides. Once they are laced up completely put a clamp of some kind (from a small spring clamp from the garage to a bulldog clamp from your desk) at the ends to keep them from pulling back through. With the Jump Mat positioned near center of the Main Framework, again work your way around the elastic, snugging it up yet again. Mine was snug enough that if I dropped a ¾” x 25 foot tape measure on the Jump Mat from a foot or two it would rebound nicely. Tie a simple double or triple knot at the ends of the elastic at its four ends.
|
|
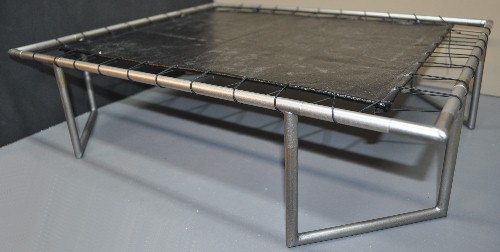
FABRICATING THE “SPRING” PADS
All that is left is the pad over the “springs” (elastic). I made this from pleather available at any good fabric store. Pleather is a very thin vinyl material with a bit of stretch that should lay quite flat over the elastic straps when sewn snug enough to the required size. For the size of trampoline I made, I cut the pleather into four pieces. One pair at 23” x 4 ½” and the other pair 19” x 4 ½”. By folding them in half lengthwise, with the good side in, I simply sewed the ends shut…turned them right side out…and slipped them over the spring area of the frame. I did have to notch the bottom sides where the legs are. I slipped the two shorter ones on the ends first then slipped the two longer ones on the sides, overlapping the end covers. Looks good to me.
Have fun girls...