HOW TO MAKE A WOOD SUSPENSION BRIDGE
Being first featured in episodes 110-112 of our story iCarly:Five Years Later, a request was made as to how it was built. We hope you can duplicate our efforts for your own adventures.
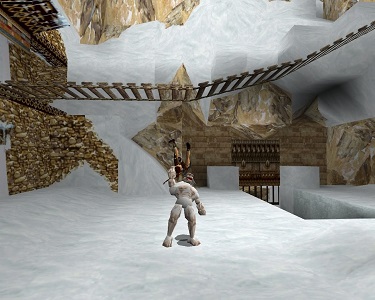
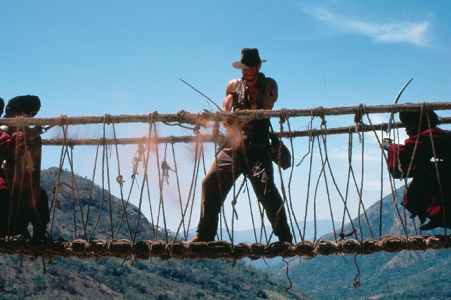
This was a lot of fun to make even though I raised a few blisters tying all the knots. The inspiration for this project primarily came from the early Tomb Raider video game as well as the second Indiana Jones movie. That was the look I was going for.
|
|
Tomb Raider Screen Capture Indiana Jones
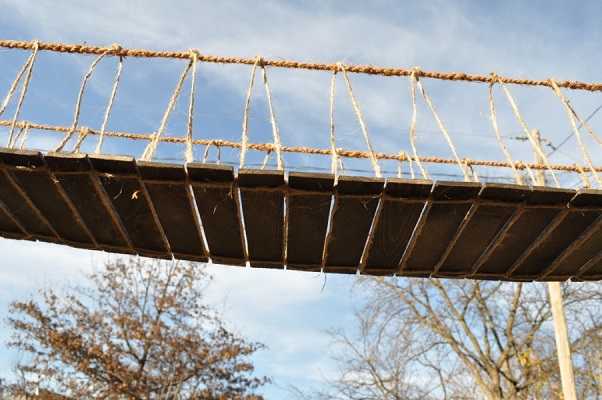
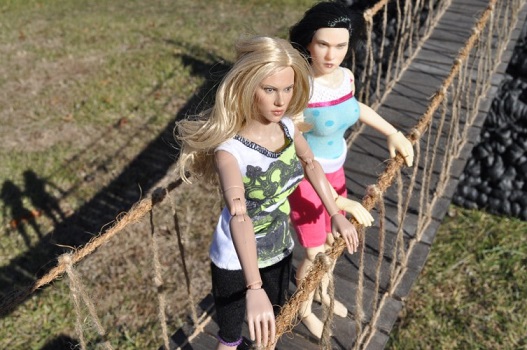
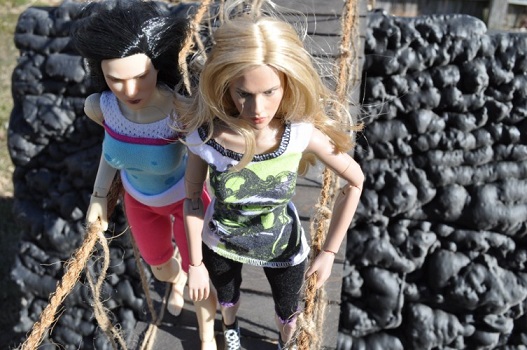
Here's mine. I think it turned out quite well.
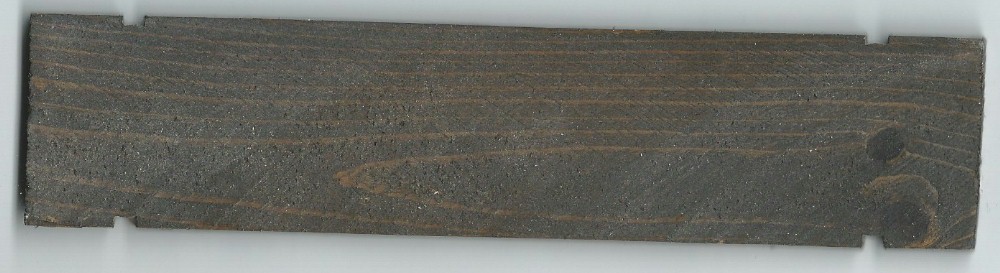
First it seemed a matter of determining the width of the bridge and the width of the planks I wanted to use. For my bridge, I made the planks 6 5/8” long, 1 ½” wide (the thickness of a 2 x 4) and 3/16” thick. You can see I put four notches in each plank at 5/8” to ¾” from the ends. This is where the knots will grab each plank so they should never slip out.
Next question is “How many planks do you need to span the distance desired?” My first bridge spans about 10 feet, or 60 feet in 1/6th scale. Which is 120 inches divided by 1 9/16” (the width of a plank plus the distance taken up by the rope knots on one side) equals almost 74 planks. Once enough planks were cut to size and notched, I put on a pair of latex gloves and set about staining them. You do not have to stain the planks…but I did. I like the way they look.
I would suggest using an odd number of planks as this will make the knot tying of the rope connecting the planks to the handrail rope be the same at each end. I did not and will explain the difference near the end of the tutorial.*
Now you need to cut four lengths of twine. It takes two lengths on each side. The length of this twine is relative to the length of the bridge and the number/width of the planks. Not only does it have to be as long as the finished bridge…there must be enough length for a double knots between each plank.
On a side note…I used three different sizes of twine. A small twine for the ropes from the bridge planks to the hand rail rope. A medium twine to lash the planks together and a larger twine (1/4”), almost a rope, for the hand rail rope. Personal preference here but I do like the way it looks.
Once you have the twine cut to length (SEE two paragraphs down for clarification on this length), wrap each strand around your fingers to coil it up into a controllable mass and put a rubber band around each. As you use them it is easy enough to pull more length from the coil and to not be fighting with the full length.
How much you leave at the first knot is up to you as you can always tie on more length if needed and it does not look too bad. I suggest tying the first double knot in each pair of twine at about 12” minimum from the end. If you use anything near what I did at the bridge ends, this will be more than enough.
I paid extremely close attention on my second bridge so I could offer solid guidance on just how long this twine needs to be starting out. So, using the last of one spool of twine, I cut four strands of Blue Hawk brand 7 pound twisted jute twine (#0349245) to 14’ 4”, which I figured was way overkill for a bridge less than 7 feet (and it was) but it was not worth saving any and coming up short, and I had 48 planks around to work with. I am figuring on a bridge that should finish at about 6 feet 10”, but with a bit of sag, it will span about 6 ½ feet…or 39 feet in 1/6th scale. As mentioned above, I tied a double knot about 12” from the end of each pair. Figuring on losing a good ½” for each double knot (or 49 knots for 48 planks), I will use up just over 2 feet of twine in the knots.
I found it also best to use a vise with padded jaws to hold the plank you are working with when tying the knots. If you do not have padded jaws on your vice simply wrap one end of the jaws with masking or duct tape. I’m only gripping on less than ½” of a plank.
Two things to be watchful for. One is not to break the twine. Obvious, right? But twine may seem quite strong but it is easy to get carried away and start pulling harder on the knots and…POW. You broke it. Secondly, be mindful of blisters. I managed to raise a couple before I knew it on my first bridge but had no issues on the second. Twine is very abrasive on the skin. I’d just rather warn you ahead of time.
Place the first plank in the vice and tie the twine to both ends making sure the original knot in the twine is in the notch at the bottom edge of the plank and the new knots are on the top edge.
Without moving the first plank, place the second plank on top of it and tie them together with the lengths of twine as shown. I found it easier to hold these two planks together with a small spring clamp during the tying of the knots. Do not be too concerned if the gap between the planks is not always even as it does not seem to matter in the end result but keep the twine as tight as possible without breaking. Twine, by its very nature, varies greatly in diameter over short distances. Remember, always use double knots.
|
|
Move the second plank into the vise and repeat the above process on all subsequent planks, pulling twine from the coils as needed.
|
|
Third Plank not yet tied in Third plank tied in place
At the end of the 48 planks, with 12” extra at the starting end, I found there was 4’ 8” of twine after the 48th plank. More than enough to be cut down to secure this end and not be overly wasteful.
The length for the handrail rope is much simpler but I would leave plenty of extra at each end until you decide just how you plan to secure the ends when in use. Lay the bridge out flat on the floor and measure from end to end. Add 18-24” minimum to this for the handrail ropes. My 48 plank bridge measured 6’ 7” so I added 48” to this for a rough total length of 11’. I like this rope to be long, as for now, I run the rope through an eye screw then run the end out of camera view and secure with a spring clamp for easy disassembly later so 24” at each end is nice.
The ONLY way I could figure on securing the handrail rope to the planks of the bridge and have it look even was to make a jig that would allow me to tie two locations at a time that would maintain the correct distance once the knots were tied at the handrail rope. This jig was made from scraps that were laying around so it is not very pretty but it is functional.

|

|

|
Inside of jig Outside of jig
|
|
Shows clearance notch at bottom for plank ropes Notch for handrail rope
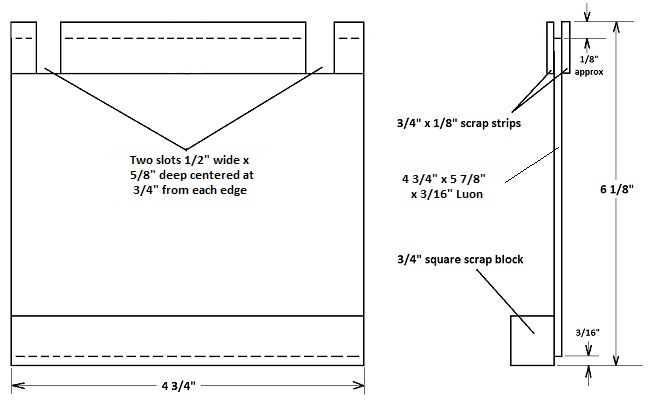
Please notice that my jig has three notches in the top. This is an error and I only used the outer two.
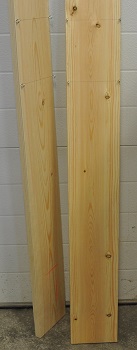
For this next part you must suspend the bridge as though you were using it. It was simple enough to take two 1 x 6s, WHICH ARE ACTUALLY ¾” X 5 ½”, and install 4 eye screws in each. Two for tying the bridge to and two for securing the handrail ropes to at the correct distance apart. In order to make this as pleasant as I could for all the tying, the boards should be over 36” long with the bottom two eye screws 30” from the floor and the upper two eye screws 6” above that as shown below.
For this next part you must suspend the bridge as though you were using it. It was simple enough to take two 1 x 6s, WHICH ARE ACTUALLY ¾” X 5 ½”, and install 4 eye screws in each. Two for tying the bridge to and two for securing the handrail ropes to at the correct distance apart. In order to make this as pleasant as I could for all the tying, the boards should be over 36” long with the bottom two eye screws 30” from the floor and the upper two eye screws 6” above that as shown below.

|
|
I drilled pilot holes in the wood so I could get the eye screws installed without splitting the wood at about 1/8” from its edge. This configuration allowed me to sit on my garage stool and roll up and down the length of the bridge on casters. I secured one board to the side of my table saw with a spring clamp and the other board to a table that I weighted down enough to keep it secure under the weight. Run the twine from the bridge through the lower eye screws and draw them up snug and secure. I’d use another spring clamp to secure these ends as twine does not take kindly to being tied and untied repeatedly very well.

|

|
Secure one end of the handrail rope through an upper eye screw in the similar manner (a spring clamp is still best), leaving 12”-18” minimum extra for later fastening, and feed the other end through the other eye screw but do not secure it. If you have a light spring clamp you can clip onto its end to give minimal support to this rope but still allow you to pull on it as needed works well. It should not be droopy nor should it be pulled tight.
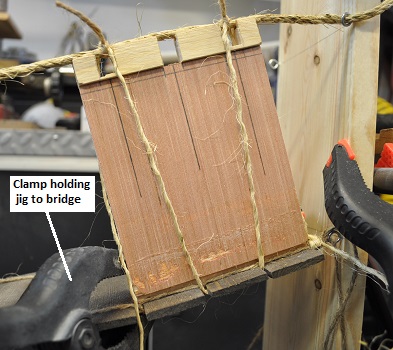
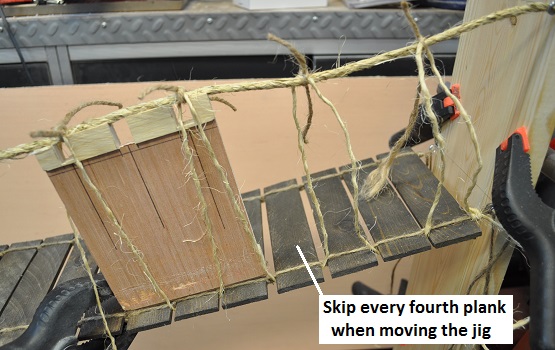
I simply worked the rope webbing right from the spool of twine. No precutting. You will need a second length or spool of small twine (Knotting twine) to be used at every meeting of the webbing rope and the handrail. This can either be the same twine as used for connecting the planks or a cut off from the webbing spool. Tie off the end of the webbing rope securely to the rope in the bottom eye screw. Yes, this is actually a “final” tie off of twine. I still left this rope with plenty of extra that you can trim off later or simply use with the other ropes to secure each end of the bridge. Place & clamp the jig on the planks at one end of the bridge and place the handrail rope on top of the jig. The jig should be centered over the first three planks and then moved to cover three planks at a time, SKIPPING one plank as you progress across the bridge.
I simply worked the rope webbing right from the spool of twine. No precutting. You will need a second length or spool of small twine (Knotting twine) to be used at every meeting of the webbing rope and the handrail. This can either be the same twine as used for connecting the planks or a cut off from the webbing spool. Tie off the end of the webbing rope securely to the rope in the bottom eye screw. Yes, this is actually a “final” tie off of twine. I still left this rope with plenty of extra that you can trim off later or simply use with the other ropes to secure each end of the bridge. Place & clamp the jig on the planks at one end of the bridge and place the handrail rope on top of the jig. The jig should be centered over the first three planks and then moved to cover three planks at a time, SKIPPING one plank as you progress across the bridge.
|
|
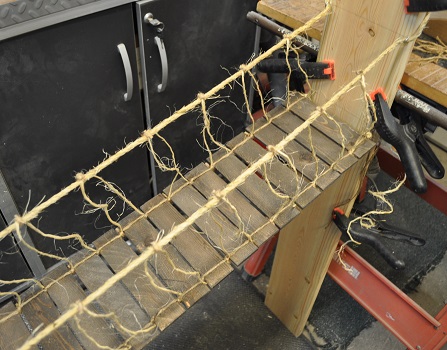
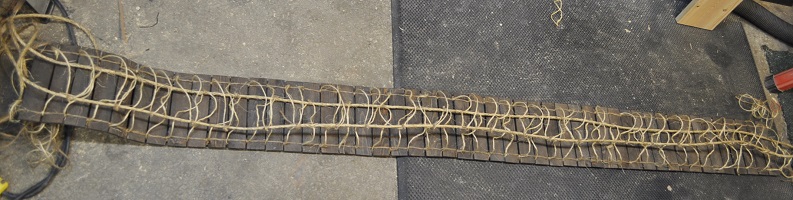
Work the webbing rope over the handrail rope at the first notch of the jig and then feed the twine between the first and second plank then back up between the second and third plank. Work this rope again over the handrail rope at the second notch in the jig. Feed the rope between the third and fourth plank, then back up between the fourth and fifth plank. It may be awkward with the spool of twine but it gets easier quickly. Using a length of the knotting twine, tie a double knot around the handrail rope and the webbing rope at approximate center of the notch. The excess twine from the “knotting twine” can all be trimmed either when the bridge is half done or completely finished to save a lot of time picking up and putting down the scissors after every knot. With these two knots securely tied, move the jig to the next set of three planks (SKIPPING ONE PLANK) and continue the process. When you reach the other end of the bridge, tie off the webbing rope as before and cut. I feel compelled to warn you again about raising blisters. Especially from tying all the knots connecting the webbing rope to the handrail rope.
|
|
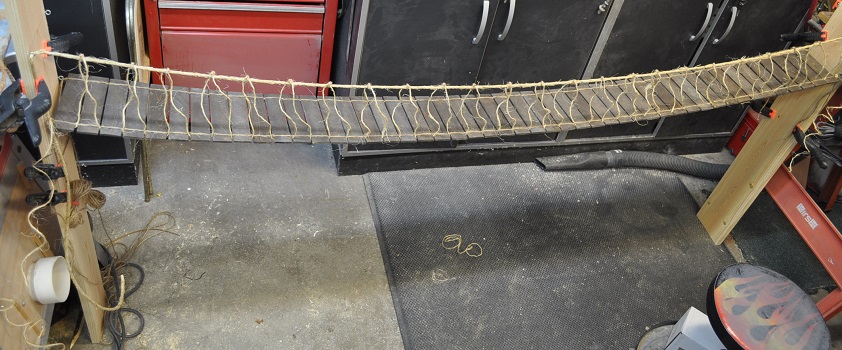
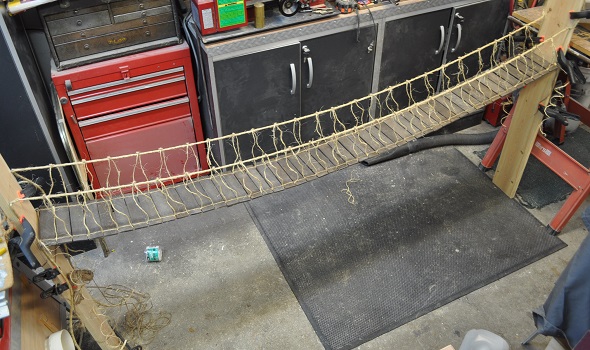
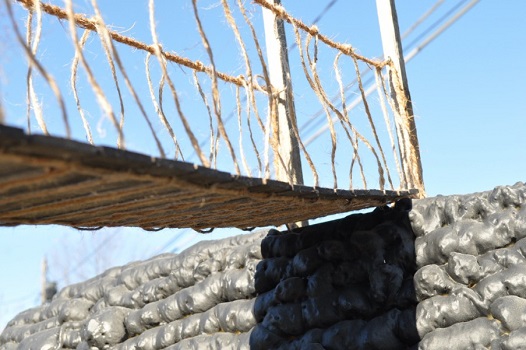
The bridge with one handrail completed.
Move to the other side of the bridge and repeat the whole process again. (I had to shift my table and table saw in order to have enough room on the other side.)
* Remember, if you use and odd number of planks, the webbing rope will end up being tied to the plank ropes just like at the beginning while if you use an even number of planks, the webbing rope will need tied between the last and next to the last plank or to the handrail rope at the end.
|
|
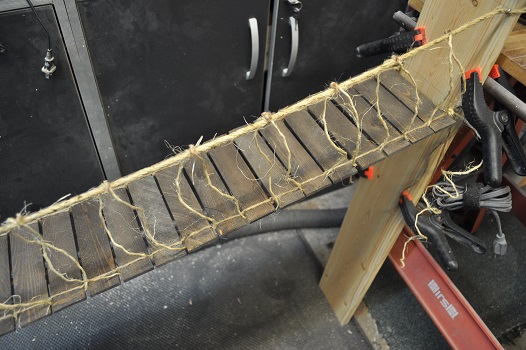
Please note: The distance between the planks on the first bridge I made using this method was so small that the webbing ropes had no chance of working out from between while the gaps on my second bridge were notably bigger. Due to this issue, I decided to use a small twine to go around to at least every other gap and tie the webbing rope to the plank rope at these gaps. I suppose you could accomplish the same this with small dabs of glue but it would not be my first choice. Simply personal preference on this matter.
STORAGE
Even my 10 foot bridge takes up very little room when not in use. Yes, you still have to deal with whatever you settle on using to support each end but the bridge itself compacts down very well. Once removed from the end supports, simply lay it out flat and fold the handrail ropes inward onto the bridge. Then roll it up as shown.
Even my 10 foot bridge takes up very little room when not in use. Yes, you still have to deal with whatever you settle on using to support each end but the bridge itself compacts down very well. Once removed from the end supports, simply lay it out flat and fold the handrail ropes inward onto the bridge. Then roll it up as shown.
|

|
SET-UP
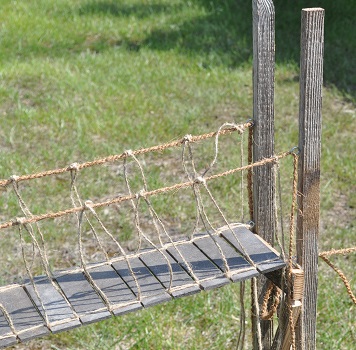
I would have liked to have been able to secure this to one of those huge “well covers” that look like a boulder…but I do not own one…yet. So, my second choice was to make a single framework out of some old, weathered wood I had laying around and install the same eye screws in it at the same height as when I built the bridge. I did spray paint the eye screws first to make them look rusted. This worked for one end.
I would have liked to have been able to secure this to one of those huge “well covers” that look like a boulder…but I do not own one…yet. So, my second choice was to make a single framework out of some old, weathered wood I had laying around and install the same eye screws in it at the same height as when I built the bridge. I did spray paint the eye screws first to make them look rusted. This worked for one end.
|
|
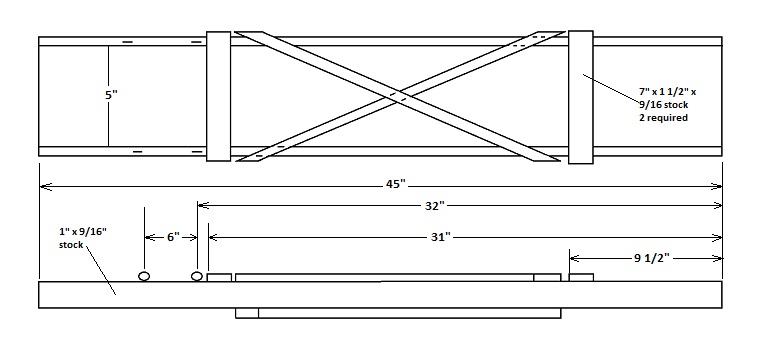
The only thing remotely critical on this support is the 5” between the uprights and the 6” between the eye screws. The rest…just wing it to suit you. That is why I did not get too carried away over dimensioning every little thing.
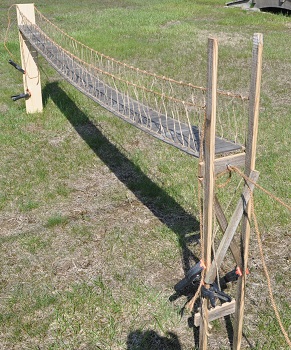
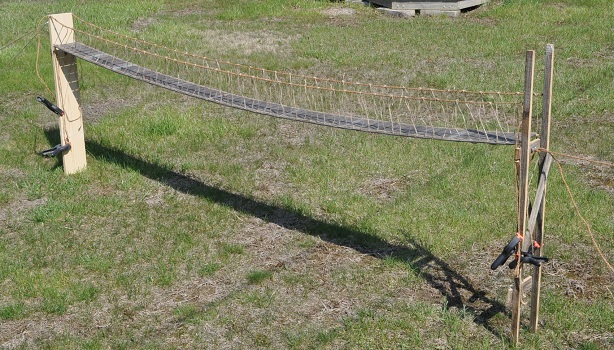
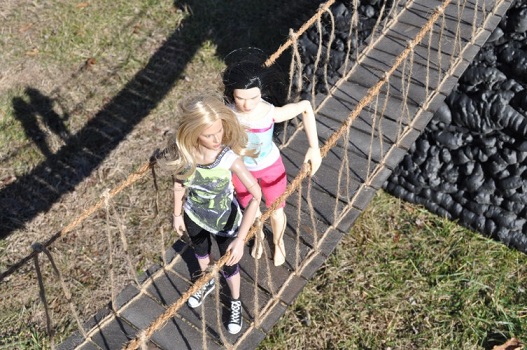
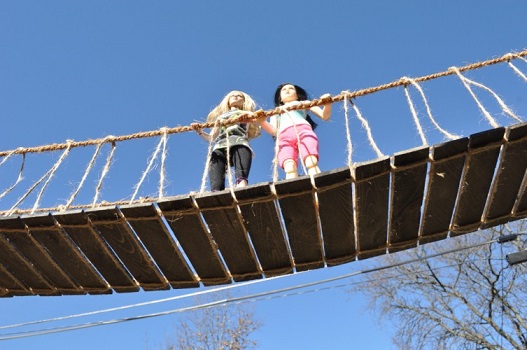
The other end is supported by one of the boards I used during the construction as I did not yet plan on being able to see both ends at the same time in pictures. One end is secured to my privacy fence with a 10 foot (approx.) cord while the other is anchored using two metal stakes and another length of cord as you would a badminton net. In order to photograph the finished end with the weathered framework, I found I could fit one of my large “rocky” backgrounds made from a 32” x 40” foam core and a load of expandable foam insulation under the bridge and bring the top edge up to the bridge bottom. I know some people poke fun at these panels (I haven’t seen them do better) but they are the best I have at the moment…and I like them.
The other end is supported by one of the boards I used during the construction as I did not yet plan on being able to see both ends at the same time in pictures. One end is secured to my privacy fence with a 10 foot (approx.) cord while the other is anchored using two metal stakes and another length of cord as you would a badminton net. In order to photograph the finished end with the weathered framework, I found I could fit one of my large “rocky” backgrounds made from a 32” x 40” foam core and a load of expandable foam insulation under the bridge and bring the top edge up to the bridge bottom. I know some people poke fun at these panels (I haven’t seen them do better) but they are the best I have at the moment…and I like them.
|
|
|
|
I can only hope this tutorial is of help to someone and if you have any questions please do not hesitate to contact me.