HOW TO MAKE WOODEN CRATES
|
|
I’ve been asked several times now for a tutorial on the wood crates that are in my many stories.
So here it is.
So here it is.
MATERIALS LIST
NOTE: You will often find, in my tutorials, that I use a LOT of 3/16” thick Luon in my projects, from walls to basic props. The primary reason is I get a 4 foot x 8 foot sheet for about $13.00. I have the lumber yard typically cut it crosswise at 28” (which is the height of my room walls) to make them easier to handle for any prop, including NEW walls. Plus they fit easily in my car.
2 foot x 2 foot x 2 foot crate – THIS IS THE ONE WE WILL BE MAKING TODAY
2pc 4 x 4 3/16” LUON
4 pc 3 5/8” x 3 13/16 3/16” LUON
1/8” thick trim strips needed (3/4” wide) (pine)
Wood glue
Rubber bands / clamps
*******************************************************************************************************
4 foot x 4 foot x 4 foot crate
2pc 8 x 8 3/16” LUON
4 pc 7 5/8” x 7 13/16 3/16” LUON
1/8” thick strips needed (3/4” wide) (pine)
Wood glue
Rubber bands / clamps
*********************************************************************************************************
I figured by listing these two sizes, it should be easy enough for you to list out the sizes needed for any size crate you may like. The trick is to keep all measurements, length, width and height to remain on an even inch…or desired fraction of an inch when allowing for the single or double thickness of the Luon or other material you may choose. If you still have an issue, please contact me.
For rectangular crates…first figure out what sides will be the top and bottom. These two sides WILL be full size. Such as, on a 4” x 4” x 8” crate, the top and bottom will either be a full 4” square or a full 4” x 8” rectangle. Each of the remaining sides will be reduced by 3/8” on their height of the crate and 3/16” on the length and depth of the crate. The sketch below illustrates this crate with a 4” x 8” lid.
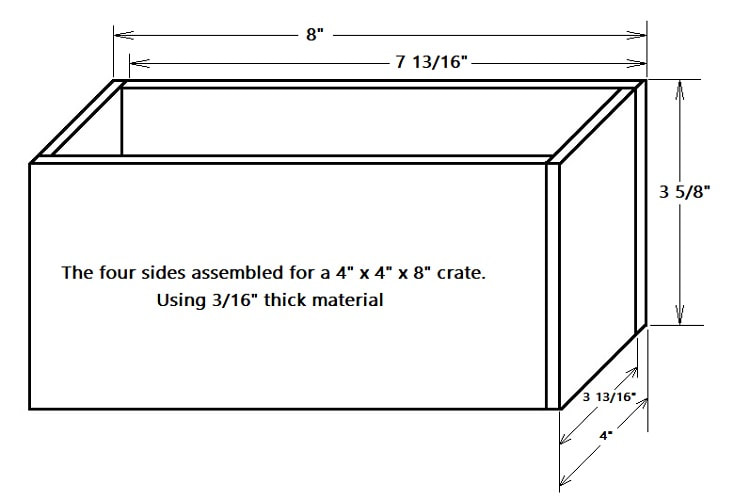
This should become clearer once you have made one.
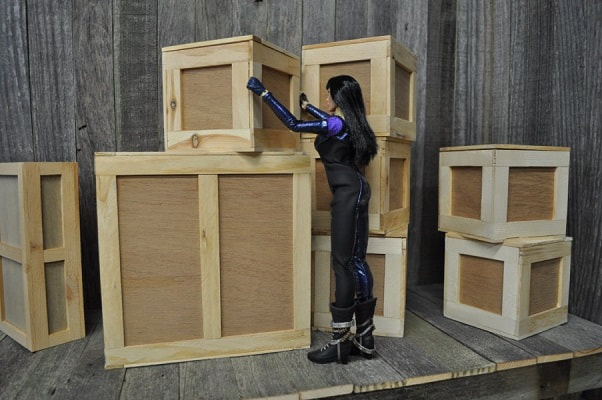
We will be making a 4’ x 4’ x 4’ crate for this tutorial but this can easily be modified to make any size crate you can imagine. Other sizes I have shown throughout my stories include, but not limited to, 4” x’ 8” x 8”, 4” x 4” x 8”, 4” x 8” x 12” to as small as 1 ½” x 1 ½” x 4” as seen in my “That’s Entertainment” story.
Start by cutting the needed pieces of Luon. I find it easier to cut a strip or two of Luon to 4” wide making sure there is enough combined length for all six sides as this is the widest of ALL pieces. Once you cut off the two pieces for the top and bottom stated below, you have easily handled stock for the rest.
2 pieces 4” x 4 and 4 pieces 3 5/8” x 3 13/16”
Set the square pieces aside for now.
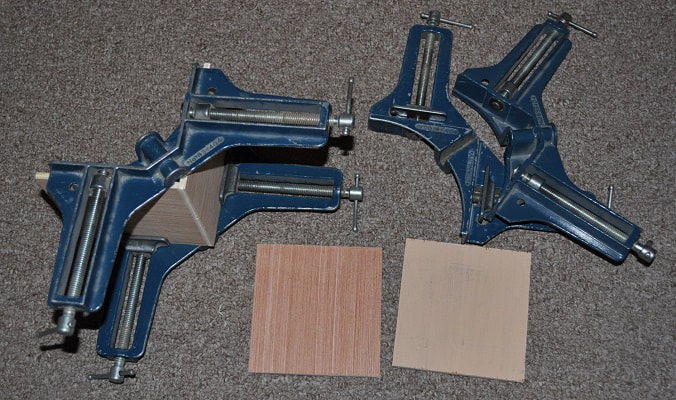
Clamp and glue the remaining sides together as shown with the glue joint on the 3 5/8” or 7 5/8” sides if making the 8” cube crate. Once clamped and before gluing each corner, check that the clamped length IS 4 inches. If it isn’t 4”, you have the wrong edges together.
I highly recommend buying a few corner clamps to hold everything square while the glue dries. They are up to about $5.00 apiece now at discount tool places like Harbor Freight Tools. But they are worth it. You do not need eight at one time. If you do not mind waiting on each joint to dry, you can get by with two…or four.
2 pieces 4” x 4 and 4 pieces 3 5/8” x 3 13/16”
Set the square pieces aside for now.
Clamp and glue the remaining sides together as shown with the glue joint on the 3 5/8” or 7 5/8” sides if making the 8” cube crate. Once clamped and before gluing each corner, check that the clamped length IS 4 inches. If it isn’t 4”, you have the wrong edges together.
I highly recommend buying a few corner clamps to hold everything square while the glue dries. They are up to about $5.00 apiece now at discount tool places like Harbor Freight Tools. But they are worth it. You do not need eight at one time. If you do not mind waiting on each joint to dry, you can get by with two…or four.
Notice how the four sides are fitted together in the sketch below to make the 4” square.
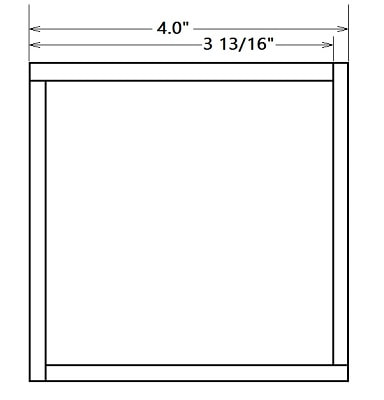
Example of a 4” cube crate.
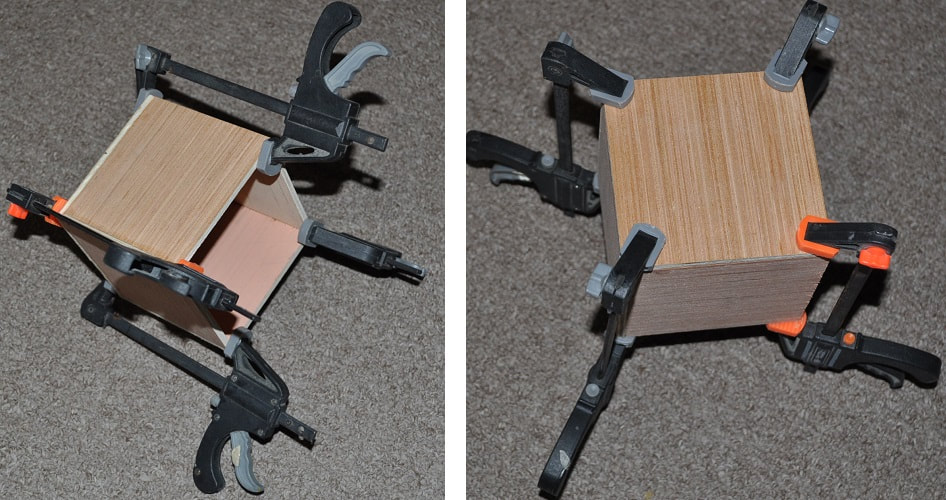
Showing the four side walls and the clamps.
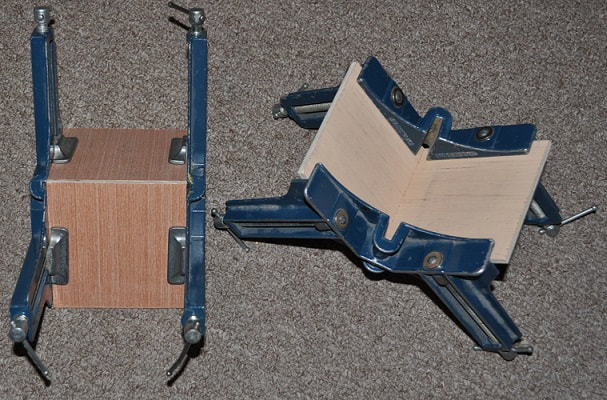
The four sides glued, clamped and drying as two subassemblies.
Once the two subassemblies are dry, they may be glued and clamped together as shown above.
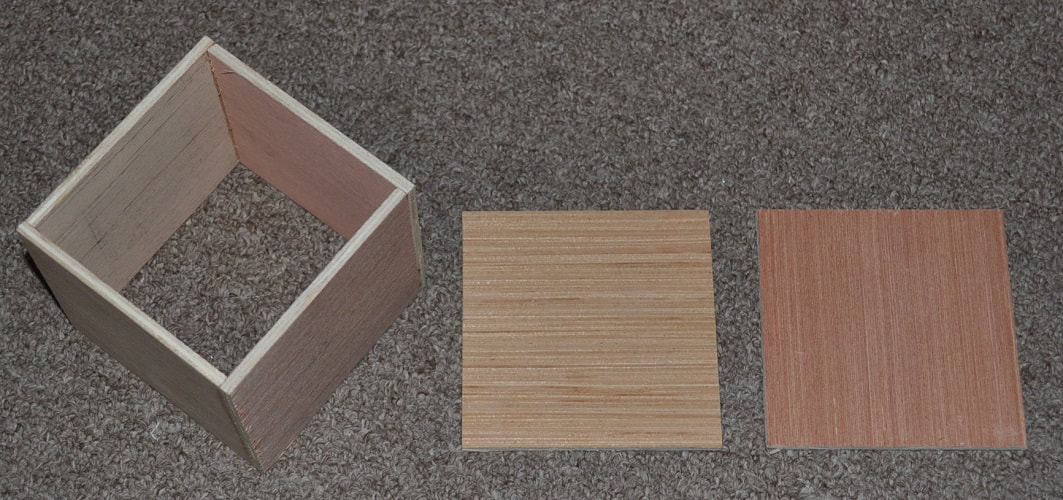
Properly glued, the walls make an open-ended box measuring 4” square and 3 5/8” high.
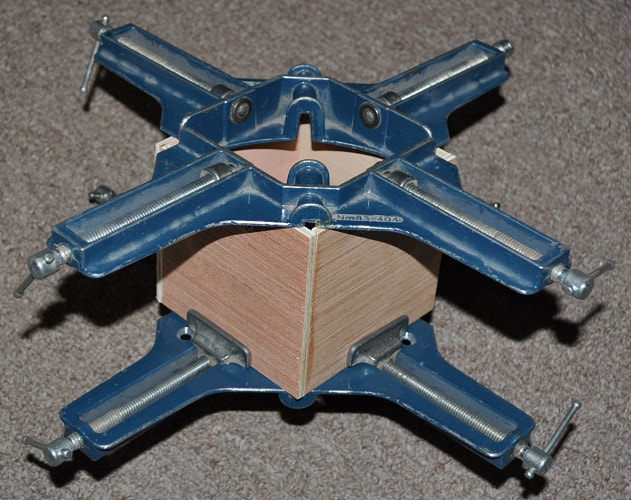
This is the process for making a 4” x 4” x 4” crate up to a 7” x 7’ x 7” crate (gluing the sides only two at a time. For crates 8” x 8” x 8” or bigger, there is room for the clamps so all four corners may be glued and clamped at the same time if you have enough clamps.
This is the process for making a 4” x 4” x 4” crate up to a 7” x 7’ x 7” crate (gluing the sides only two at a time. For crates 8” x 8” x 8” or bigger, there is room for the clamps so all four corners may be glued and clamped at the same time if you have enough clamps.
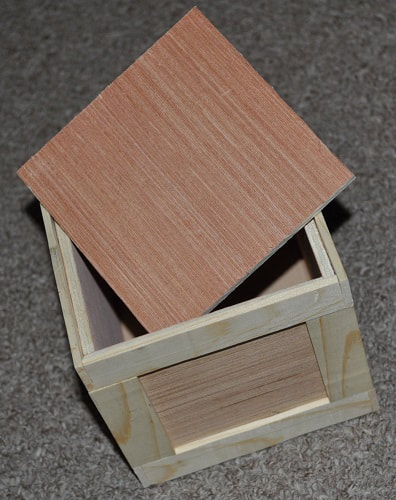
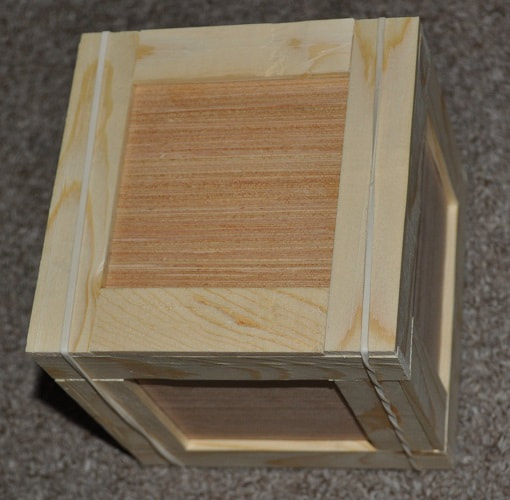
THE FOUR SIDES READY FOR AN END PIECE
Pick one of the remaining 4” x 4” pieces…check the fit to ensure it does NOT hang over the edges of the sides (trim down if needed – it is better, on this end, to be 1/16” small than 1/32” big)…
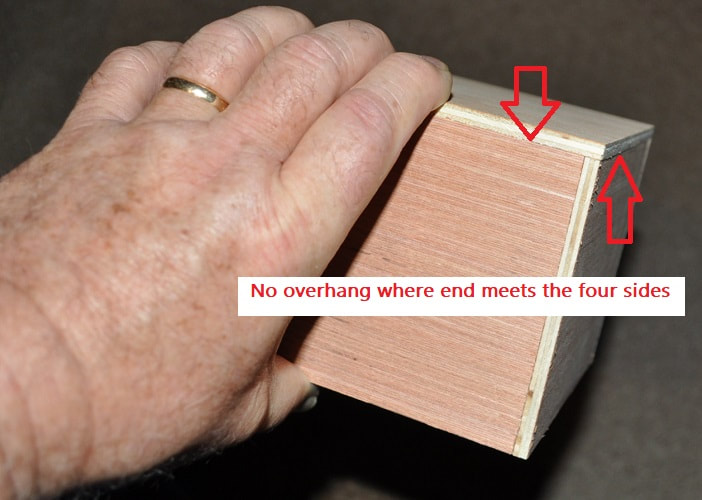
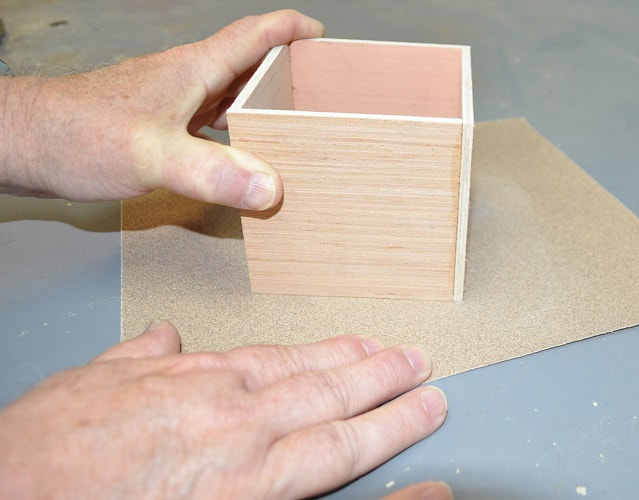
…select the worse of the two ends of the open-ended box, if there is a difference, and glue the 4” x 4” piece in place. This can be held in place with good rubber bands or a few small clamps. I prefer to use the BEST end for the end that opens. If the selected end is unduly rough, you can carefully rub it against a full sheet of course sandpaper as shown above.
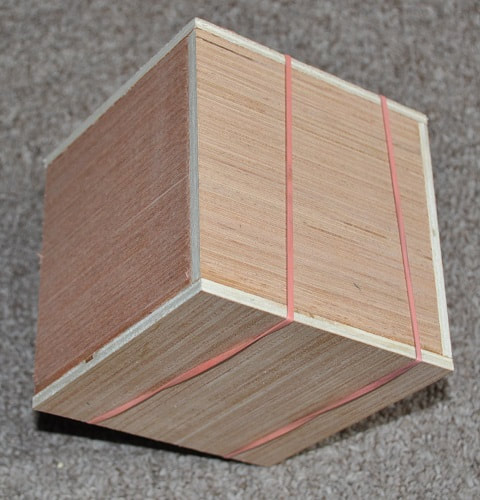
One end glued and clamped in place.
Before continuing, check the fit of the other end piece. It should line up with the sides flush with no overhang as well. Trim if needed. Place this piece on the open end of the crate and hold in place with a couple of rubber bands for now. It needs to be in place as a spacer for adding the strips of wood.
For the strips of wood to trim out the crate, use a table saw on standard stock 1 x 2 or 1 x 4 (or random scraps – all typically ¾” thick) to make strips about 1/8” thick. You can do the math but trust me…it takes a lot of strips. The top and bottom takes about 15” each and the other corners will take another 22” approximately so rip plenty of strips to well exceed the needed 52 inches of material for this one crate. Especially if you plan on making several crates. This is not necessary but…if you have access to a planer…you can leave the strips a little heavy and then run them through the planer to the 1/8”, which it the minimum my planer goes down to. I’ve made them both ways as my early crates predate my purchase of a planer by years.
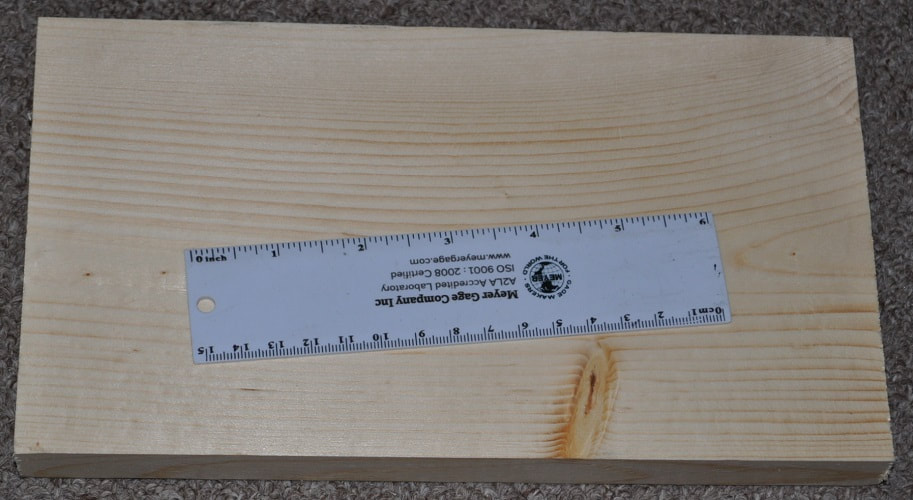
This scrap of 9 ¾” long 1 x 6 from my scrap bin…
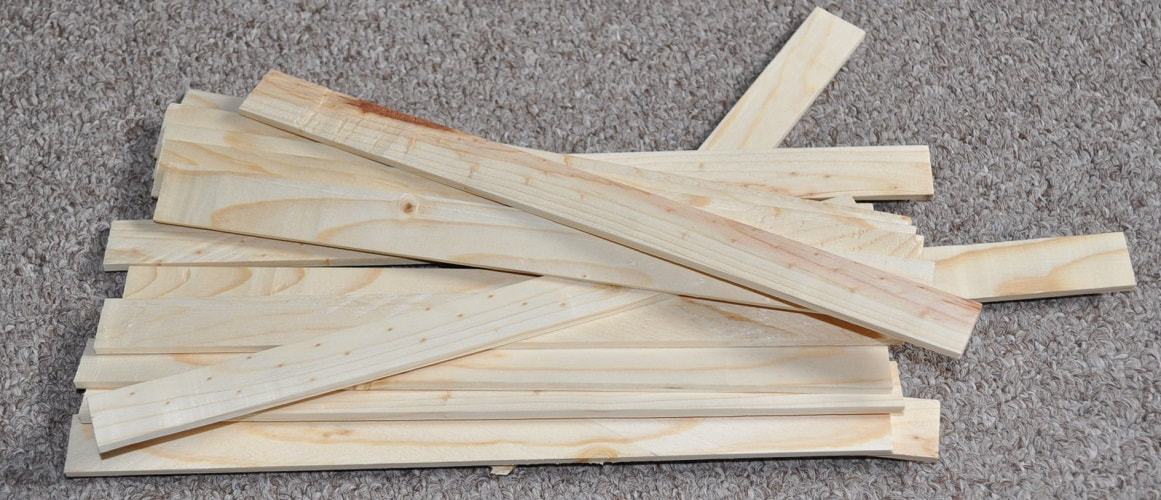
…produced these 18 strips at 3/16” thick that were then run through my planer to 1/8” thick.
There are TWO ways to finish this and have it still open. What follows works best for me and is the easier to open. I’ve made them both ways and feel this is the better method. If you are curious about the “other way” let me know and I’ll do an amendment to this.
To begin, pick a side…any side…just NOT the top or bottom. If your cube is a true 4” cube, you will need to cut four strips 4” long. Two for the top edge and bottom edge of this side and two for the top edge and bottom edge of the other side.
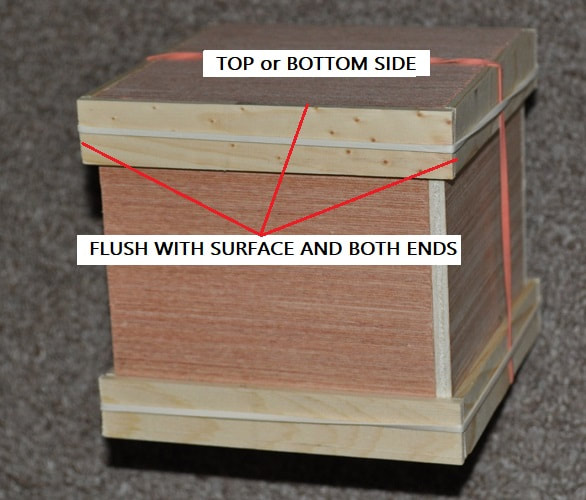
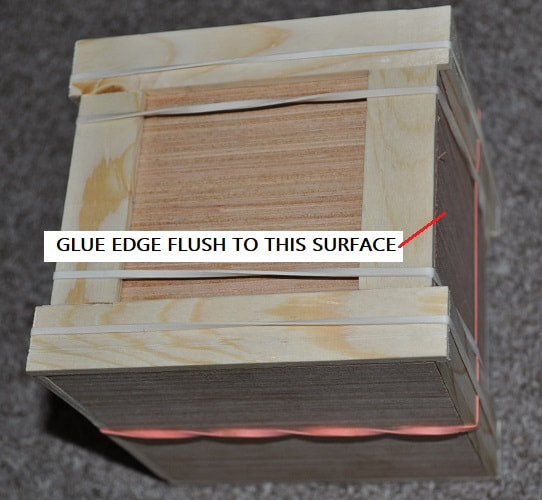
Glue them in place along the top and the bottom of the crate…even (or a bit short) end to end and even with the surface of the 4” x 4” square top and bottom.
USE GREAT CARE NOT TO GET GLUE ON THE EDGE OF TOP PANEL!!!
Glue them in place along the top and the bottom of the crate…even (or a bit short) end to end and even with the surface of the 4” x 4” square top and bottom.
USE GREAT CARE NOT TO GET GLUE ON THE EDGE OF TOP PANEL!!!
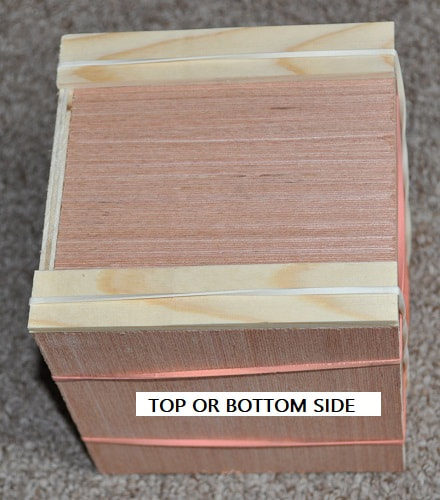
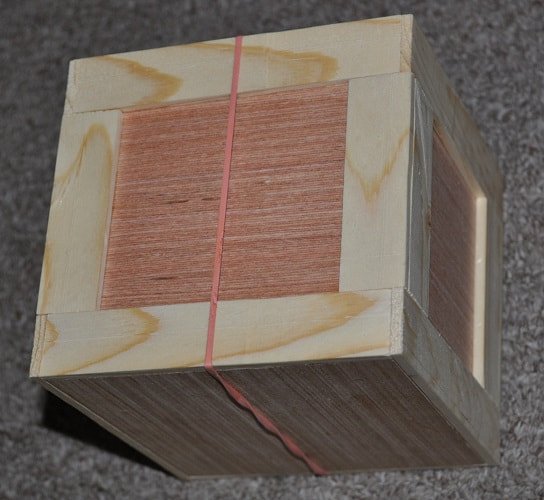
When dry, flip it over and glue the remaining two strips to this opposite side. If you use rubber bands as clamps, it is possible, if careful, to glue the strips to both sides at the same time.
Once this is dry, remove all rubber bands and slip at least one back on the crate around the sides with the four newly installed strips to hold the top on. This is also a good time to check that the top is still easily removed.
Cut four strips approximately 4 ¼” – 4 5/16” long, depending on the accuracy of the strip thickness and crate size. I'd suggest simply measuring each strip here. These strips should end at the outside edges of the previously installed strips.
Cut four strips approximately 4 ¼” – 4 5/16” long, depending on the accuracy of the strip thickness and crate size. I'd suggest simply measuring each strip here. These strips should end at the outside edges of the previously installed strips.
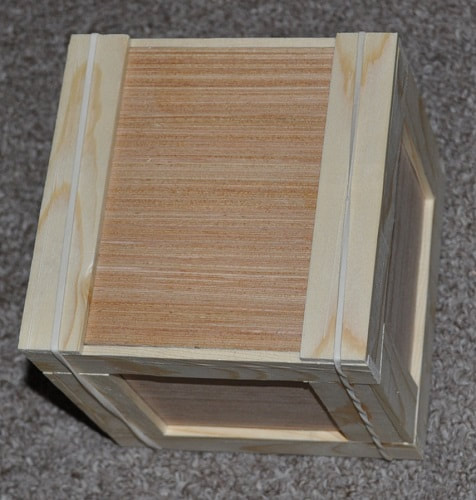
Glue them in place as before on the two remaining sides…flush on the ends and again even with the top and bottom panels.
Cut two strip to approximately 2 ½” (whatever the gap is between the two installed strips) (for this crate, mine turned out to be 2 9/16” for all these strips) and glue and clamp them (if needed) to this side between the top and bottom strips and flush with the edge of the crate. If these strips are flat, they may not need clamped…just apply the glue and place.
Flip it over and do the same to this side.
Flip it over and do the same to this side.
Measure and cut four more strips for the remaining four corners. Glue and clamp them in place so they are flush with the outer edge of the first four corner strips as shown above.
At this point, you should be able to remove the top using your fingernail or a hobby knife. If your top side IS a true enough square, it should not matter how it is put back on. If there IS an issue with fit, it is best to place a small, discrete mark on the top’s edge and the crate lip as an indexing mark.
NOW TO FINISH THE TOP AND BOTTOM
The top and bottom finish out identically. BUT caution must be used when gluing the strips to the top panel so as NOT to glue the crate shut.
The top and bottom finish out identically. BUT caution must be used when gluing the strips to the top panel so as NOT to glue the crate shut.
Starting on the bottom, measure and cut two strips approximately 4 ¼” – 4 5/16” and glue in place as shown above. They should fit flush on their three outer edges with the crate.
Repeat this process on the other end…the top…that will open so be very careful with the glue.
Repeat this process on the other end…the top…that will open so be very careful with the glue.
Measure and cut two strips to fit between the wood strips you just applied. Glue and clamp (if needed) them in place so they are flush at the corner edge, overlapping the mating corner strip.
Follow this same process for the top panel (the side that is removable again using care not to glue it shut).
Follow this same process for the top panel (the side that is removable again using care not to glue it shut).
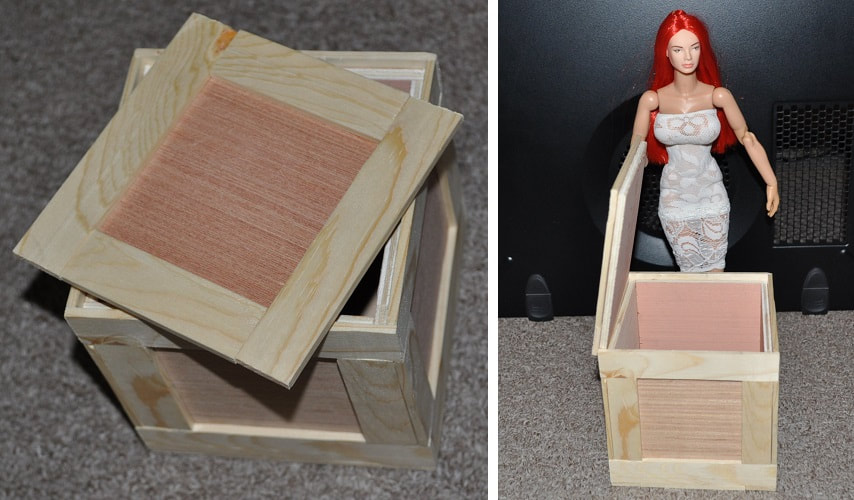
Once this is dry and the clamps / rubber bands are removed, you should be able to easily lift the top panel from the crate. If it IS stuck in places, try slipping a thin, metal ruler between the sides and the strips glued to the top. With a little care, it should come free with a little effort and maybe a little prying.
When I was making the bulk of my crates, I started a basic assembly line so that each time I went into the garage to work on them…every time I unclamped a subassembly, I could glue and clamp another subassembly So I had five or six crates in the process at one time…at different stages rather than making one start to finish before starting the next. Eventually every time I went into the garage I was unclamping a finished crate or starting a new one.
Again, if there are any points I could be clearer on, please send me a comment.
Again, if there are any points I could be clearer on, please send me a comment.