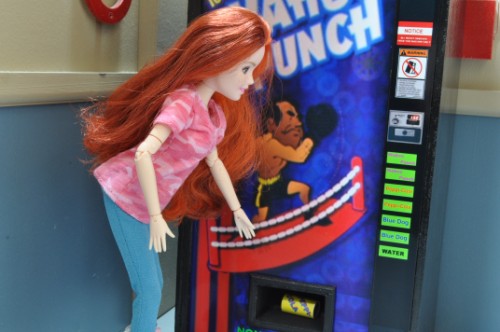
HOW TO MAKE A POP MACHINE
So...you wanna build a pop machine? So did I...so I did.
|
|
Typical pop machines measure: Height 72”, Width – 37.5”, Depth – 34.5” and weigh 559lbs.
PARTS LIST
6 ¼” x 5 ¾” Luon (1) top
5 7/8” x 5 ¾” Luon (1) bottom
11 13/16” x 5 ¾” Luon (2) sides
5 1/8” x 3/8” x ¾” pine (4) corner braces
11 5/8” x 5 7/8” Luon (2) front & back
1/16” thick hobby plywood(or basswood) pop chute
5/32” x 5/32” wood pop chute bezel (SEE sketch below)
1/16” x 1/8” x 11 5/8” pine or basswood (1) to hold left side of graphic
Glue
Brads, ½” to ¾”
#2 x ¼” & 3/8” Flat Head wood screws
NON-opening Pop Machine
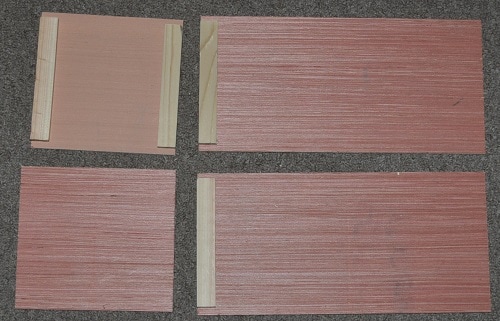
On the bottom piece, glue two braces flush with the sides(the 5 ¾” length sides) and set back from the back ¼”. This should leave a set back at the front edge of 3/8”.
To one end of each side piece, do the same thing…flush with the end and ¼” from the back edge. Be careful here or you may end up with TWO right or TWO left sides.
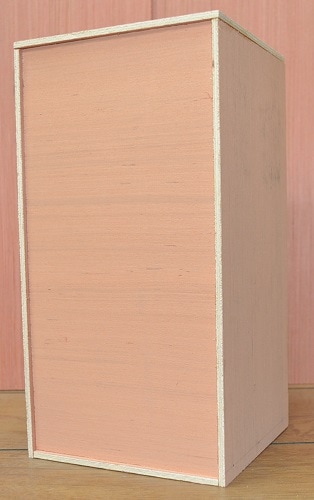
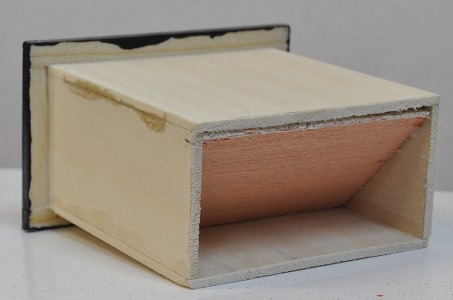
Now attach these sides to each other to form a box with no front or back. I’d suggest using glue and 1/2” to ¾” brads at these four joints.
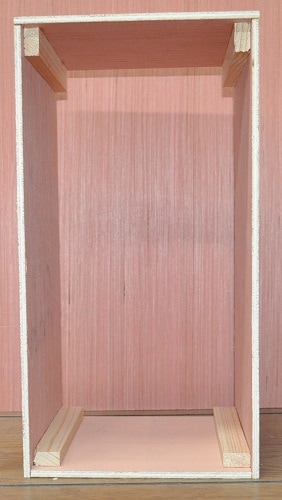
Insert the front panel in place to help square up the sides while the glue dries. The back panel will later be secure with a screw in each corner brace.
The job of making this “wood" appear at metal will take some doing. While you are laying out the front panel, now is a good time to start on the side walls and the back panel to set and fill any brads used and begin the sealing the grain and sanding. You want these sides SMOOTH so I would not recommend using a roller here though a brush will do for most wood finishes. Whatever type you are most comfortable here is fine. Lacquer or poly-varnish will work fine. Apply a coat, let dry then sand. Repeat until the grain appearance is gone. The front and back edges will take the most effort as they are the edge grain of plywood. But it can be done. While this is drying between coats you can work on the front panel.
For the front panel, there will be a series of buttons and such taking up an area about ¾” wide from top to bottom but the pop chute should still be placed in the middle of the whole panel as shown in the sketch.
For the front panel, there will be a series of buttons and such taking up an area about ¾” wide from top to bottom but the pop chute should still be placed in the middle of the whole panel as shown in the sketch.
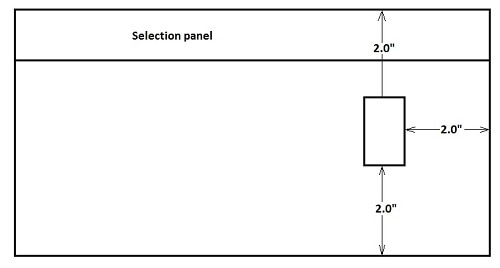
These dimensions are approximate, depending on the material thickness used for the chute.
Before cutting the hole, I’d suggest fabricating the actual pop chute and make the hole fit it rather than the other way around.
If you can get your hands on some 1/16” hobby plywood, this will be easier than using 1/16” basswood. Any good hobby shop/craft store should have each. Or at least the basswood. Mine was currently out of the plywood so I settled for the basswood I already had in my hobby wood supply.
The chute consists of basically an open-ended box with a bezel around the open end that will fit through the hole and hide any rough fit. The internal dimensions of the chute, from the front should be near 1 ¾” wide and 7/8” high. The depth is up to you as it does not go anywhere but should have some depth to hold a can of pop. See the detailed sketch of mine…which is overkill
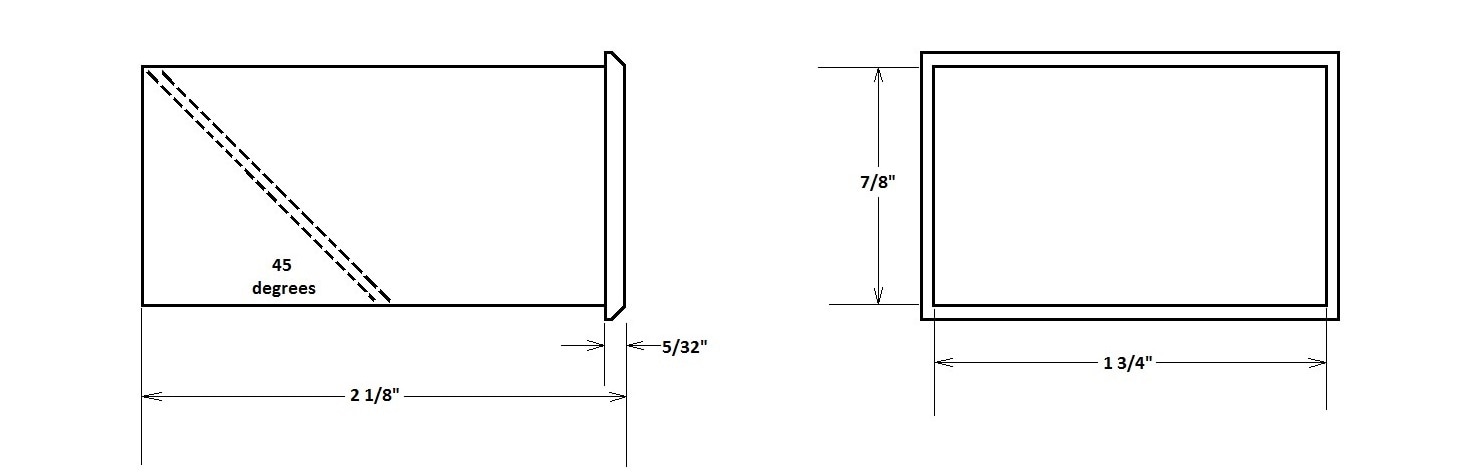
The bezel around the chute amounts to 5/32” square stock glued in place and sanded to an angle on the front edge.
Once the pop chute is completed, accurately measure the width and height of the needed hole. Carefully mark and cut out the hole in the front panel and insert the pop chute but do not glue in yet.
The panel for the buttons and such can be made now too. This can be simply a 1/16”-1/8” strip of wood (plywood is best) 1” wide as long as the front panel is tall, or 11 5/8”. This should be sanded and sealed well and painted a gloss black.
Start sanding and sealing of the front panel. The finish here is not as critical as the other sides as it will mostly be covered with a computer printed picture. NOTE: when you are sealing this panel try to NOT seal one edge about ¾” - 7/8” wide for the length of the panel. This will allow for a better glue joint when you add the button panel.
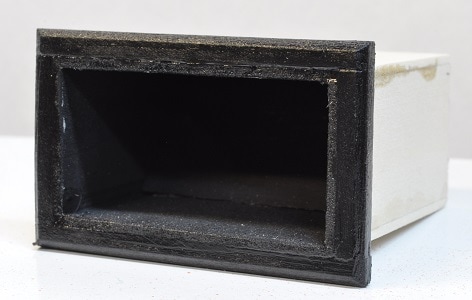
You can also seal and paint the pop chute, inside and the bezel, flat black. You can paint the bezel a gloss black if you like.
Once the pop chute is completed, accurately measure the width and height of the needed hole. Carefully mark and cut out the hole in the front panel and insert the pop chute but do not glue in yet.
The panel for the buttons and such can be made now too. This can be simply a 1/16”-1/8” strip of wood (plywood is best) 1” wide as long as the front panel is tall, or 11 5/8”. This should be sanded and sealed well and painted a gloss black.
Start sanding and sealing of the front panel. The finish here is not as critical as the other sides as it will mostly be covered with a computer printed picture. NOTE: when you are sealing this panel try to NOT seal one edge about ¾” - 7/8” wide for the length of the panel. This will allow for a better glue joint when you add the button panel.
You can also seal and paint the pop chute, inside and the bezel, flat black. You can paint the bezel a gloss black if you like.
|
|
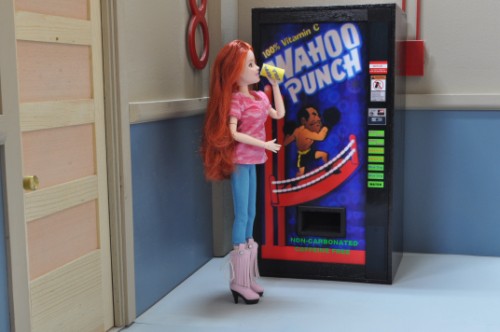
I used actual glossy PHOTO grade paper to print my front graphic on. Unfortunately, this paper comes at a maximum of “letter” size. Or 8 ½” x 11”. So the printout will be short. I split the shortcoming between the top and bottom so that an extra strip of wood, ½” at the top and 5/8” at the bottom, would cover this issue properly. These pieces are held in place by 2 #2 x ¼” flat head wood screws each while the panel for the buttons is held in place with three. I simply painted the heads on the top and bottom strips while the three on the button panel are covered when the button graphic is applied.
This next part is tricky for securing the left side of the photo paper. I’d suggest wrapping the left edge of the photo paper with wax paper and put in place. Carefully glue a 1/16” x 1/8” strip of wood down the inner left side of the front over the photo paper and wax paper. Do not push it too hard against the paper as it dries. Remove the wax paper and install the graphic phot paper for the final time and secure with the three wood strips and the 7 wood screws. Cut out the hole for the chute and check fit. I printed the button panel graphic on glossy photo paper as well and applied a strip of two-sided carpet tape to the back. This will need trimmed to size with a metal ruler and a razor blade as it will gum up scissors. Recheck the fit of this graphic. When all look well, remove the backing from the tape and carefully apply to the panel. The chute may be secured in many ways. The simplest is to carefully apply a couple drops of glue to the inside of the cabinet where the chute meets the front panel.
All that is left now is to drill four holes in the back panel at the corners to secure it to the corner braces with #2 x 3/8” wood screws.